With any food or drink item in Memsec7 it’s possible to add instructions for the kitchen or bar staff member preparing the item. If necessary these can be added to items as they’re ordered if a customer has a specific request. Often though, you’ll know in advance the range of additions or variations an item is going to require. In that circumstance we recommend you pre-configure the items using the facility in Tills>Till Setup>Kitchen & Drink Printing in the back office program.
This has various tabs where you can set up instructions in a variety of ways. Instructions set up here can be copied & pasted onto other items and can also have a price associated with them. Click on the tabs below for more detail on the functions available on the corresponding tab on your system.
Under this section all of your sale items are listed on the left. Selecting an item in this list will display any associated instructions in the central list. You can then edit those existing instructions, add to them or remove some or all of them.
Over time, instructions can build up into a very long list for any food item. This section is ideal for performing maintenance from time to time and removing duplicate (though spelled slightly differently) and unnecessary items.

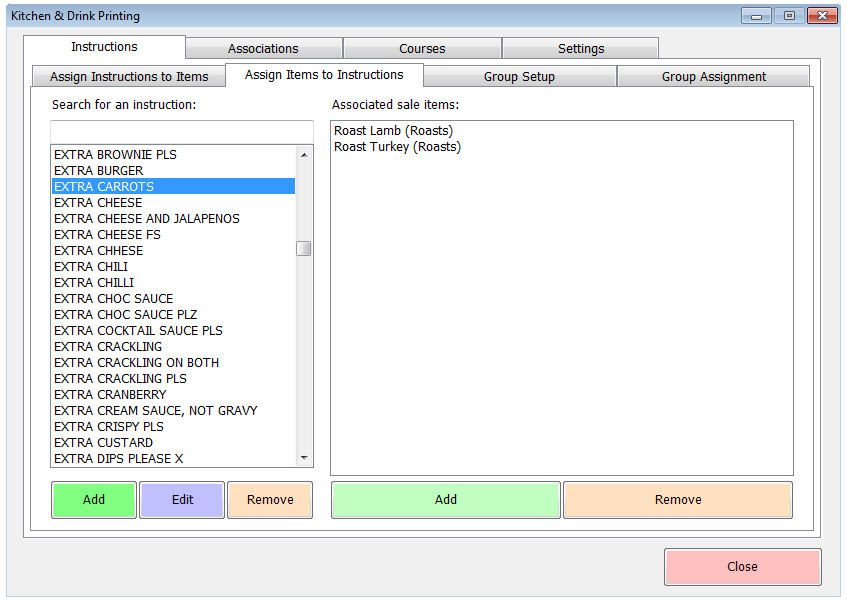
As you might expect this tab works in exactly the opposite manner to the first tab. Instead of selecting an item in the list and then working with its associated instructions, here you select an instruction from the left hand list and manage (Add or Remove) sale items on the right to which it should apply.
You can also remove instructions entirely here, so again this tab can be useful for maintenance. Removing an instruction from the left hand list deletes it from all sale items, so you may find that this is a faster process.

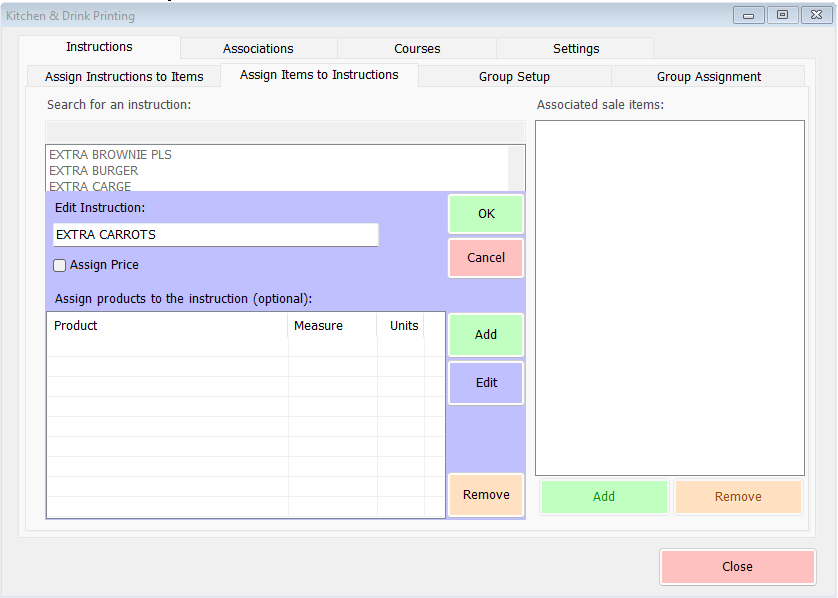
Also in this section, you can assign products to instructions, to ensure that when an addition is made to an item, the underlying product’s stock is reduced accordingly. Select the instruction in the list on the left and click Edit. You’ll see this screen;

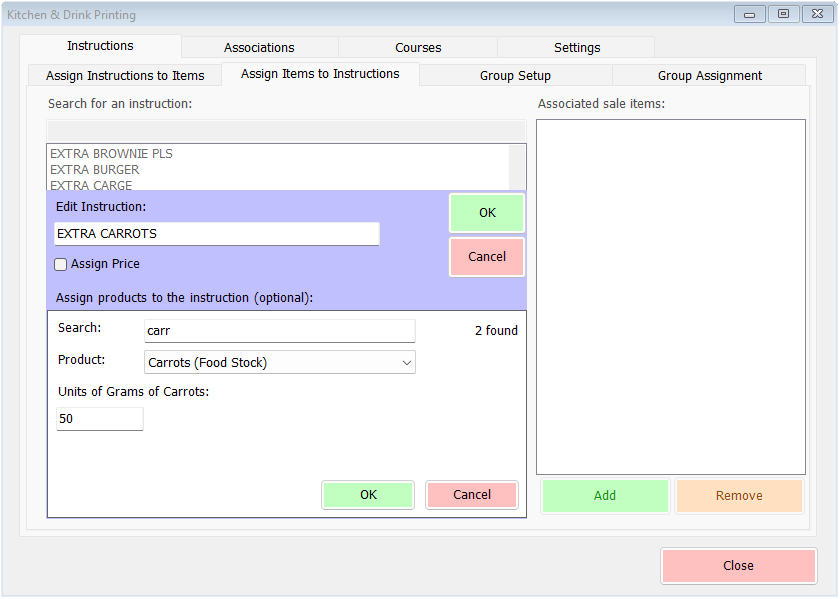
In order to associate a product with the instruction, click Add. The screen will change again, allowing you to search for the product required and set the quantity of that product that goes into this instruction item.

Click OK at the bottom to save the product details. You can add multiple products here if required. Once you’ve added all relevant products, click OK at the top to save the instruction with the addition(s).
If an item has a large number of applicable instructions it can be difficult to find the relevant instruction(s) each time. We also find that quite often there may be a subsection of the instructions for an item that it’s always necessary to choose but which can get lost amongst all the other options. For this reason we have a groups feature for instructions.
Under a heading of your choosing you can configure a group of instructions so that as well as setting the choices available you can dictate the minimum and maximum number of selections and whether an instruction can be repeated. Typical uses of this facility are Steak cooking instructions, ice cream flavours, sauce options and side dishes. There’s no limit to the number of groups an item can use.
For cooking instructions, the minimum and maximum selection numbers would be set to one and repeats wouldn’t be allowed. For ice cream flavours it may be a minimum and maximum of 3 but repeats would be allowed. You might also have a group of pizza toppings with a minimum of 1 and a maximum of 3 for a ‘make your own pizza with up to 3 toppings’. Repeats would presumably be allowed so a customer could have ‘double pepperoni’.

Once you’ve set groups up, this tab allows you to allocate them to the relevant sale items. Select the required group(s) on the right and click ‘<< Assign’ to bring the group into the middle section. There it will display with an option to expand the group to show its individual members. By default they’re all ticked but you can untick individual items if required. For example, you may have a pizza toppings group from which you want to exclude meat options for a vegetarian pizza. You can also use the up and down arrows to change the order in which the groups will appear.
With the relevant group(s) and their applicable members selected, choose the sale items in the list on the left to which you want to apply those groups, then click ‘Apply Groups to Selection’. You’ll be asked to confirm that you want to apply the select instructions to the number of sale items. Click Yes and the associations will be made.

Some general hints and tips;
- Remember to use the search boxes at the top of the left hand lists to find the items or instructions you’re looking for.
- Only ever add a single topic as an instruction – ‘No cheese or ham’ should be two separate lines; ‘No cheese’, ‘No ham’. Instructions with two or more elements are less likely to be reused and more likely to be misinterpreted in the kitchen.
- When adding new instructions to an item or a group, if you press enter on the keyboard rather than clicking on ‘OK’ the item will be saved but you’ll then be able to immediately add another without having to click ‘Add’ again. If the previous item had a charge that will also stay set.
- Try to avoid duplication wherever possible. For example, rather than one group with Chips and Boiled potatoes and another with Chips, Boiled, Jacket, Sweet Potato Fries you should create only the larger group and then select the relevant members for each item where they vary.
- If setting up a group for number of glasses to accompany a bottle of wine or jug of water you could add an instruction for each possible number of glasses or you could just add ‘1 Glass’ and ‘Glasses’ and allow the items to be repeated. For 4 glasses you’d then select ‘Glasses’ and then press the ‘+’ sign 3 times to get to a total of 4. This may seem a slower process but time is saved by not having to find the correct number in the list. Either method is valid, why not see which works best for you?
- If you find you have lots of duplicate items being created by staff ‘on the fly’, consider changing the staff grade at which saving instructions is allowed (in the back office go to Till>Till Setup>Permissions, find Save Instructions in the grid). This won’t stop them typing in new instructions but will avoid the lists growing quite so quickly.
- All of the above relates to the Instructions section of Kitchen & Drink Printing. There are 3 other tabs; Associations allows you to allocate items to individual kitchen and if relevant drink printers, Courses lets you manage the different food courses you offer and Settings provides a facility to determine how the different elements print on the kitchen tickets.
