Warning: Undefined array key "hotspot_offset_y" in /srv/users/memsec/apps/memsec/public/wp-content/plugins/elementor-pro/modules/hotspot/widgets/hotspot.php on line 1060
Warning: Trying to access array offset on null in /srv/users/memsec/apps/memsec/public/wp-content/plugins/elementor-pro/modules/hotspot/widgets/hotspot.php on line 1060
Collection Hours
Payment Methods
Minimum Order Value
Time Slots
Booking Ahead
Service Charge
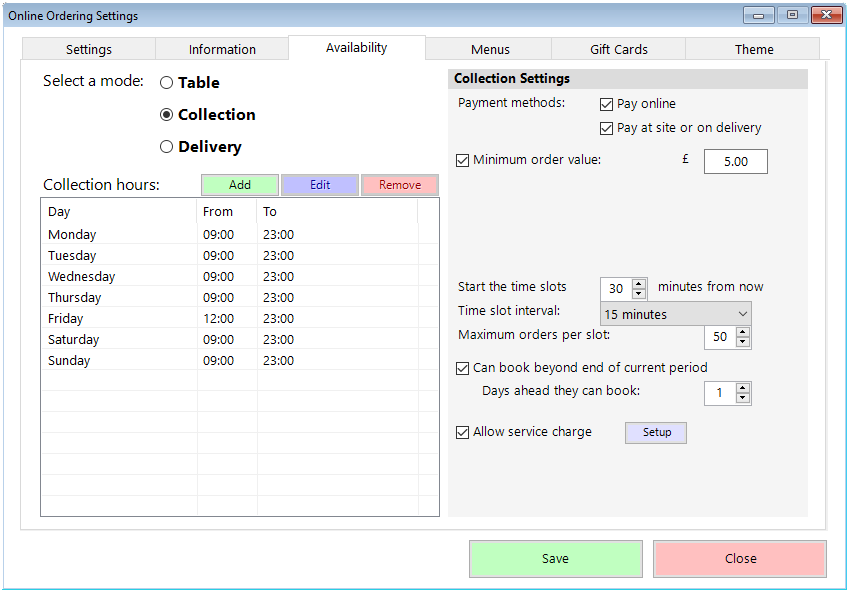
Delivery/Collection Hours
This section allows you to set which hours of which days of the week your customers will be able to collect or take delivery of orders made on the app. The app itself will always be available if either of these modes is configured, so customers can place orders at any time, but only for a time slot within the hours you specify here.
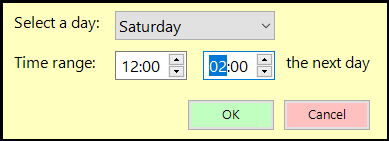
To add a time range, click on the green ‘Add’ button. You’ll see a box like this;
Select a day from the drop-down at the top, then set the start and end hours. If you select an earlier end time than start time the system assumes you want the session to extend over midnight.
You can have multiple sessions on any given day. This section relates to overall availability only. In the Menus section, individual times can be set for categories within a menu.
The blue Edit button allows you to alter an existing entry to change the day and/or start and finish times, and the red Remove button will delete the selected entry in the list.
Minumum Order Value
This is a simple setting which does exactly as is described. If you tick this option and enter a value in the box that then appears,

customers will have to order items totalling at least that amount in the app before they’re able to check out. They are made aware of this requirement in the basket summary on the web app screen;
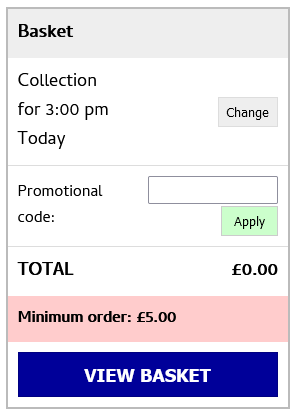
As soon as the basket total exceeds the minimum value, that message will disappear.
Time Slots
Collection or delivery orders have to be allocated a specific time slot. In this section of the Availability screen you specify how those slots will work.
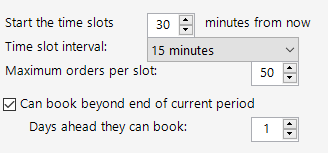
In the first section, you set how far in advance of placing an order the available slots should start. This will be dictated by how long your orders are likely to take to prepare and how much notice of a new order you therefore require. When a customer logs on to your web app to place a new order, they have to first choose a time slot.
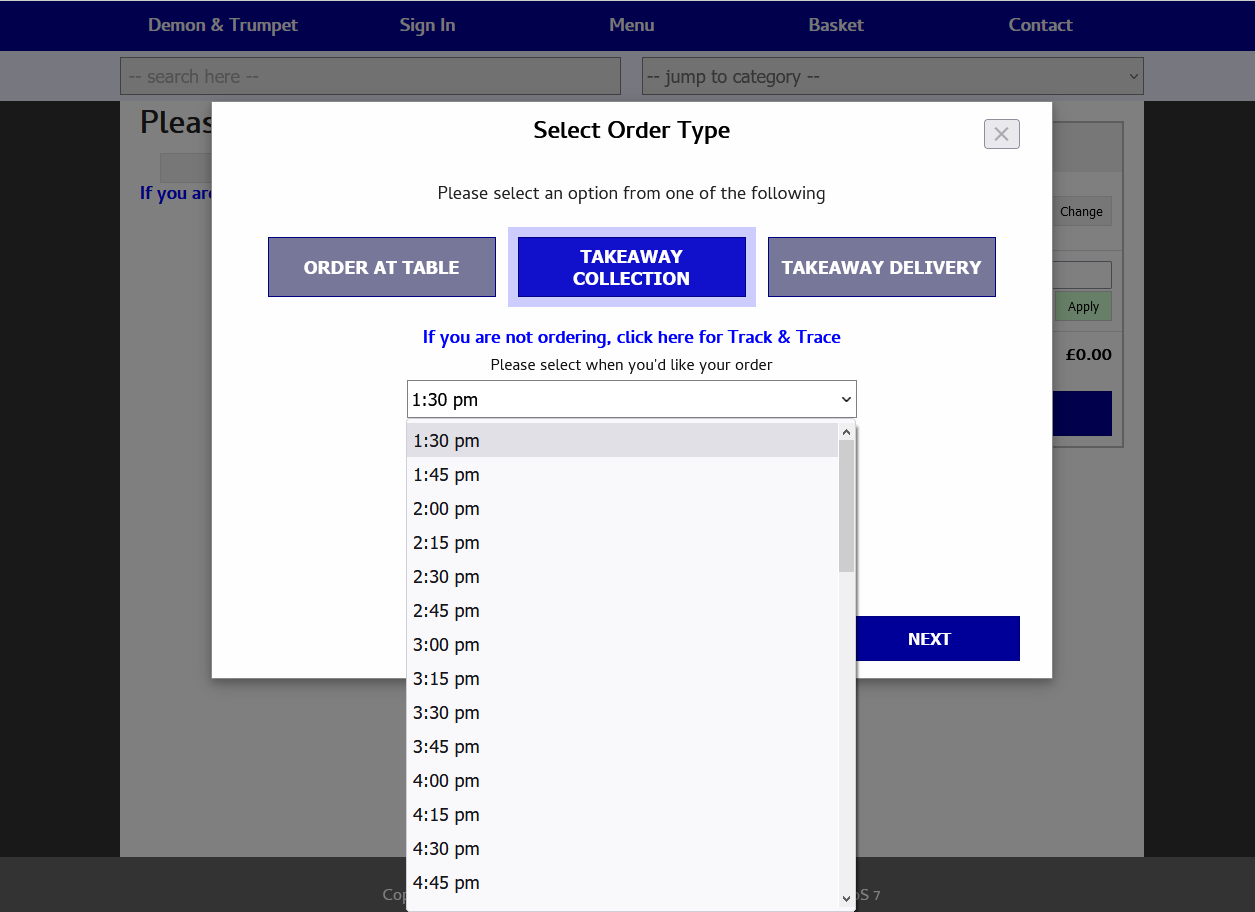
The earliest available slot will be at least the number of minutes you set here in the future. The second section here will also have an impact – the Time slot interval. You have a choice here of 10, 15, 20 or 30 minutes. If this figure is 15 minutes that will create slots at 15 minute intervals from the time you set in the hours section as the starting time for any given day. So, for example, if a customer places an order at 4.31pm and you have slots every 15 minutes starting from 30 minutes away, the first slot they will be offered will be 5.15pm.
Maximum orders per slot will also be dictated by your capacity to fulfil orders, and will of course depend on the slot interval you select. When the maximum number of orders you set here is reached for any given time slot, that slot will no longer be offered to new customers in the drop-down as seen in the image above.
Booking Ahead
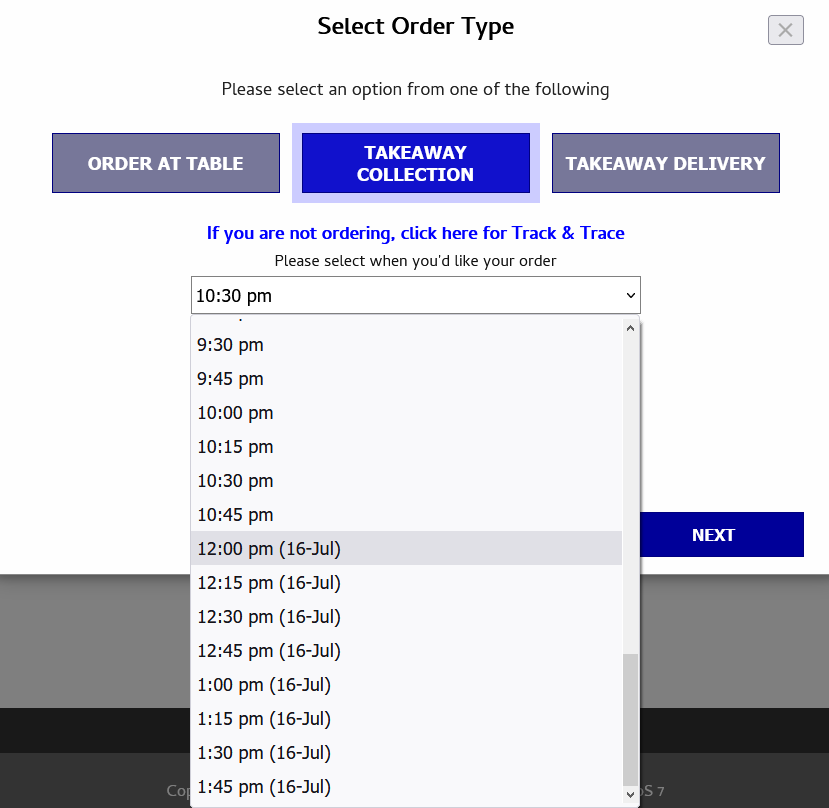
Finally, you have the option of allowing orders for future dates by ticking the option ‘Can book beyond end of current period’. This will then reveal the sub-section ‘Days ahead they can book:’ where you can set the number of days in advance customers will be able to place a collection or delivery order. Again, this will be reflected in the drop-down list where the customer selects their time slot. Slots after the current period/day will have the date in brackets shown after the time.
Allow Service Charge
You can apply a service charge to WebApp orders. This is separate from any on-site service charge you may already have configured, and can be either a percentage or a fixed amount. You need to tick this option box and then click Setup to configure how you’d like the charge to be applied. You’ll see this screen;
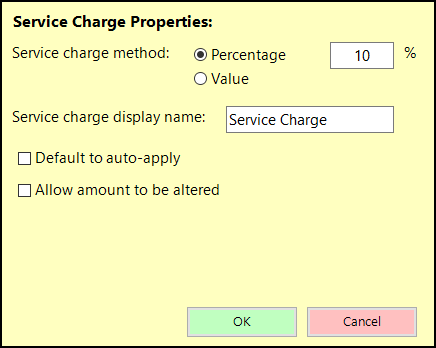
You can choose between a percentage of the overall order cost or a fixed amount. You can then change the way this charge is described in the app if you want to avoid directly referencing a service charge, such as ‘Online ordering fee’ or ‘Delivery fee’.
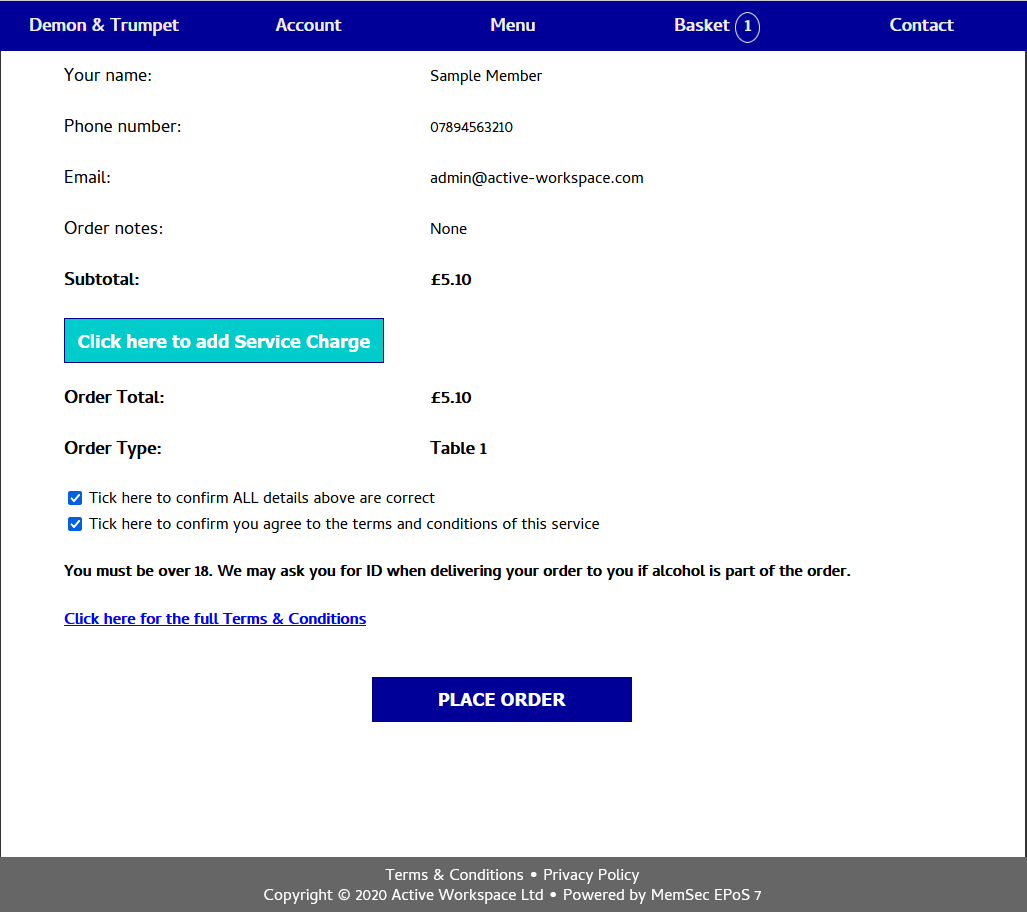
The two optional check boxes determine how the Service Charge will be added, altered or removed. If you don’t tick ‘Default to auto-apply’, the charge won’t be applied unless the customer chooses to press the button on the checkout screen, as seen below;
The box ‘Allow amount to be altered’, if ticked, will mean that the default fee will be applied but the customer will have the option to change it, hopefully upwards but they can also lower or remove it if they choose.
If the customer clicks the button to add Service Charge, or if you choose the auto-apply option, then instead of the button the charge will appear on the checkout summary like this;
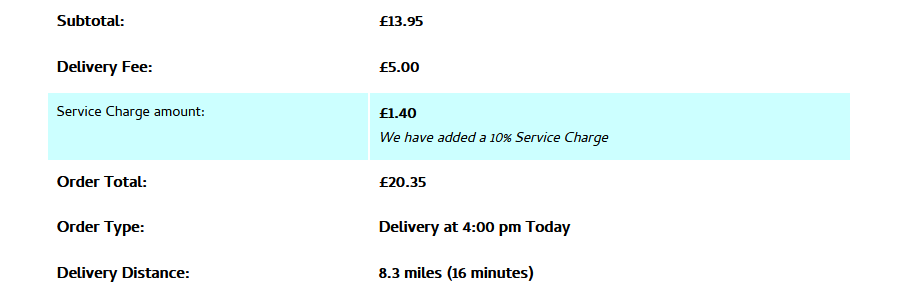
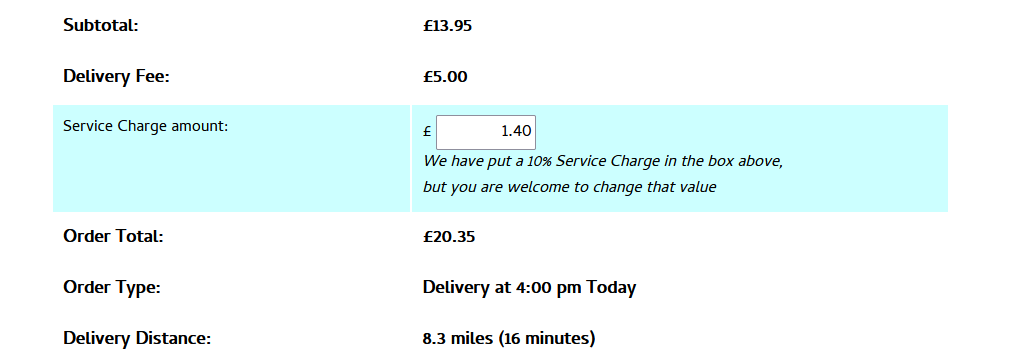
In the above image we can see that there’s no option to alter the charge or remove it, because the second option hasn’t been selected. If it is selected, the display looks more like this;
Delivery Settings
At the bottom of the settings screen you will find a section specifically for deliveries;
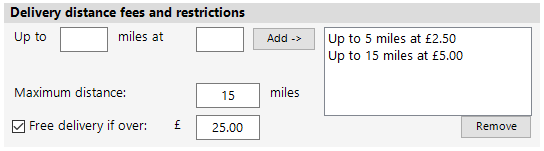
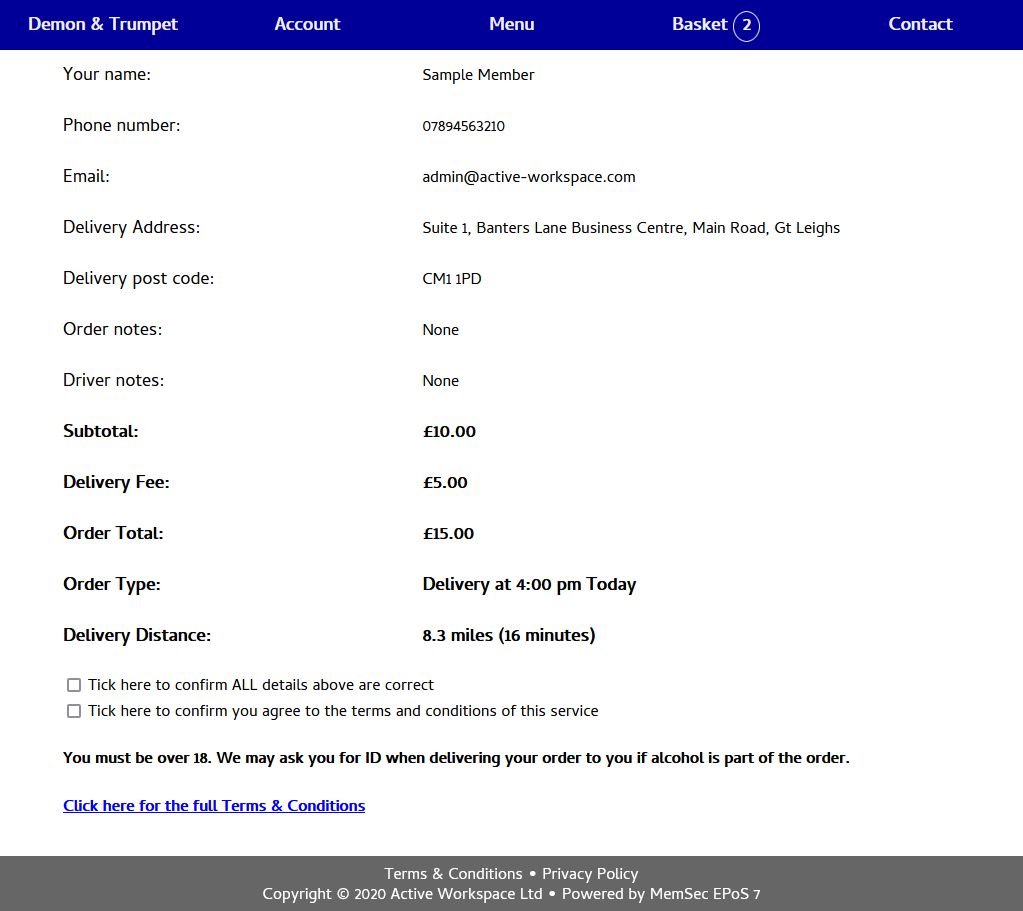
Here you can configure your delivery charges based on distance from your post code, as set in the Information screen, to the customer’s post code. You can have any number of bands, simply enter a number of miles in the left-hand box and the fee in the right-hand box, then click Add. If you make a mistake or want to delete a band, highlight it in the list on the right and click ‘Remove’, then re-add as required. When an order is placed, the customer will see details of the delivery fee applicable, including the distance and usual driving time, once they’ve entered their address and post code and clicked ‘Review Order’;
You can also set a maximum distance, outside of which orders will be declined. When the customer clicks on ‘Review Order’ they’ll see this message on the screen;
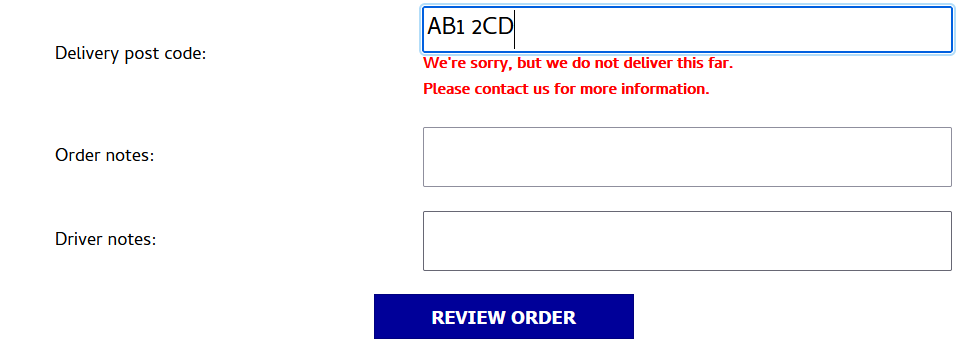
Finally, there’s an option to offer free delivery, irrespective of distance, for orders exceeding a certain amount. To use this option simply tick the box ‘Free delivery if over:’ and enter the required spend amount in the box that appears to the right. When this is applicable the summary screen above will not have the Sub-Total or Delivery Fee lines.