In Memsec7 it’s possible to have multiple kitchen and drink printers. By default, all items will print to all relevant printers, but you can change that to suit your requirements. This article will explain how.
Printer Setup
The first step in configuring multiple printers is adding them to Memsec7. Normally, we will have set up kitchen and drink printers for you as part of your installation, or remotely if a printer is added later, so this step will probably have already been done. In the back office, select General>Printers, then click on the Printer Assignment tab.
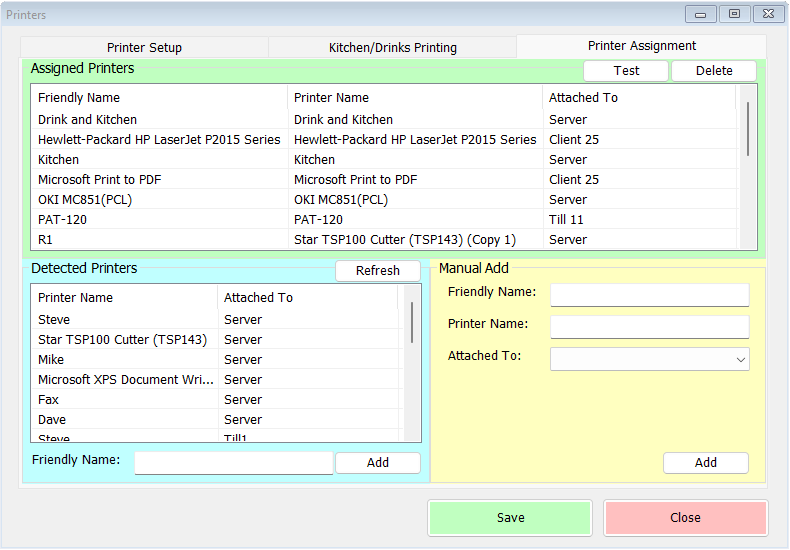
Printers in the Assigned Printers section at the top of this screen are available to be used within Memsec7. If the printer you need to use is not in this section, then it will be listed in the Detected Printers section at the bottom left, as long as it has been installed on a computer that’s currently running Memsec7. For kitchen and drink printers it’s most useful to install them on the server till or computer, so that they will always be available while the system is running properly.
Next, click on the Kitchen/Drinks printing tab.
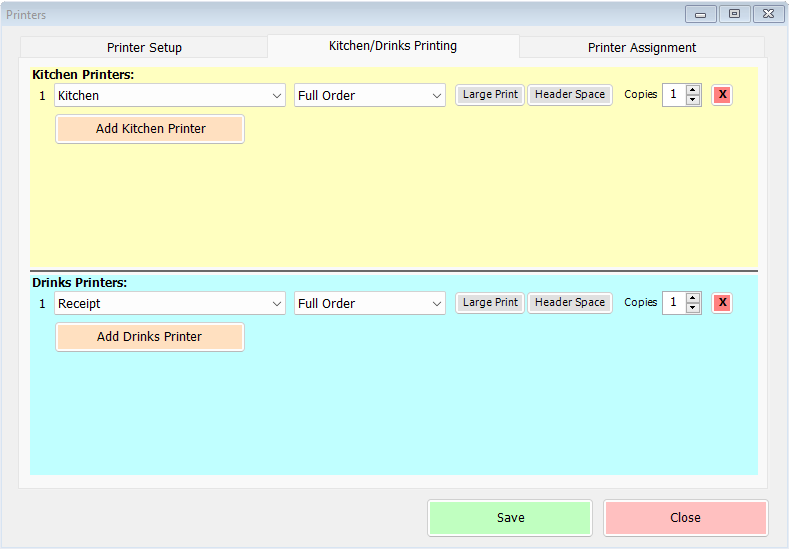
As can be seen above, each printer in the two sections has various options that can be configured for that printer specifically. The number of copies of each ticket can be set on the far right hand side. Left of this is the button for Header Space – this is a toggle switch, and if it’s selected it will be yellow. If this is selected, the printer will leave a space at the top of each ticket so that it can be tucked into a clip without obscuring any of the text. The Large Print button is also a grey/yellow toggle switch, and as its name suggests will generate a larger font print if selected.
The drop-down in the middle of each row provides the first step in generating different tickets for different printers. Where only one kitchen or drink printer is configured, this box will default to the ‘Full Order’ option shown, since otherwise some items may not be printed.
To add a second or subsequent printer, click the Add Kitchen/Drinks Printer button. This will add another line to the section, allowing you to select another of the printers in the Assigned Printers section of the Printer Assignment tab, and to set the above options.
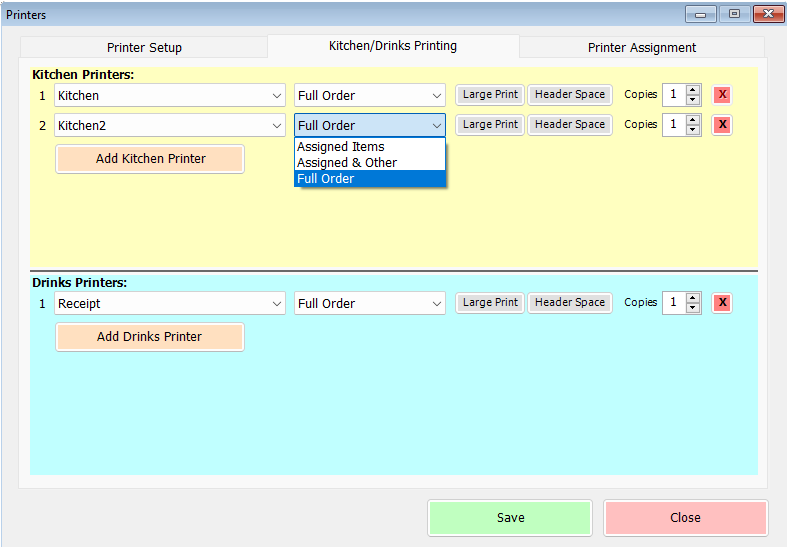
With more than one printer available, you can change what each one prints, if required, from Full Order to either Assigned Items or Assigned & Other. Full order will mean that each ticket shows every (food or drink) item ordered. Assigned Items will mean that only items assigned to that particular printer will be printed, and Assigned & Other will generate a ticket that lists the assigned items as normal but then adds footer section detailing other items on the same order in smaller text.
Assigning what to print
In order to assign items to a printer, once you’ve selected an option other than Full Order in the printers screen, go to Till>Till Setup>Kitchen & Drink Printing, then select the Associations tab.
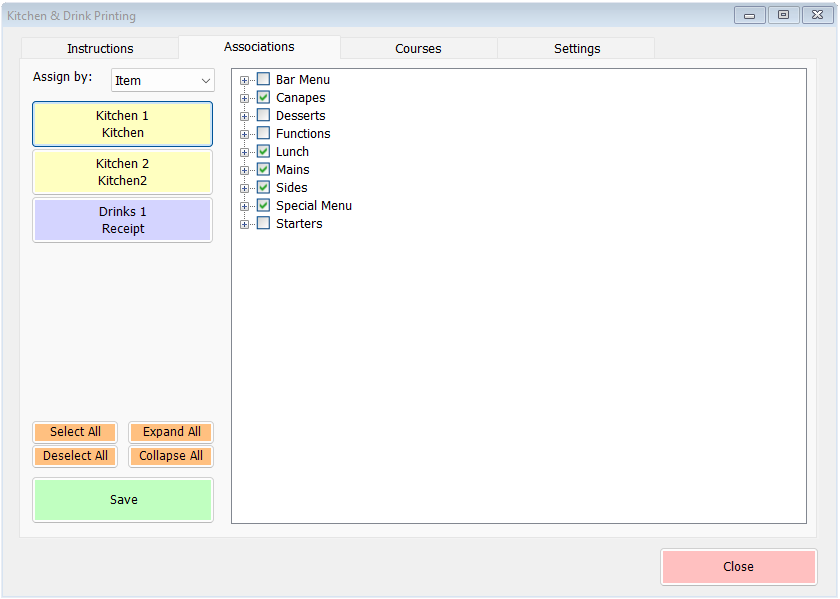
Please note that any changes you make in this section will only apply to printers where an option other than Full Order has been selected and saved in the Printers screen. At the top left of this tab there’s a drop-down which allows you to choose between assigning by Item or Course. Many kitchens will have a separate printer for each course, or it may be that desserts are prepared outside of the kitchen. In these types of scenario, it’s simplest to use the Course option. Where different printers are used for fried versus baked items, or hot and cold dishes, these are less likely to be split on a course basis, so the option to assign individual items is best.
When assigning by item, the tree view that makes up most of this screen will show all categories relevant to the printer type (so food categories for kitchen printers and drink categories for drinks printers.).
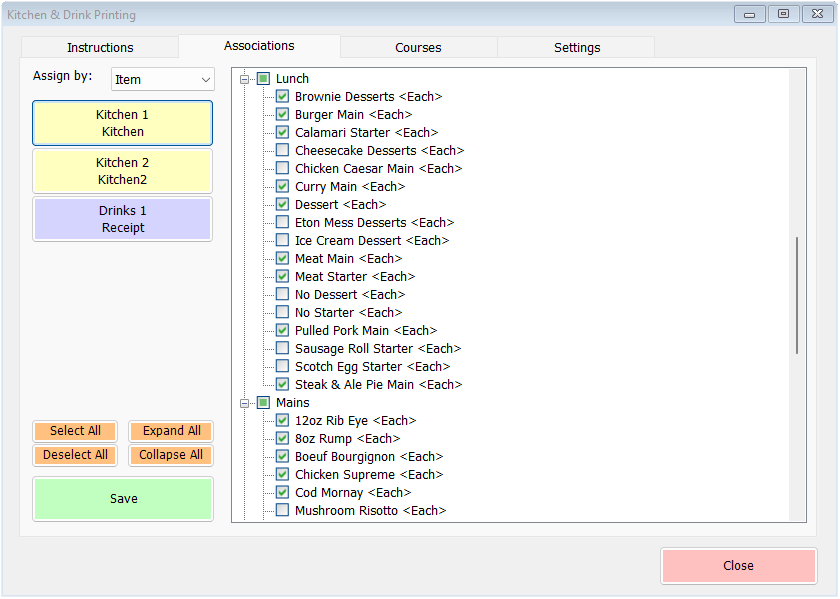
There are 4 orange buttons towards the bottom left of this tab which allow quick manipulation of the tree view. On the left there are Select All and Deselect All buttons, and on the right Expand All and Collapse All. In order to select only certain items within a category, you will need to expand that category in the tree view. The Expand All button provides a simpler means of doing this, particularly if you’re using the touch-screen on your till rather than a mouse. With the categories expanded you can select or deselect items as required. Select the items for each printer in turn, then click Save to apply the changes.
Please note – whenever a new item is added to your system you will need to allocate it to the correct printer using this process.
Allocating by course is much simpler, naturally, as there is no need to expand anything in the tree view, you simply select each course as required.
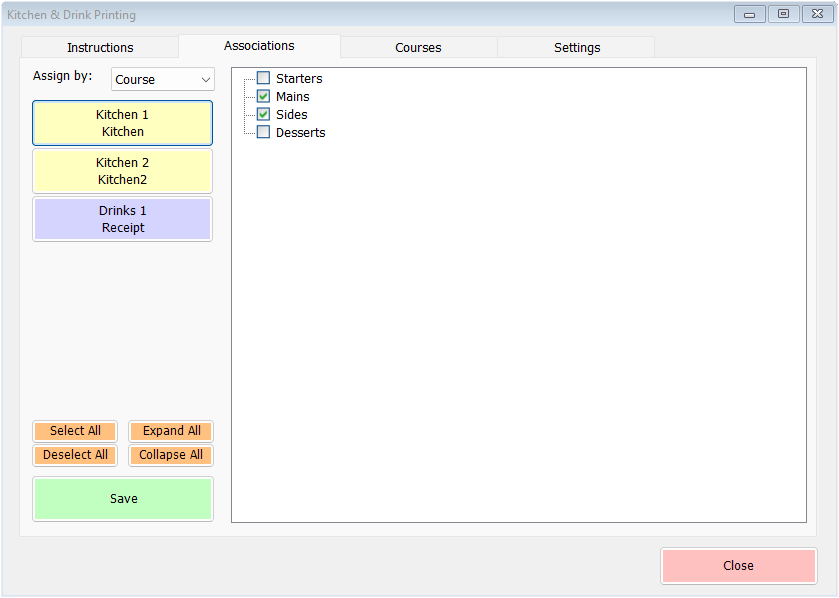
With both selection options, it’s possible to have the same item or course print to more than one printer.
