How-To Guides
Staff Rota
Staff Rota
How to organise, populate and distribute your staff rota in Memsec7
Memsec7 provides a rota facility as standard. This guide will show you how to manage the settings to match your site’s shift patterns and staff packages, how to populate the rota and how to share it with your staff.
Before you start to use the rota, you may well find it useful to create and populate staff departments in order to make the rotas more specific. You can do this in the back office under Till>Till Setup>Lists and Groups. Click on the Clerk Departments button on the left and you’ll see a screen like this;
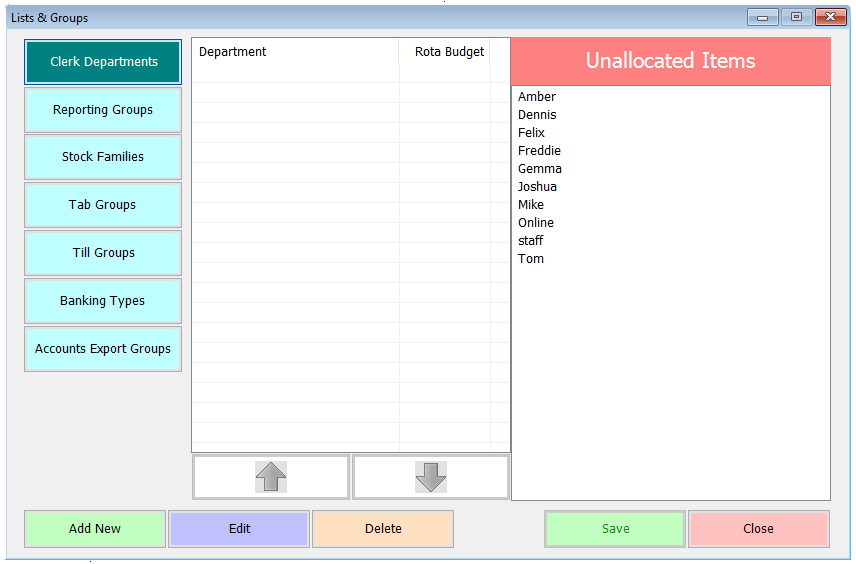
To add a Department, click on ‘Add New’, type in the department name at the top left and then tick all the staff who are in that department. Once all are selected, just click ‘Save’. In the image below we’re setting up the Kitchen department with 3 employees.
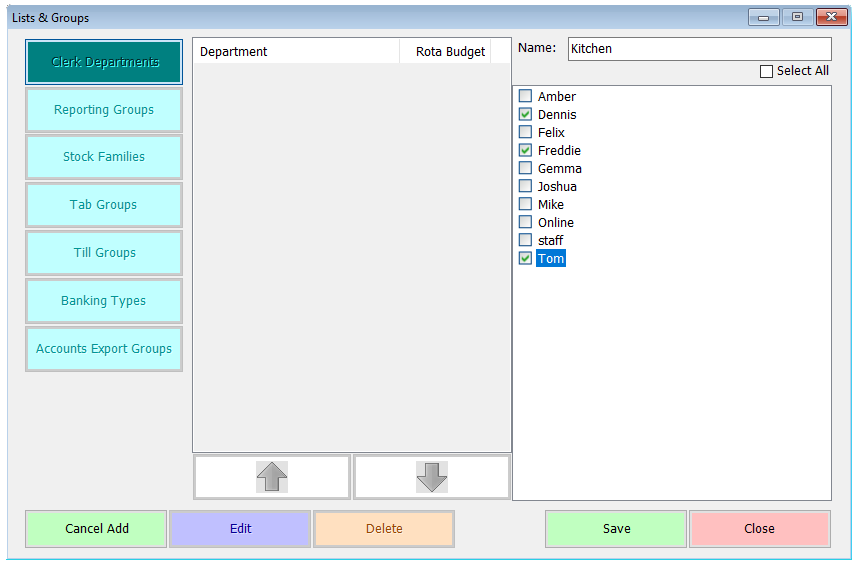
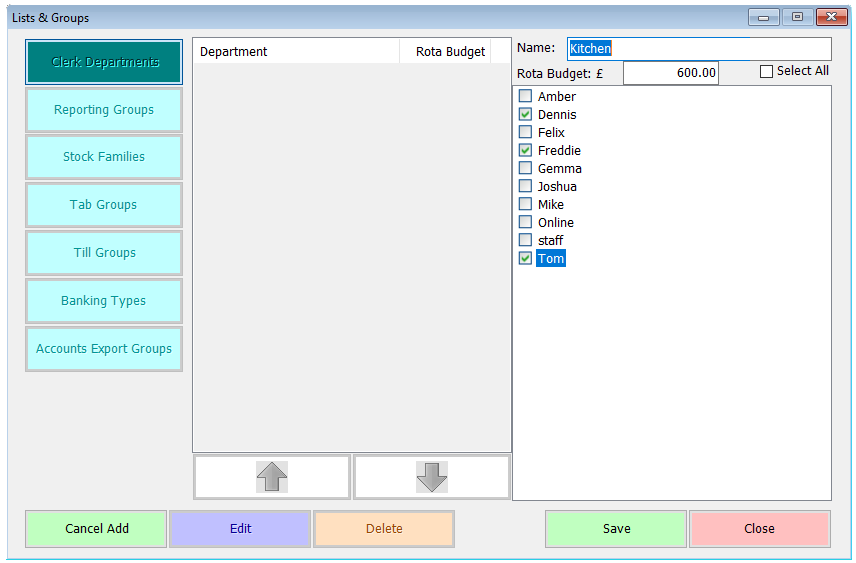
Once you’ve created a department, if you edit it you can also add the departmental weekly budget.
In order to check the rota against budget you’ll also need to populate each staff member’s record with their pay structure. This can be found under Staff>Clerks. Highlight the staff member’s name on the left and click Edit. Scroll down to the Employment Details section and complete the relevant sections, contract hours and either a weekly or monthly salary or an hourly rate. You can also enter their annual holiday allowance in days.
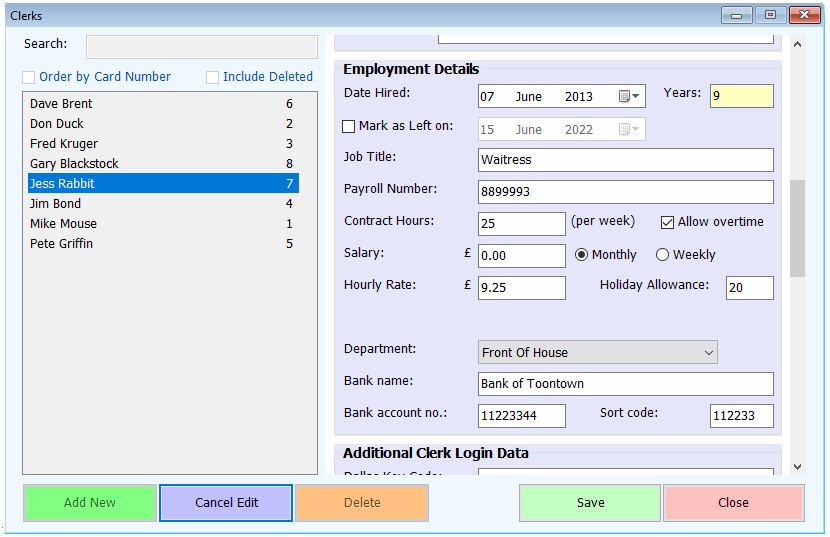
You can change their department here too, and if required you can store their bank details.
Once you have all your departments created and all staff allocated with their pay details set, you can start to configure the rota. You’ll find the rota settings under Staff>Staff Settings. The screen looks like this;
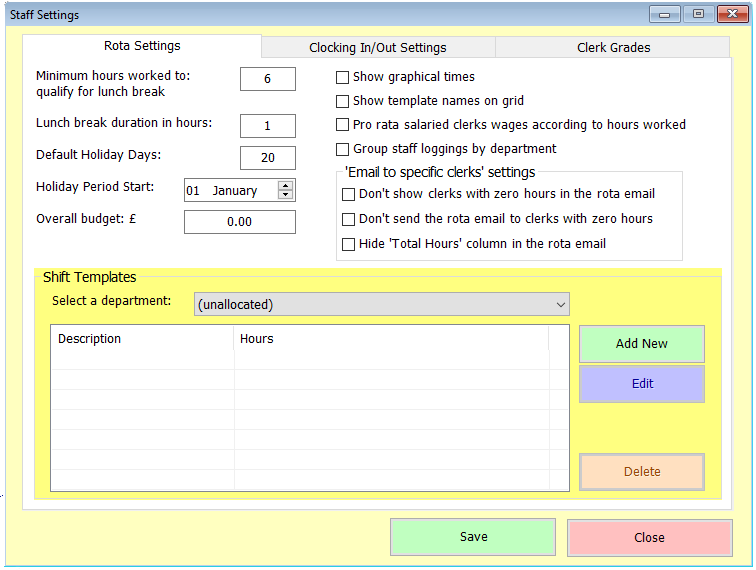
At the top left you can see some operational settings that will help match your company policies;
The top right options relate more to the display and layout of the rota screen;
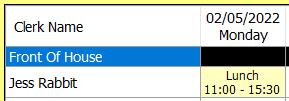
 Ticking this option changes that to show a coloured block representing the period of the day covered, like this;
Finally there are three options around emailing the rotas. All are self-explanatory.
Most venues will have repeating shift patterns for most, if not all, their regular staff. These can be pre-configured here, so that filling the rota becomes much easier. To add a shift template, select the department to which it is to apply in the drop-down and then click the ‘Add New button. You’ll see a screen like this;
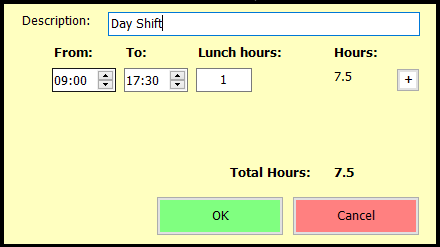
Give the shift a description, set the start and end times and check that the value in the Lunch hours box is correct. You can even create a template for a split shift by clicking on the ‘+’ sign to add another start and end time. Click OK to save.
The rota form itself is found under Staff>Rota. When you first load it you’ll see staff listed under their respective departments and a column for each day of the week plus one for total hours and finally a wages column.

To begin populating the rota, simply click on the cell in the grid corresponding to the staff member on the left and the day along the top. You’ll see a form like this, with a choice of options;
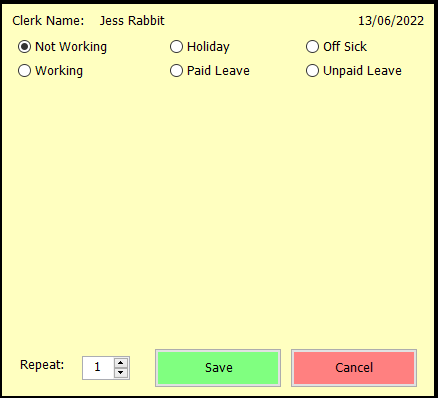
Not working, the default, will leave the cell blank as it originally appeared. For all options, this form has a ‘Repeat’ setting which will allow you to fill multiple days with the chosen option. For all options other than ‘Not Working’ there is also a notes field available so that you can record further detail if necessary.
Selecting Holiday will change the cell to green and populate it with the word ‘HOLIDAY’. This will reduce the person’s holiday allowance by 1 day.
Selecting Off Sick will change the cell red and populate it with ‘Off Sick’.
Selecting Paid or Unpaid Leave options will display an additional drop-down list with a choice of reasons for the leave period;
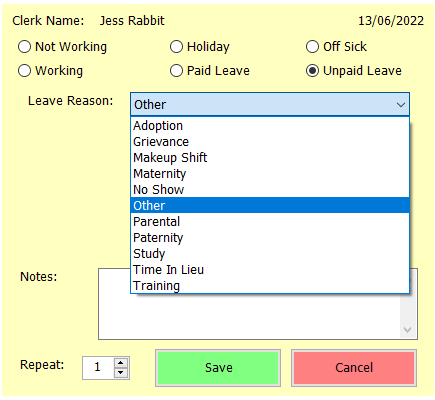
This list is fixed but if you have a specific requirement for other reasons to be available in this list please email support@active-workspace.com and we’ll add it to the list on your site(s). Once you save a Paid or Unpaid Leave entry the cell will be populated with the selected reason and coloured dark green for Paid Leave and dark red for Unpaid Leave.
Selecting the Working option will display a list of shift templates for the selected employee’s department.

To use a template, simply select it in the list and click ‘Use Selected Template’. This will change the screen to display the start and end time from the selected template. Alternatively you can click ‘Manual Entry’ and set different start and end times. You’ll then have the option to allocate lunch break as appropriate, the option to mark this work period as Training, and an option to allocate a ½ day holiday as opposed to the full day option provided by the Holiday selection.
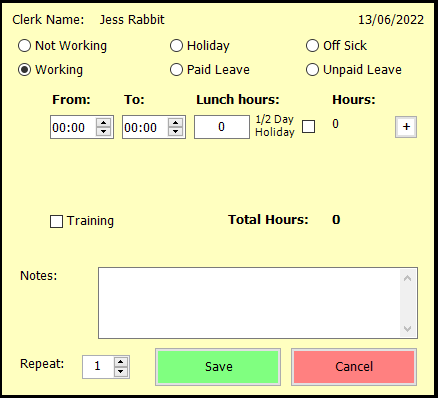
As with the template setup screen, there’s a ‘+’ sign to allow you to create a split shift, or even a double-split shift (3 distinct working periods in the same day).
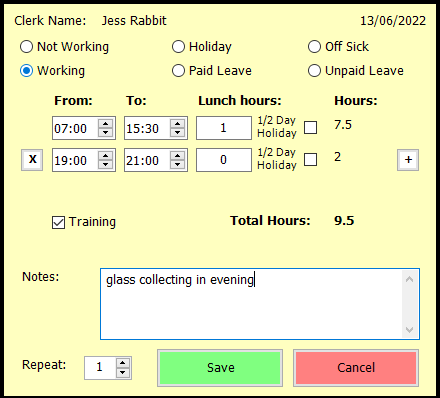
To remove a second or third split, click the ‘X’ to its left.
As above, the hours set will be shown according to the setting selected in yellow (split shifts are a darker yellow). If there are notes, there will be an asterisk next to the hours. If training is selected, ‘TRAINING’ will appear in the cell as well as the hours. The various colour options are shown below;

In order to speed up the process of populating a full rota there are a number of copy options available. Once you have populated a week for a staff member, if you right-click on their name you’ll see a pop-up menu with these options.
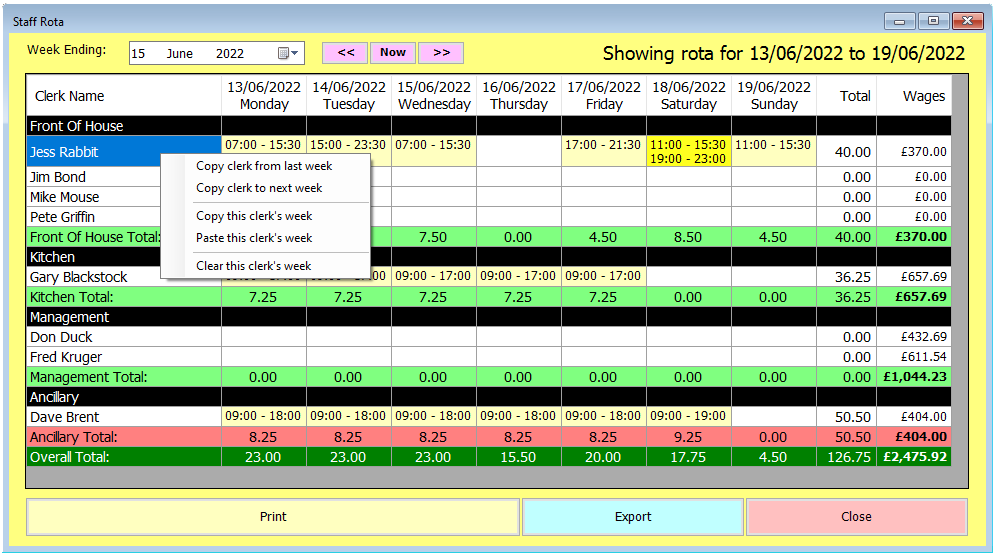
‘Copy clerk from last week’ doesn’t require the current week to be populated but naturally does require the previous week to have been set for the selected staff member. It will copy their rota hours from the previous week into this week.
Similarly, ‘Copy clerk to next week’ will take the figures from this week and replicate them in the following week’s rota.
‘Copy this clerk’s week’ will copy the selected clerk’s hours for this week to the clipboard and allow you to paste those hours for another staff member using the ‘Paste this clerk’s week’ option.
Finally, you can clear all the hours for a staff member for a particular week using the option ‘Clear this clerk’s week’.
There are similar options for each department – right-click on the department name and you’ll see a pop-up menu with ‘Copy group from last week’, ‘Copy group to next week’, ‘Copy this group’s week’ and ‘Paste this group’s week’. Please note that you can’t copy and paste between different departments.
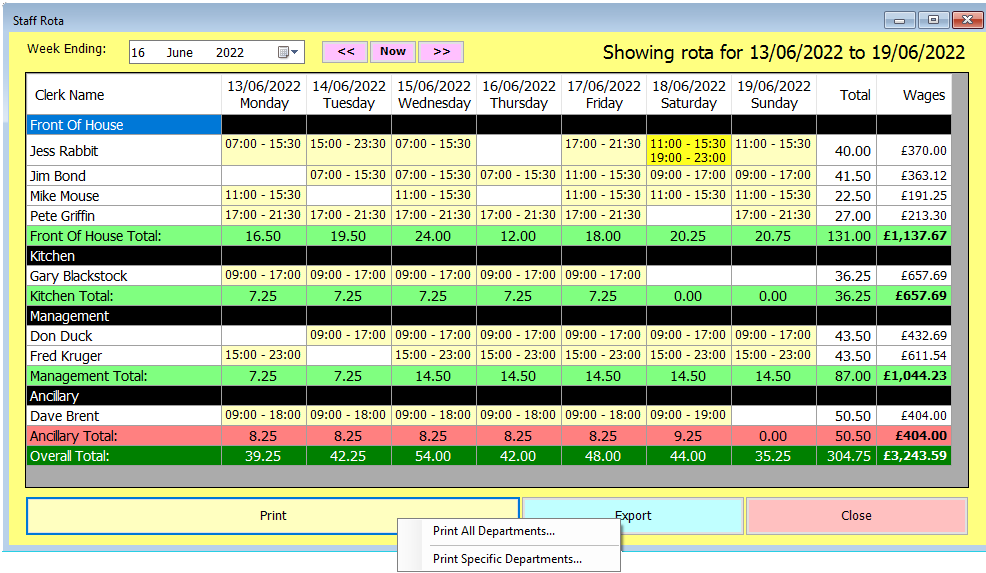
As you build the rota you’ll see the total hours and wages columns and the daily hour totals for each department and the overall totals at the bottom of the screen increasing. You may notice that in the image below, the total row for the Ancillary department is in red. This is because it has exceeded its budget of £400 for the week. The other department totals, and the overall total, are green as they’re on or under budget.
Once your rota is complete you’ll need to make it available to the staff concerned. Clicking ‘Print’ will generate a pop-up menu giving you the choice between printing the whole rota or just specific departments.
If you select the department option, you’ll see this selection screen.
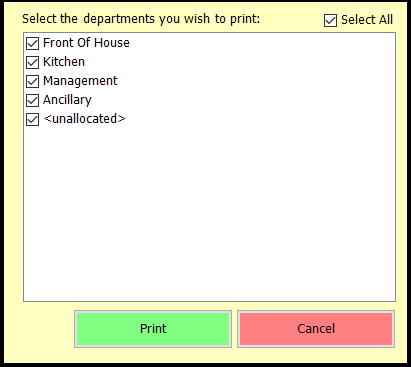
Untick any departments you don’t want to print and click ‘Print’, or click ‘Cancel’ to abort the printing process.
Next you’ll be asked which way around you’d like the rota to print, portrait or landscape.
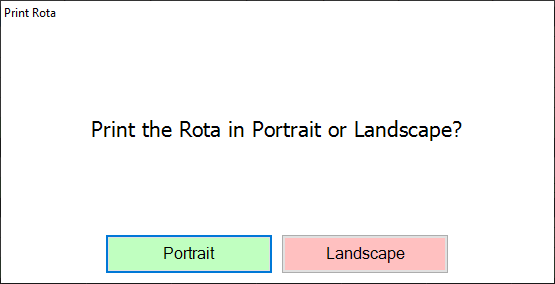
Normally landscape will be ok but if you have more than 45 lines to your rota (department names, totals and individual staff names) then you may find the landscape print extends to a second page. In this case portrait will help keep it to one page.
Alternatively, you can export the rota. Clicking ‘Export’ will generate another pop-up menu;
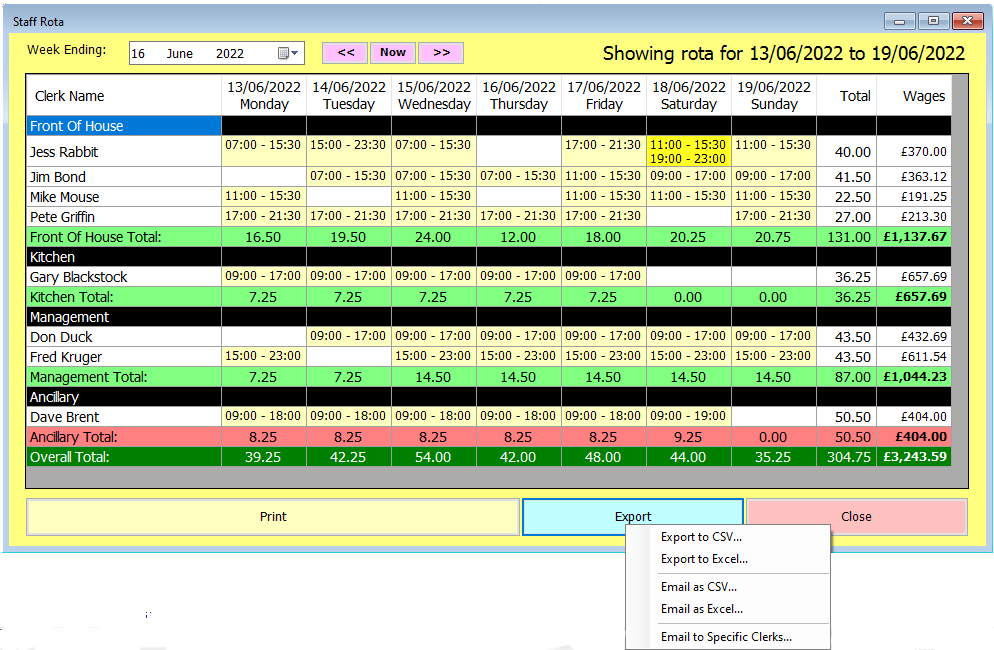
As with all Memsec7 reports, you can export to a local .csv (comma separated values) or .xls (Microsoft Excel) file, or you can email either of those formats to an email address you enter. However, specific to the rota is the option to email to selected clerks. This will show another form;
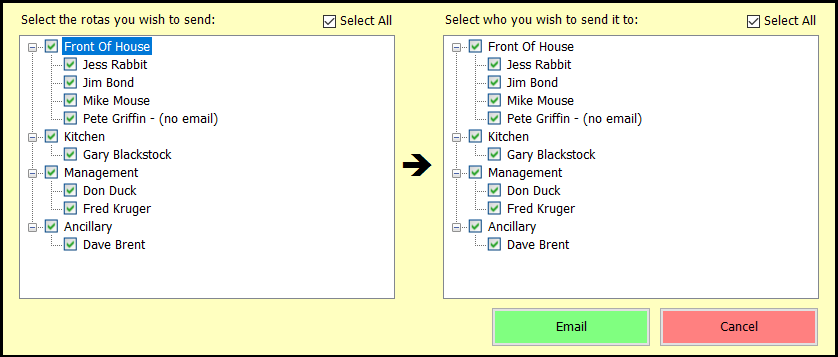
This displays two identical lists of employees. On the left you should select the employees whose rotas you wish to send, and on the right you should select which employees will receive the email. By default, every employee is selected on both sides, meaning all rotas will be emailed to all staff that have an email address stored in the system (under Staff>Clerks, in the Personal Details section). In the image above you can see that Pete Griffin doesn’t have an email address stored.
You can send each person’s rota to them individually, or each department to just its own staff, or any combination by ticking the relevant options on either side. Once you’ve made your selection just click ‘Email’ and you’ll receive a confirmation that the email(s) has been added to the queue for sending.
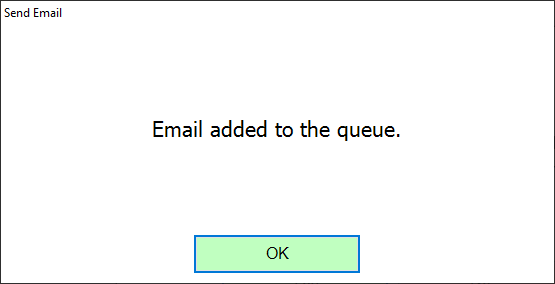
If you choose to send each person’s rota to them alone, or each department to its staff only, you’ll need to repeat this process for each staff member/department.
