How to edit or add different tab types.
By default, Tabs in Memsec7 have a single type, Table. There are various settings that can be applied to a tab type, which you can set in the back office program under Till>Till Setup>Tab Types. The screen looks like this;
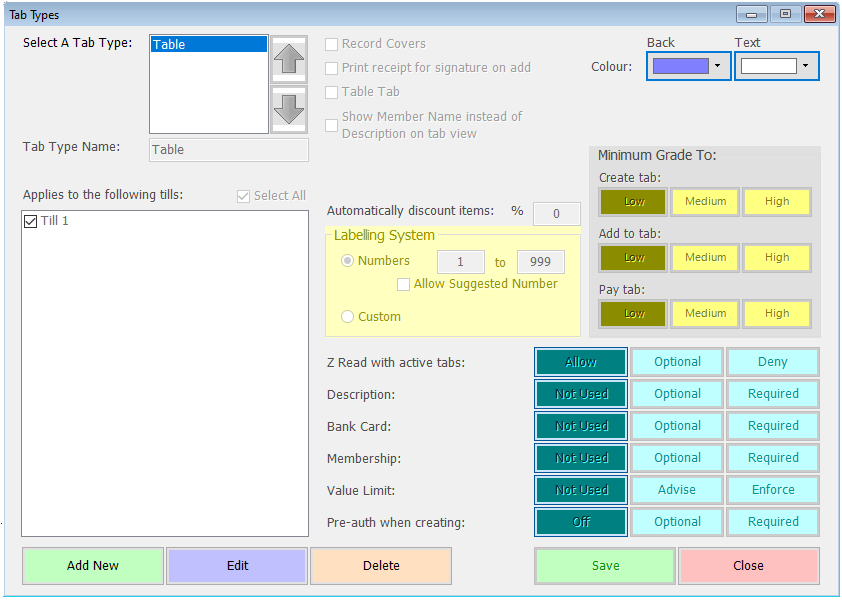
The default tab type created with a new Memsec7 database has none of these options activated, so it will normally be necessary to make some changes to ensure that tabs behave as required.
There is no limit to the number of different tab types you can have on the system. This guide will go through as though editing a tab type but the process is the same for adding a new type. To edit a tab type, hightlight it in the list at the top left and click ‘Edit’. To add a new type, simply click ‘Add New’.
The first option you’ll be presented with is the name of the tab type. Table is the name of the default type but you might want to change that to ‘Inside’ or ‘Outside Table’ etc. or add variations.
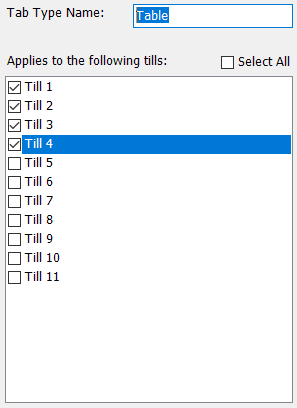
Underneath the name box you’ll see a list of your tills. You can select which tills will be able to use this tab type. This might be useful if you have different areas, such as a function room, where tabs might be treated differently to table tabs elsewhere in your venue.
Immediately to the right of the list of tab types are some on/off options.
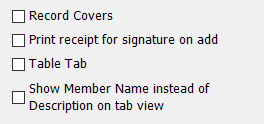
Record Covers: Allows you to record the number of people being served under a tab of this type. If selected, the till will normally ‘guess’ at this number based on the different number of similar items (drinks, starters, mains etc.) being added to the tab when it’s first set up. You can however alter this number if the guess is wrong. The number of covers is used in various reports to provide spend per cover etc. If you select this option, you’ll see another tick box appear ‘And child’. This is an extended version of the covers option that will ask how many of the covers on a tab are child covers – these are then excluded from the spend per cover calculations to give a clearer idea in reports of how much each paying customer is spending.
Print receipt for signature on add: For tabs such as room tabs or bar tabs at a function, this option means that every time a tab of this type is added to the till will print a slip detailing the items added with a signature line, so that the customer signs to agree that the items should be included on their tab.
Table Tab: This setting determines whether this tab type is available in the Table Plan (Till>Till Setup>Table Plan) as a default tab type for an area.
Show Member Name instead of Description on tab view: Where you have a membership database as part of your Memsec7 system, this option, in conjunction with the Membership setting detailed below, will show the name of the member who’s the ‘owner’ of the tab rather than any description entered.
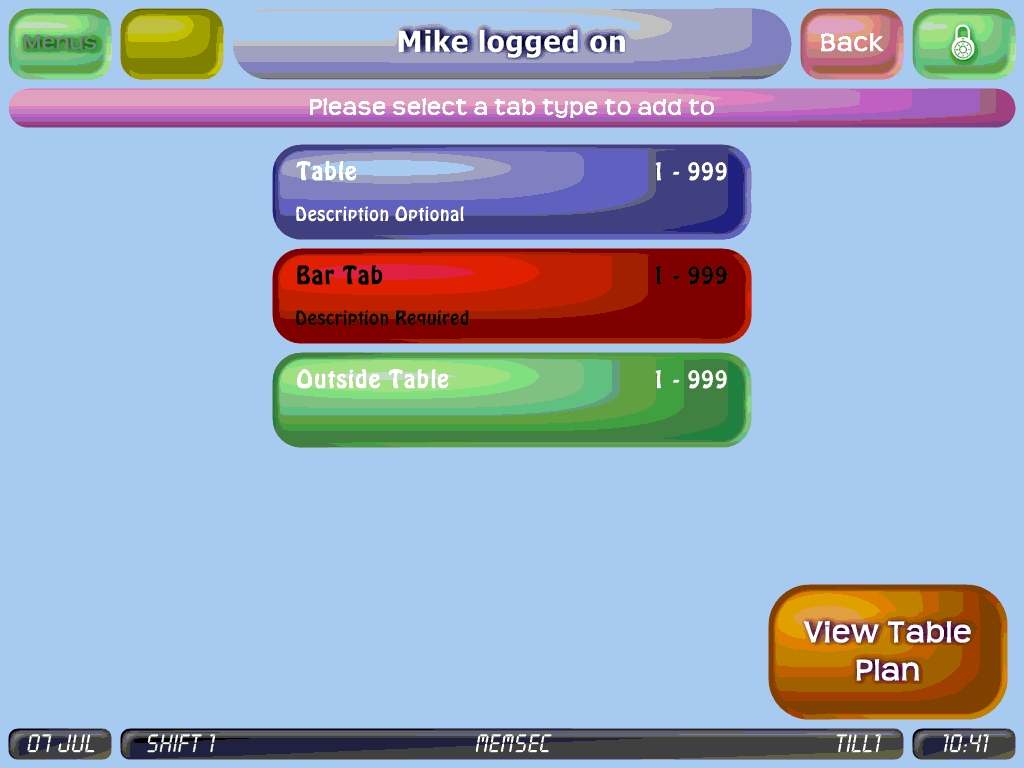
In the top, right-hand corner of the screen there are selection boxes for the colour of the buttons for this tab type. Different colours can make it easier for staff to identify the correct tab type on the till. You can change both the background and text colours. The image below shows how this might appear on your till;
In the centre of the tab type screen there’s an option to automatically discount items added to tabs of this type by a percentage. This might be used for complimentary tab types (set the percentage to 100) or you may have a tab type for regular customers who you want to give a small discount.
We’d normally recommend that if a tab type is to have a discount associated with it, you also use the options to the right of this to control which grades of staff can create, add to and close tabs of this type.
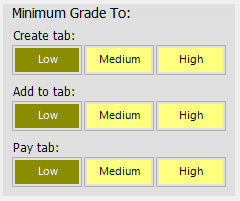
That way the discount shouldn’t be able to be abused. A common scenario is where a complimentary tab needs to be opened, and possibly can only be added to, by a member of management, but once there can be paid off by all staff.
Labelling System
The default labelling system is numbers from 1 to 999. You can change this to reflect your venue’s setup more accurately, though with table tabs we normally recommend that some spare numbers are available for transferring items to if customers wish to leave ahead of the rest of their party etc.
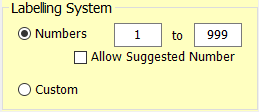
The option ‘Allow Suggested Number’ is usually used for non-table type tabs such as Bar tabs, where the number is purely a differentiator and doesn’t have any link to a physical location or entity.
Instead of numbers you can choose the Custom option for labelling. When you click the Custom option, you’ll see a new button ‘Set Custom’. Clicking this shows this screen;
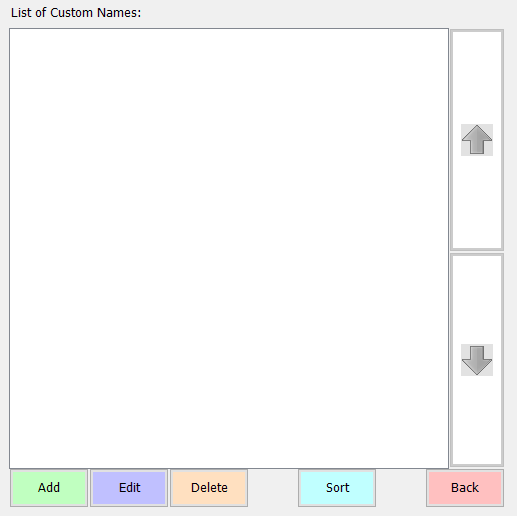
This allows you to enter names for the different tabs within a type. This might be the names of different rooms, customer names or more information about a table’s location as well as its number. Clicking Add on the above screen will replace the buttons with a box for typing the name of a new tab identifier. Click Save to add the new identifier or press enter on your keyboard to save and add another.
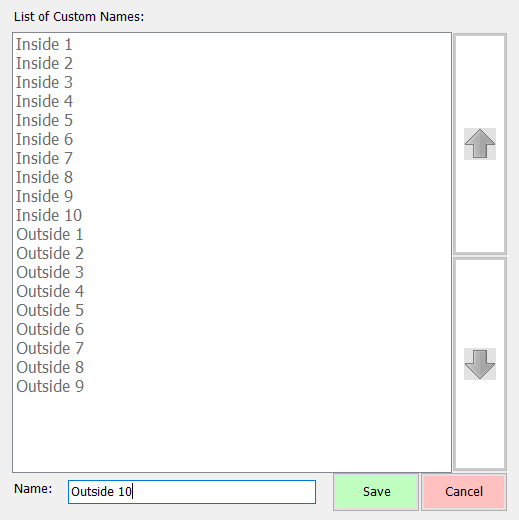
The list will build up and you can then use the arrow buttons to move items up and down, or click the sort button to arrange them alphabetically.
Finally, there are 6 settings with 3 different options.
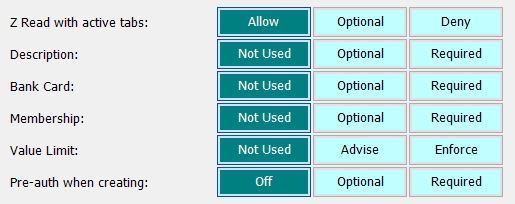
Z Read with active tabs: This option controls whether tabs can run on from one shift or day to the next. A common choice is to set this to Allow for tabs such as Bar tabs, where a customer might settle their tab once a week or so but set it to Deny for Table type tabs, which ought to be cleared on the day they’re started. The Optional setting will generate a prompt to advise the staff member who triggers a z read that tabs are outstanding but, unlike the Deny option, won’t prevent them from completing the Z Read.
Description: In addition to the number of a tab, this setting can be used to register the customer name or some other relevant detail about the tab location or the person to whom it relates. Care should be taken not to enter anything potentially offensive to the customer as this description is usually printed on bills and receipts as well as kitchen and drink tickets.
Bank Card: This setting also has Optional or Required options, and allows a card number to be stored against a tab. This is intended solely as a security measure to provide a means of (the police) tracing a customer who leaves without paying. If a valid number is entered on the till when setting up a tab the system will identify the card type and issuer, and if the card number is not valid it will warn to that effect. Please note that tabs can still be created with an invalid card number.
Membership: Where you have a membership database as part of your Memsec7 system you can use this setting to allow or require a membership number to be stored against a tab of this type. If this setting and the description are both enabled then the description will be shown on the tab buttons on the till unless the box at the top of the tab type screen is ticked.
Value Limit: You can choose to apply a value limit to tabs of this type. The two active options are Advise and Enforce. If either is selected then when a tab of this type is created the till user will be asked to set a limit for the tab. If the Advise option is selected then any addition to the tab that would take the total over the value limit will produce a warning but won’t prevent the limit from being exceeded. Once the tab limit is reached or exceeded, nothing else will be allowed to be added to the tab. If the Enforce option is chosen, it will never be possible to exceed the limit.
Pre-auth when creating: For customers with integrated card payments, this option allows or requires a pre-authorisation transaction to be performed when opening a tab of this type. A pre-authorisation does not mean that if the customer leaves without settling their bill you can claim the funds from their card – it simply pre-checks the card to ensure they have credit available to the amount pre-authorised, and earmarks that amount as likely to be debited to the card.
