New Booking
Pressing the New Booking button will display this screen;
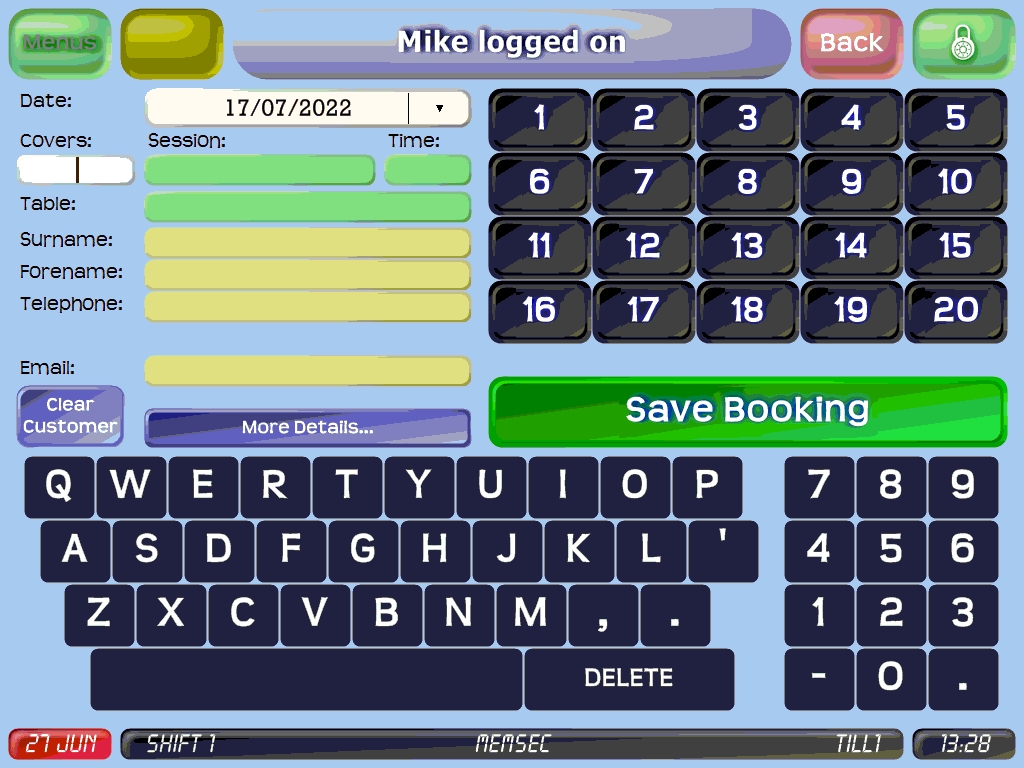
This screen is designed to work through from top-left. If you go back and change a selection, some subsequent selections may then need to be remade. The date is selected at the top, but you can change that. The top -right section of this screen will change according to which element of the booking you’re recording.
Select Covers
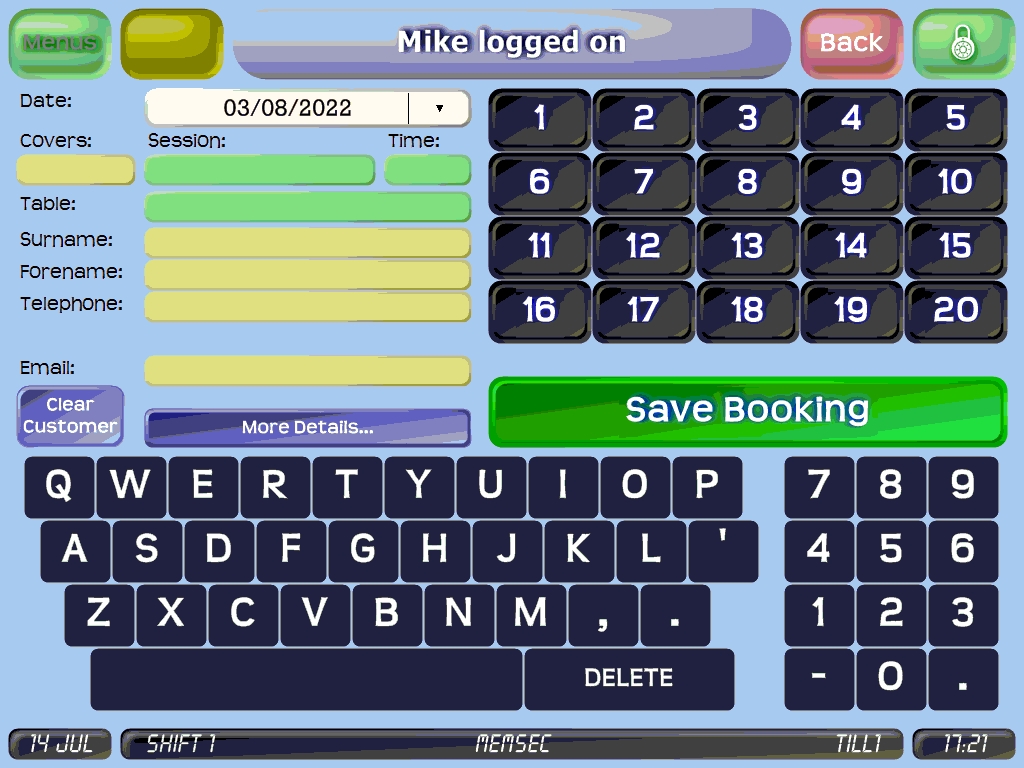
Start by selecting the number of covers by using the number buttons 1-20 at the top-right (should you need to record a booking for more than 20 covers you can use the number pad at the bottom-right). The number you press will be filled in and the form will move on to the session.
Select Session
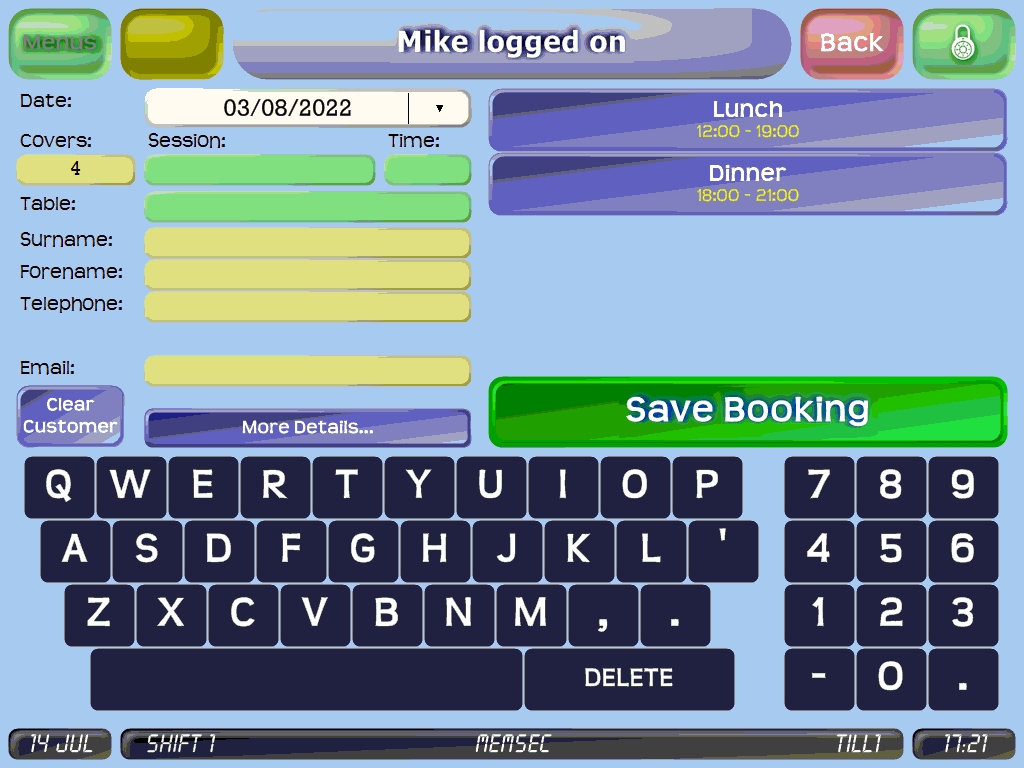
If there are no more bookings available for the selected number of covers for a particular session, you will either see a message to that effect where the start and end times are shown on the session button, or it will be disabled. Pressing a session button will select that session and display the time slots available in that session.
Select Time
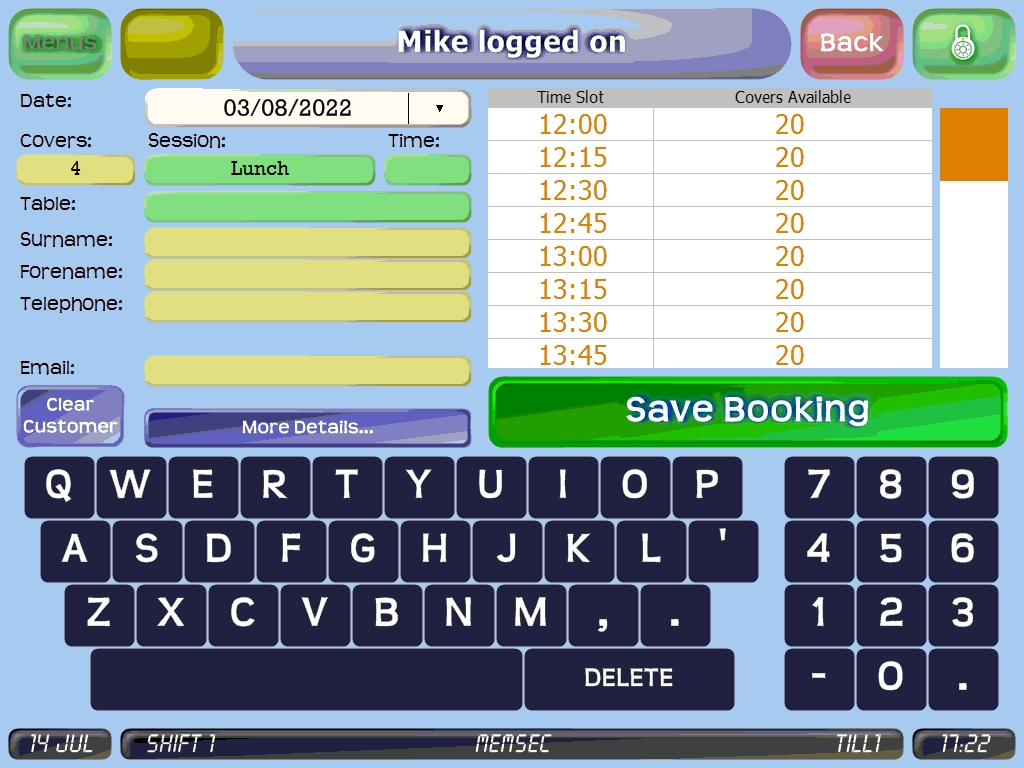
Where a booking already exists in a time slot, the total number of available covers will be lower and the slot will be coloured pink rather than white, turning to red when the number of covers left reaches zero. In sessions without pre-defined table slots this display acts as a warning – you can still book tables with more covers than are shown as available. You will be warned when saving the booking, but you can choose to continue;
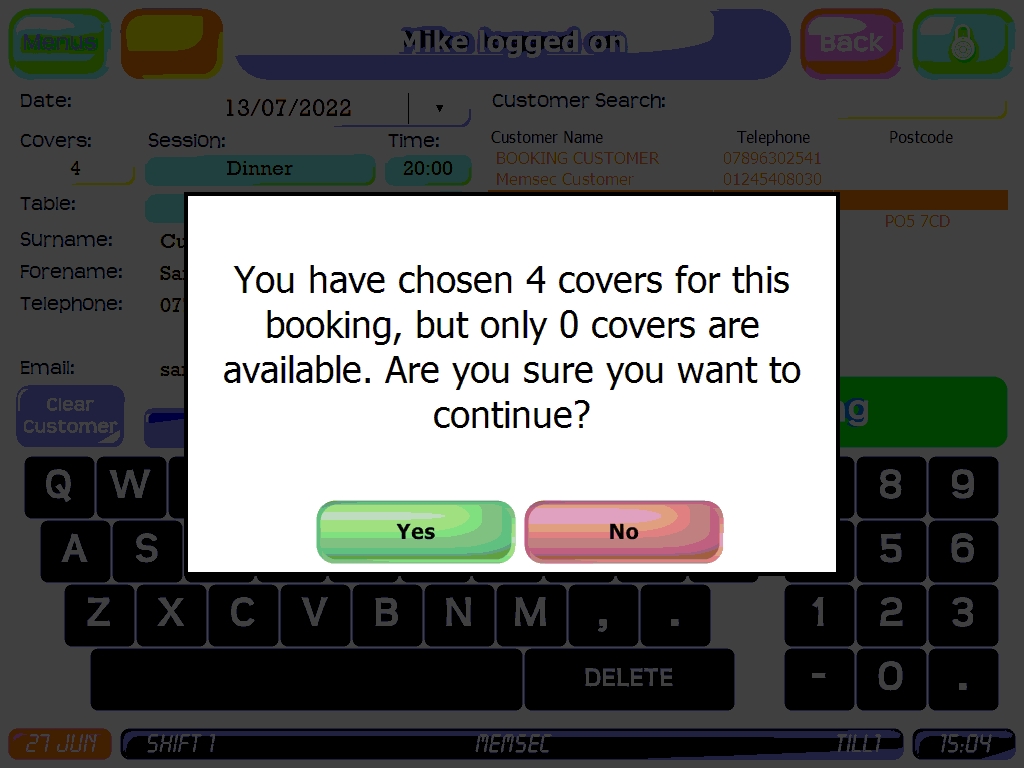
Select the required time slot, then click on the table field. The screen will change again.
Select Table
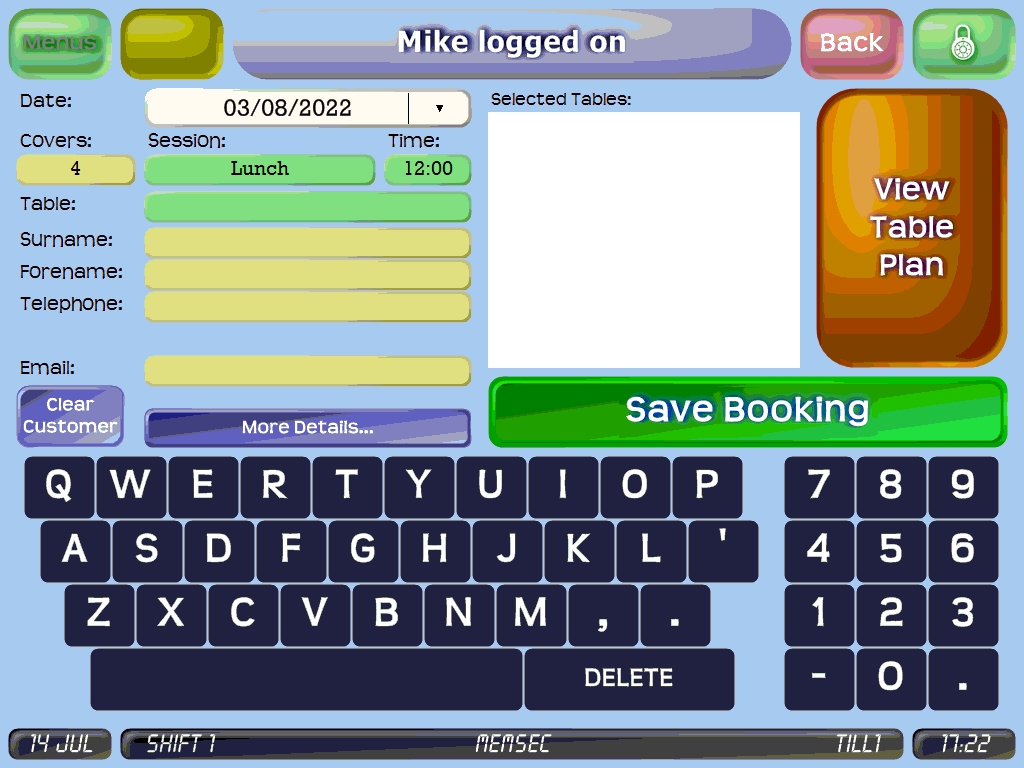
When editing a booking, the ‘Selected Tables’ list will be populated with any tables already allocated to this booking. It may not be necessary to allocate a table when making a booking (see Booking Form tab in Booking Settings) but if you want or need to do so, press the ‘View Table Plan’ button. This will display the table plan (for help with the table plan and more detail on how to configure it to help with bookings, see here)
Select Table from Plan
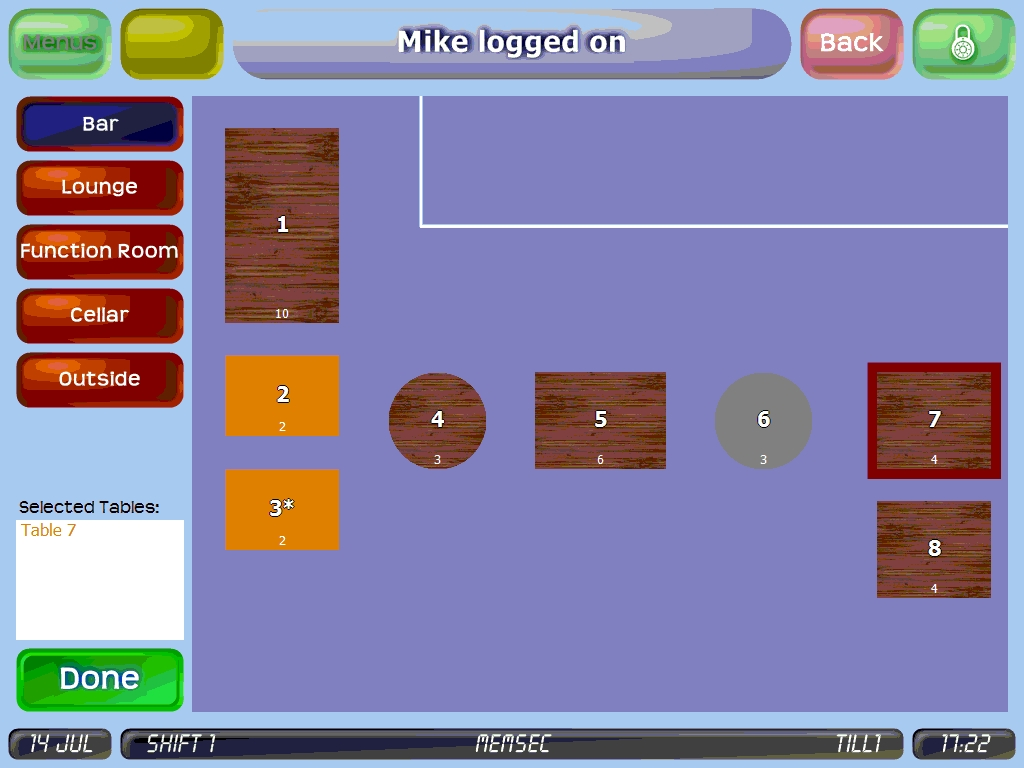
Any tables already booked within the likely timespan of the new booking will show in orange, while any tables on the plan but not set to be available for booking on-site will be grey. You can select any number of tables from the plan, even if they’re not set to be joined. As you select each table it will be highlighted red, and its number will be added to the list at the bottom left. You can see the number of covers on each table underneath its number, which should help ensure you can pick the right size table or tables. When you have completed your table selection, click ‘Done’. You’ll be returned to the booking form and the table number field will be populated, with the Surname field active.
Enter Name
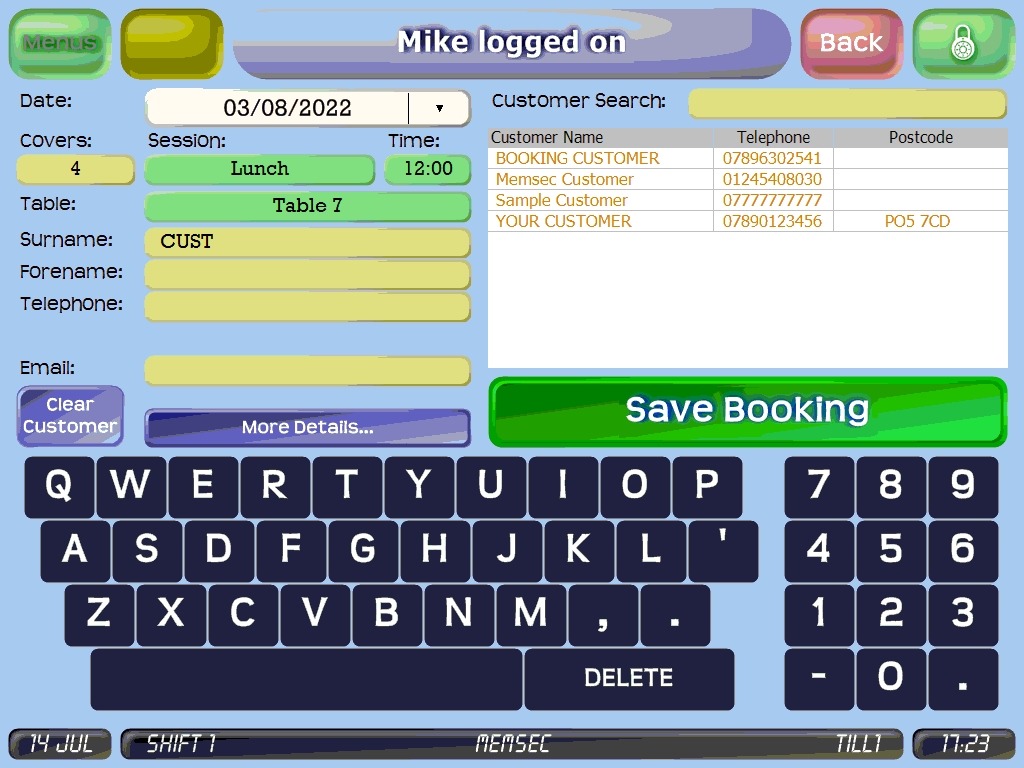
When you start typing in the surname field, or indeed any of the fields for customer details, the system will search for all possible matches based on what you’ve typed. In the example above, typing the first 4 letters of the word ‘Customer’ has returned 4 possible matches, and their names, telephone numbers and post codes are listed. Naturally if the customer making this booking isn’t in the list you can continue to enter their details, but if they’ve booked before you can select their entry in the list and the form will be automatically completed for you.
Select Name
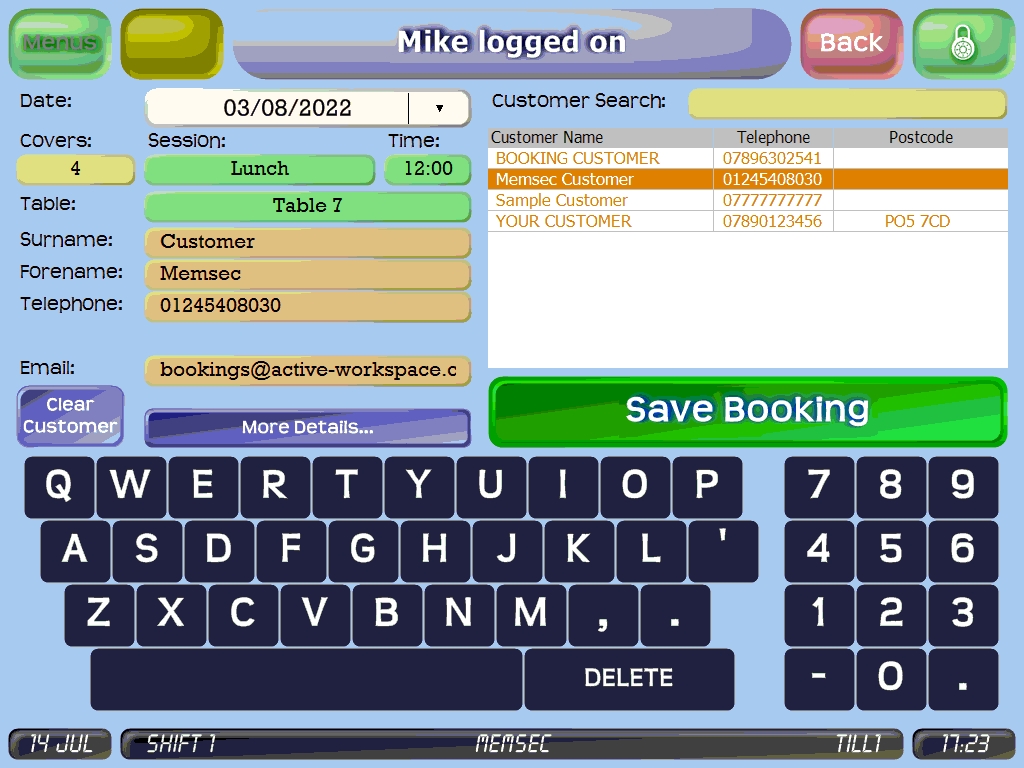
Should any of the customer’s details be incorrect you can edit them here, but it’s better to do this in the Customer screen described here as editing them here will create a new customer.
At this point it’s possible to save the booking but there are some other options available by pressing the ‘More Details…’ button.
More Details
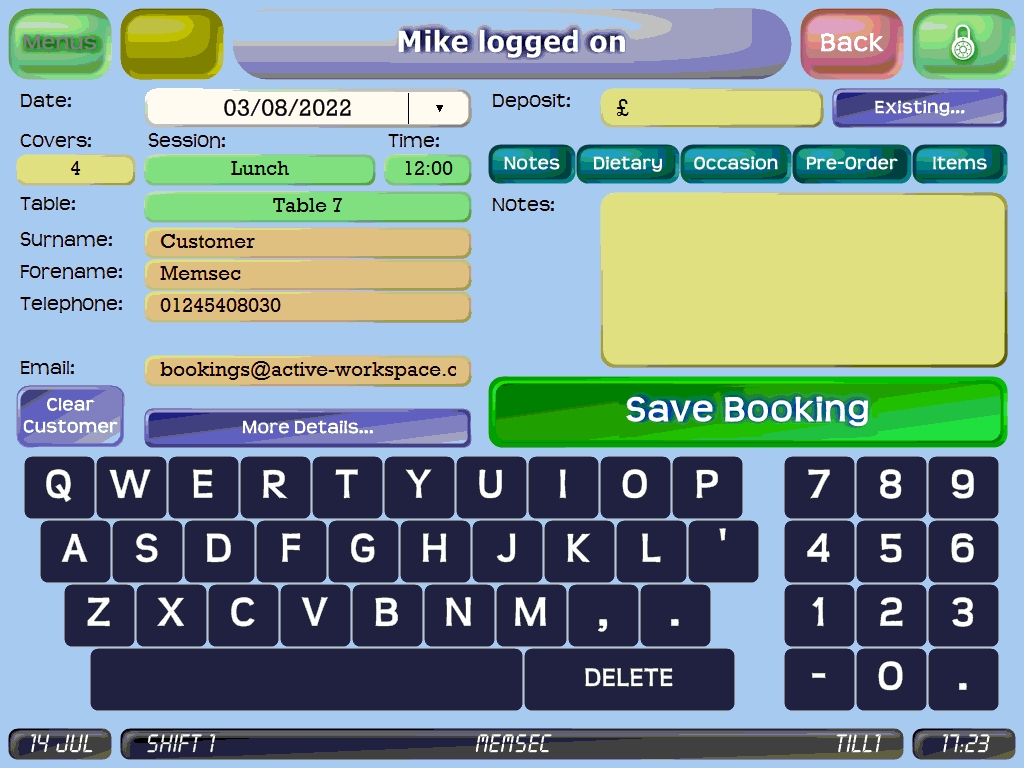
If deposits are enabled then the option to enter a new deposit amount or select an existing one will appear at the top-right (see Settings page). Under that there are buttons for Notes, Dietary, Occasion, Pre-Order and Items.
Notes allows you to make a note about this booking or customer – high chair required, table near a window etc. When you save the booking you’ll be asked whether to associate the note with the customer for future bookings.
Pre-order allows you to record whether a pre-order form has been firstly issued to and secondly received back from the customer in relation to this booking. Naturally if this is relevant at all it will usually only be for busy set-menu times such as Christmas.
Items is here for information only – items can be added to a booking made online, so if you edit an online booking you’ll be able to view the items the customer has purchased with the booking.
Dietary
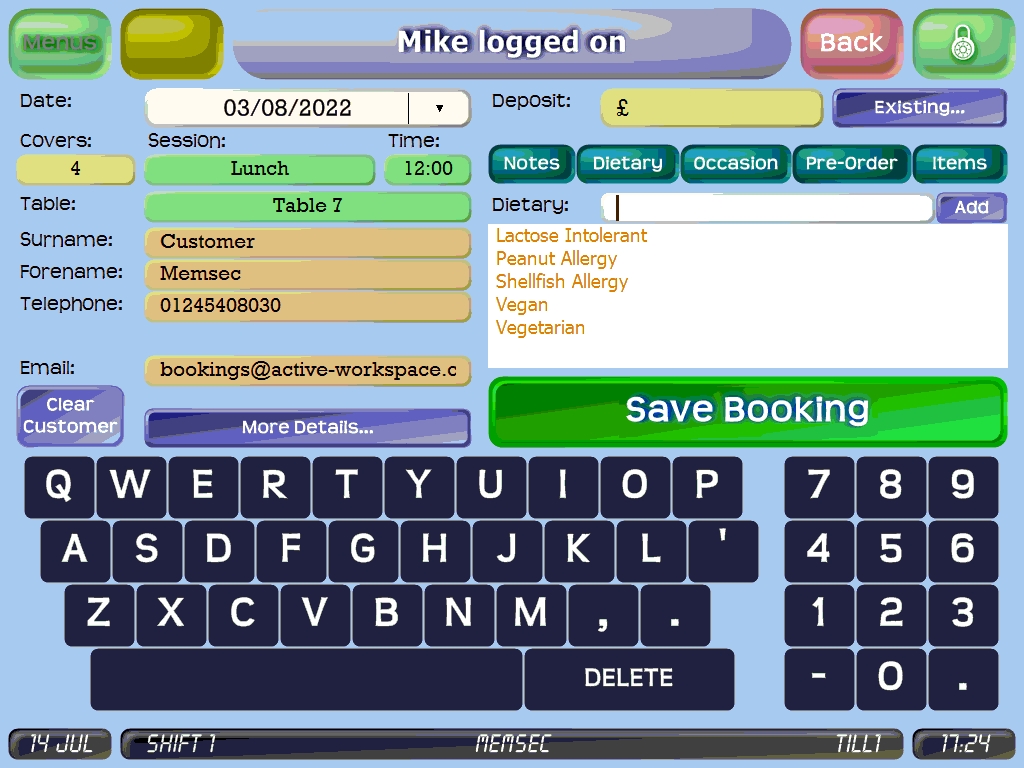
The Dietary button allows you to select from the pre-existing list of dietary requirements, (see Lists tab on Settings page) or add a new one. Anything added to this list for a new booking will be available for all future bookings too.
Occasions
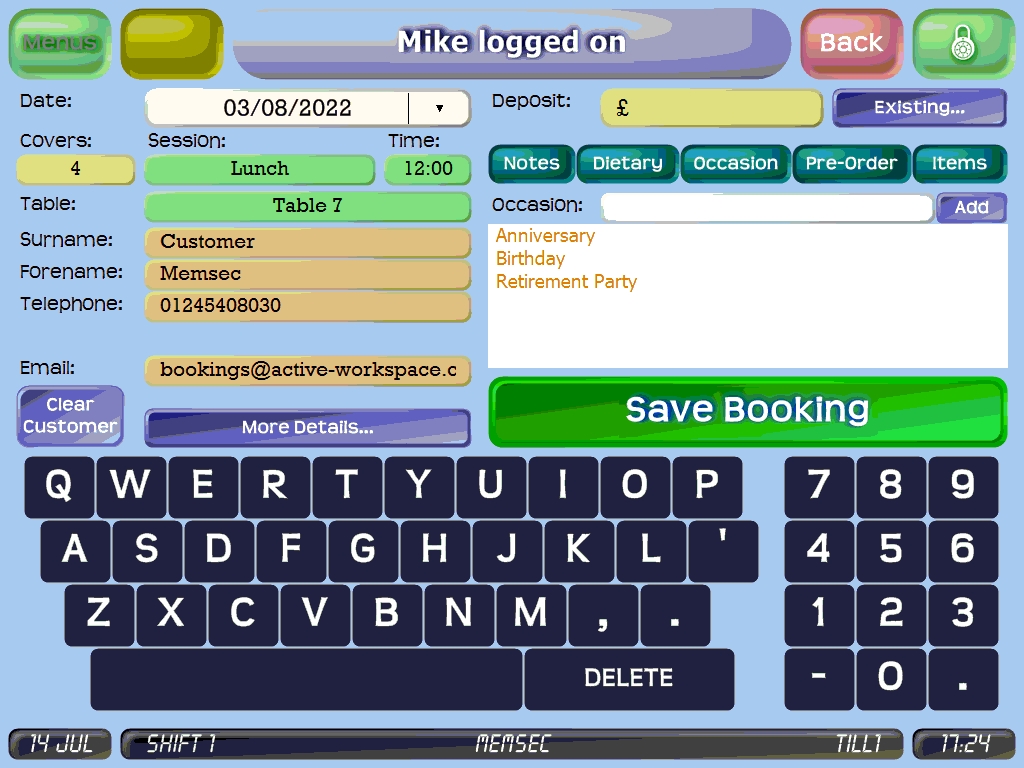
The Occasions button allows you to select from the pre-existing list of occasions (see Lists tab on Settings page) or add a new one. Anything added to this list for a new booking will be available for all future bookings too.
Save Prompt
Once you’ve added or linked any deposit, chosen relevant dietary or occasion messages and added any applicable notes, click ‘Save Booking’ to confirm the reservation. There are a number of prompts that may appear at this stage, dependent on which settings you’ve activated and whether there’s a deposit (please see Settings tab above). The prompt below will be the final one you see.
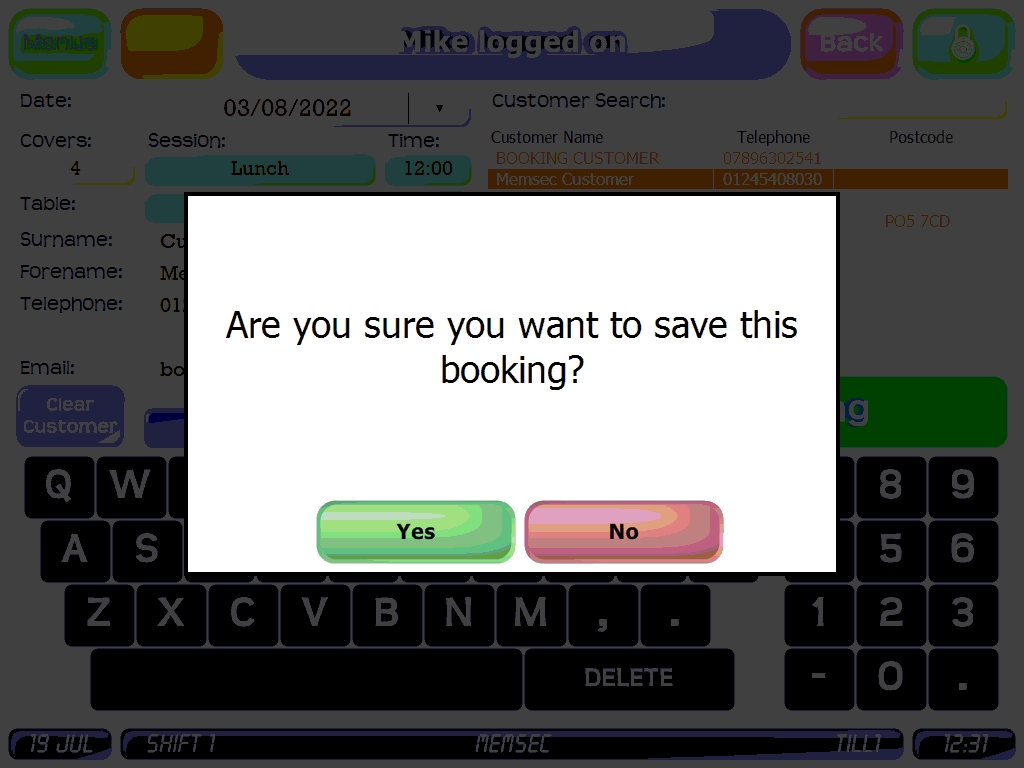
Once you’ve confirmed all prompts you’ll be returned to the list or chart view of the selected date, where the new booking will be visible.
