Products in Memsec7 are the members of a category. The definition of a product tells the system which category it belongs to, whether it’s a food or drink item, and for a stock product how you purchase it from your suppliers and how you count it in a stock take. Most of these things will be common across the category, but it’s perfectly possible to have products with different make up in the same category.
To add a new product, in the back office program go to Tills>Products. Click on Add New in the top right-hand corner, then type the name of the product in the box where the cursor appears. Next, select which category it will belong to in the drop down list. This will import the default settings for that category for the different sizes applicable to the product. Key to those is the smallest measure, as this is the measure that helps define all the others.
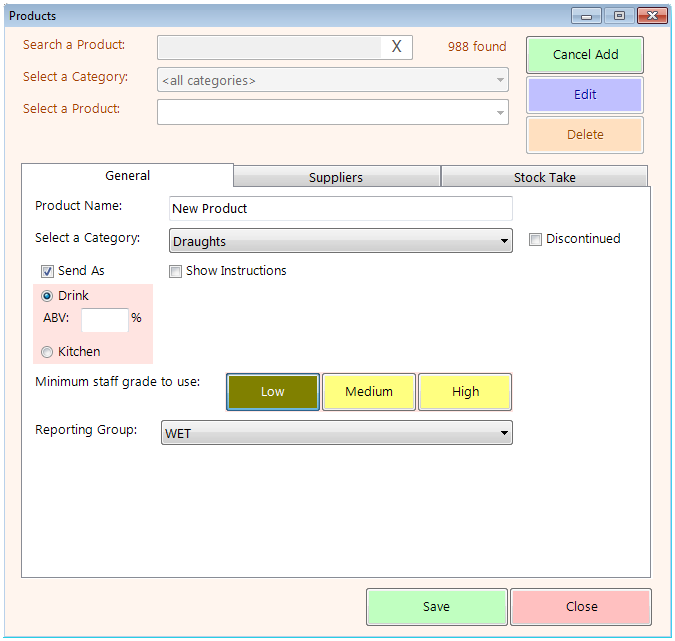
Having set the category, choose from the options under the ‘Send As’ checkbox to determine whether the product should be classed as a drink or kitchen item. If it’s the latter, you’ll also need to set which course it belongs to by default. You can also choose how any instructions related to printing are handled; ticking show instructions will ensure that as soon as a button is pressed on the till screen for any sale item associated with this product, a screen of instructions will automatically appear. The three options below that check box dictate how those instructions will behave. Optional means that instructions are available but may well not be necessary. Required means that at least one from the available list must be selected. This option has generally been superseded by the final one, Groups. These are configured in Kitchen & Drink Printing and can provide a better means of ensuring that necessary instructions can be found more easily and reliably.
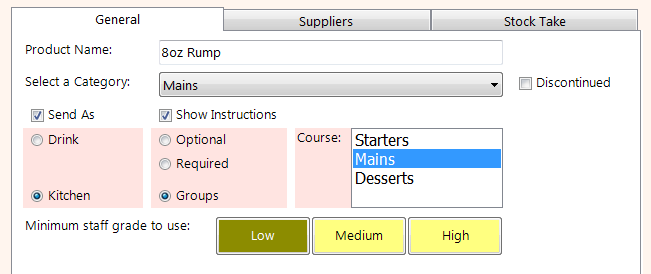
Finally on the General Tab, set which reporting group the new product should relate to and if necessary set the minimum staff grade to use (low is set by default). The only circumstance in which you might change this is for a product which you want only managers or supervisors to be able to sell the associated sale items, such as high value items or things like machine income that might be rung through the till as part of the cashing up process.
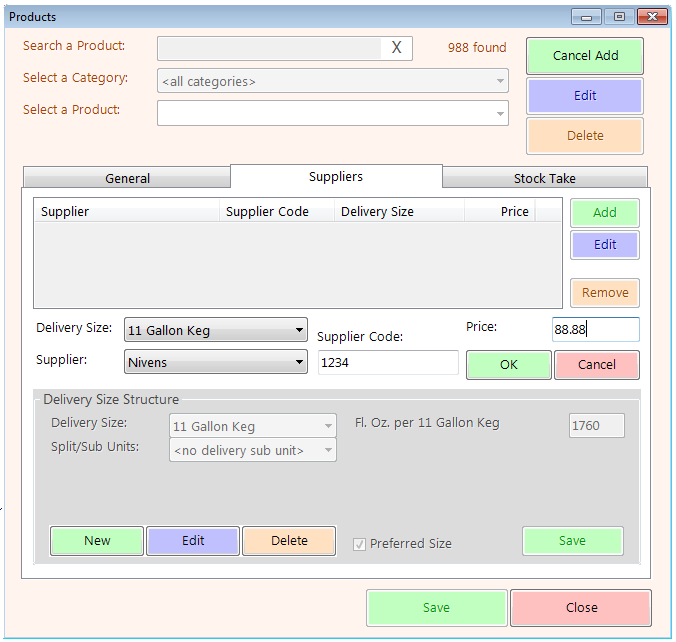
For stock products the Suppliers and Stock Take tabs also need to be filled in. (Click here for non-stock products) The suppliers tab allows you to set the price your suppliers charge for which size(s) of the product. Select the Add button within the Suppliers tab to add a new supplier delivery size. The default size for the selected category will be shown in the delivery size drop-down box.You can change this if required, using the Delivery Size Structure section at the bottom of the Suppliers tab. Click on New, select the new size from the drop-down, enter the number of smallest measures this represents in the text box on the right and then click on the small Save button. This will make the new size available in the main Delivery Size drop-down. Next select the supplier, and if required enter the Supplier Code (this is primarily for emailed orders). Finally enter the price, net of VAT, that the supplier charges for this delivery size and then click OK.
The Stock Take tab allows you to set the smallest measure for the product and the related measurements for default delivery size and stock take size(s). There’s a checkbox to set whether this product should be included in a stock take which must be ticked in order to be able to set the other values. The smallest measure can be altered from the category default but this should only be done with caution. Once a product has been created this smallest measure can’t be altered, though all other related measures can.
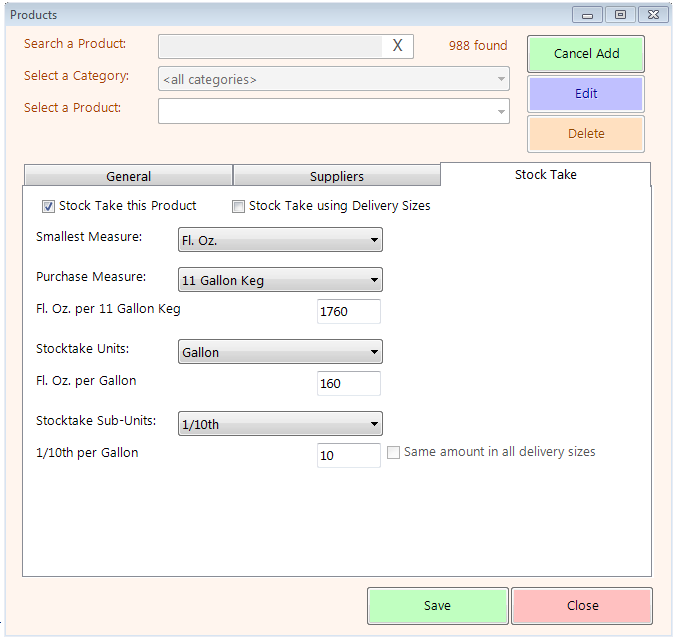
Next set the most common purchase measure. As with all measurements this will have been set to the category default to start. If you change this you will need to make sure that you also change the corresponding number of smallest measures that the new size contains. The same is true of the stock take units and sub-units.
If you purchase a product in more than one size you also have the option to count it in those sizes. This is often useful for spirits, where in addition to 70cl bottles you may well have 1.5ltr bottles for the most popular lines. The checkbox at the top of the Stock Take tab allows you to activate this option, though you still need to set a default stock take size which the system will use in the reports. Where multiple delivery sizes are to be counted we recommend using the same stocktake sub-units (e.g. 1/10th) for all sizes. Again there’s a checkbox to indicate that this should be the case.
As long as the smallest measurement is set correctly, all the related settings in the Stock Take and Suppliers tabs can be added or amended at a later date.
Once you’ve set the various measurements you can save the product. When you click the main Save button Memsec7 makes the assumption that you wish to sell the product in the measures defined in the category, so you’ll see a new screen which asks you to enter your sale prices for the relevant size items.
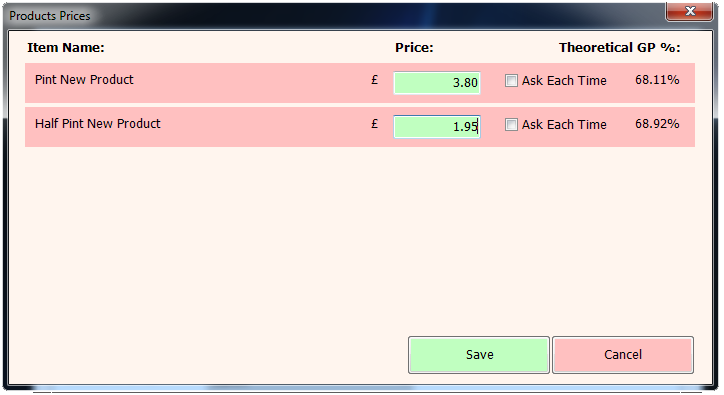
Enter a price for each size you wish to sell. If you’ve set a supplier price, this screen will show the Gross Profit percentage the price you’ve entered equates to. If this is a product that you price differently each time (such as an Open item) then tick ‘Ask Each Time’.
This last screen provides a shortcut to creating the corresponding Sale Items for you. In order to maintain those sale items, for things like changing prices and recipes, you should use the Sale Items form (Tills>Sale Items).
