Table Service Hours
This section allows you to set which hours of which days of the week your Order at Table app will be available. If customers access the app outside those hours they will either be given the option to make a Collection or Delivery order, if you have enabled either of those options, or they’ll receive a message informing them that ordering isn’t available.
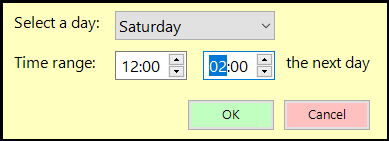
To add a time range, click on the green ‘Add’ button. You’ll see a box like this;
Select a day from the drop-down at the top, then set the start and end hours. If you select an earlier end time than start time the system assumes you want the session to extend over midnight.
You can have multiple sessions on any given day. This section relates to overall availability only. In the next section, Menus, individual times can be set for categories within a menu.
The blue Edit button allows you to alter an existing entry to change the day and/or start and finish times, and the red Remove button will delete the selected entry in the list.
Set Available Tables
You will need to specify which of your tables are available for online ordering. To do this, click on the Set Available Tables button. You’ll see a screen like this;
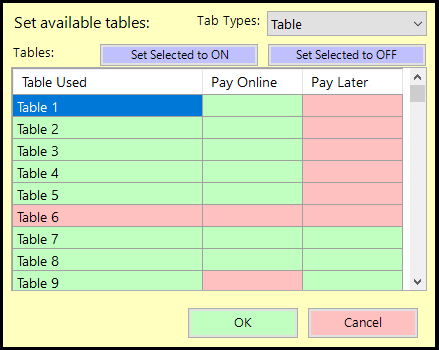
For each tab type that you want to be able to order online, as listed in the drop-down box at the top right, you need to specify which tables or locations can order and Pay Online and which can order to Pay Later. Select the cell in the grid that corresponds to the table and the payment option (you can click and drag to select multiple tables and/or options) and click ‘Set Selected to ON’ or ‘Set Selected to OFF’ as required. In the image above, tables 1 to 5 can pay online but not later, table 6 cannot order at all, tables 7 and 8 can choose either method and table 9 can only pay later. A common combination in this screen is to allow inside tables to pay later but require outside tables to pay on ordering.
Minumum Order Value
This is a simple setting which does exactly as is described. If you tick this option and enter a value in the box that then appears,

customers will have to order items totalling at least that amount in the app before they’re able to check out. They are made aware of this requirement in the basket summary on the web app screen;

As soon as the basket total exceeds the minimum value, that message will disappear.
Allow Service Charge
You can apply a service charge to WebApp orders. This is separate from any on-site service charge you may already have configured, and can be either a percentage or a fixed amount. You need to tick this option box and then click Setup to configure how you’d like the charge to be applied. You’ll see this screen;
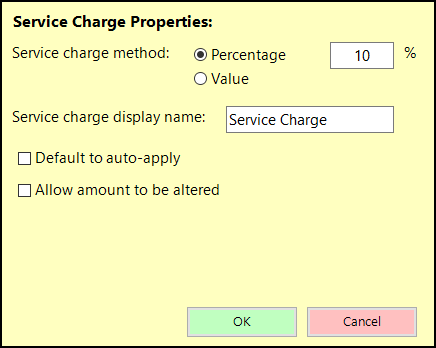
You can choose between a percentage of the overall order cost or a fixed amount. You can then change the way this charge is described in the app if you want to avoid directly referencing a service charge, such as ‘Online ordering fee’ or ‘Table Service fee’.
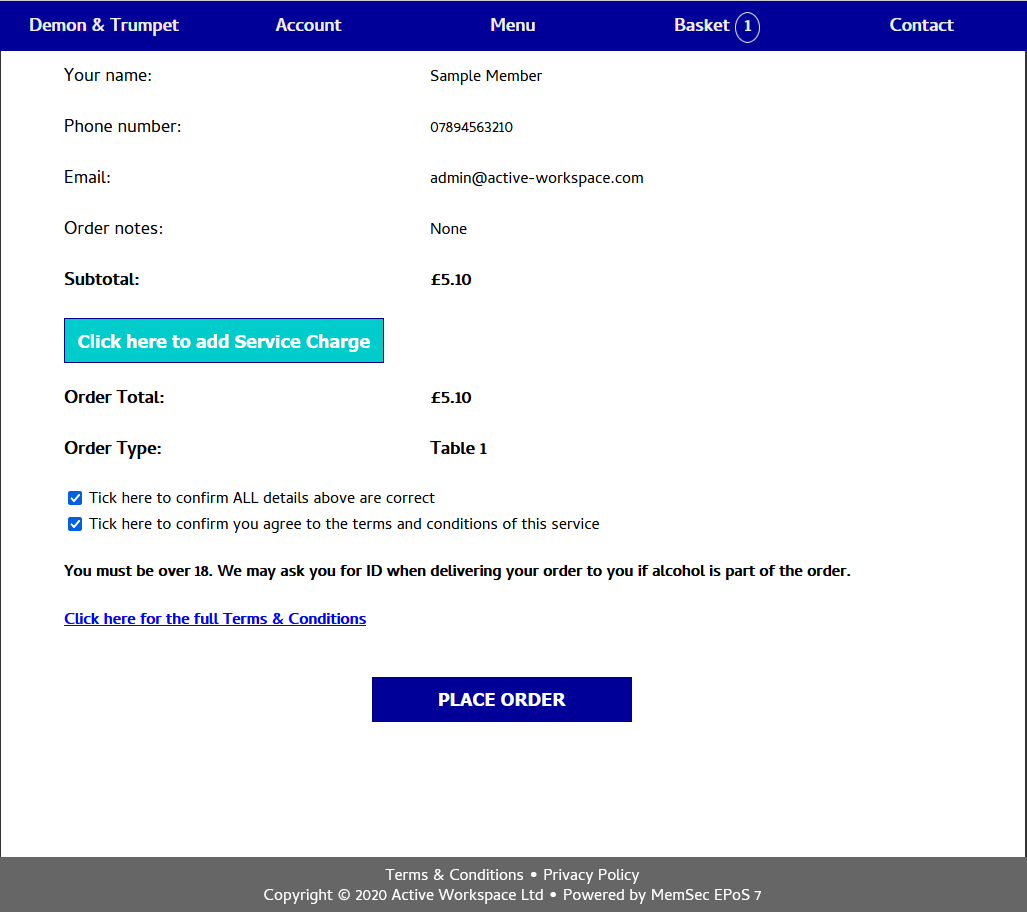
The two optional check boxes determine how the Service Charge will be added, altered or removed. If you don’t tick ‘Default to auto-apply’, the charge won’t be applied unless the customer chooses to press the button on the checkout screen, as seen below;
The box ‘Allow amount to be altered’, if ticked, will mean that the default fee will be applied but the customer will have the option to change it, hopefully upwards but they can also lower or remove it if they choose.
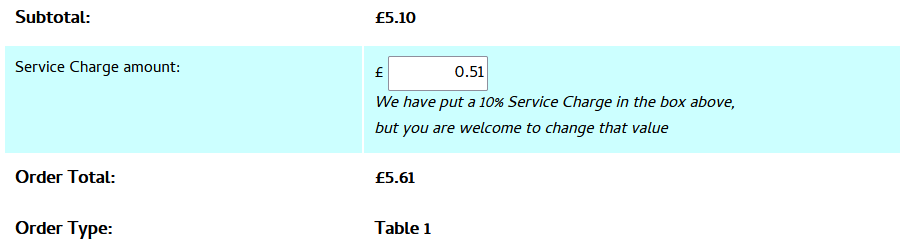
If the customer clicks the button to add Service Charge, or if you choose the auto-apply option, then instead of the button the charge will appear on the checkout summary like this;
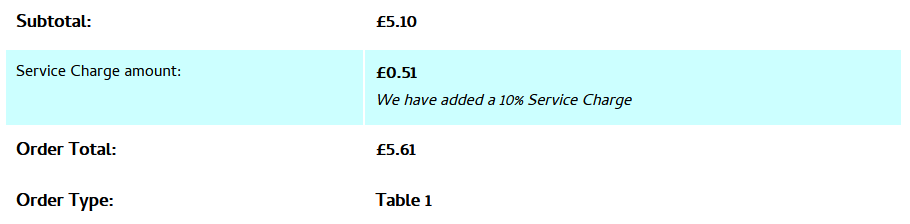
In the above image we can see that there’s no option to alter the charge or remove it, because the second option hasn’t been selected. If it is selected, the display looks more like this;