Loyalty Schemes are automatically available to all Memsec7 users. In their simplest form they allow you to record spend against a membership number but it is usually more advantageous to record some detail about your loyalty card holders using our membership facility. If you need to activate this you can do so under General>Site Settings. Just tick the option ‘Enable Membership’. For more detail see Memsec Membership Database.
Loyalty schemes in Memsec7 work on a points basis – points are awarded for spend and redeemed for a monetary equivalent. You have various choices about how points are awarded and spent. To set up and manage a loyalty scheme go to Till>Till Features>Loyalty. You’ll see a screen like this;
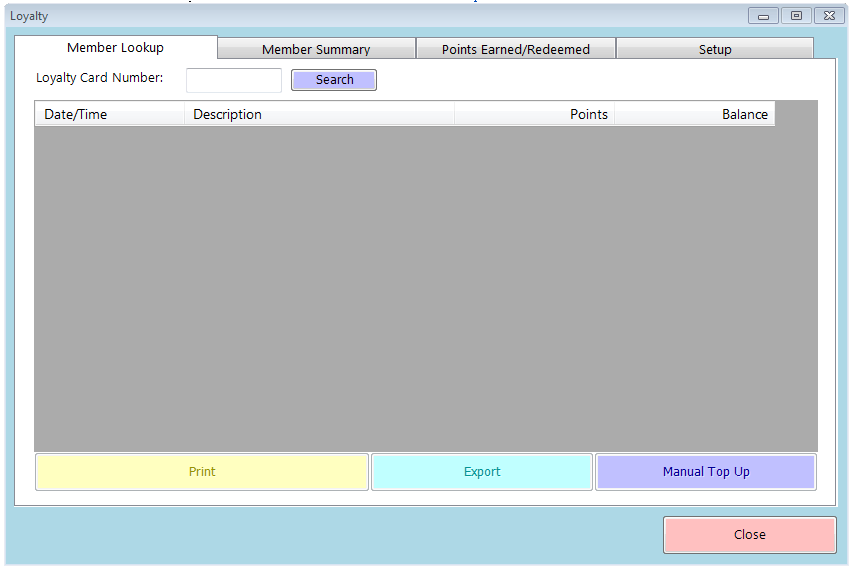
The first three tabs all deal with ongoing reporting of the scheme and members’ activity, and these are dealt with at the foot of this page. To set a scheme up, click on the Setup tab. You’ll see that Loyalty schemes, like Button Positions and Till Settings, are based around templates that can be applied to different tills at the same time. Click ‘Add New’ and you’ll see a screen like this;
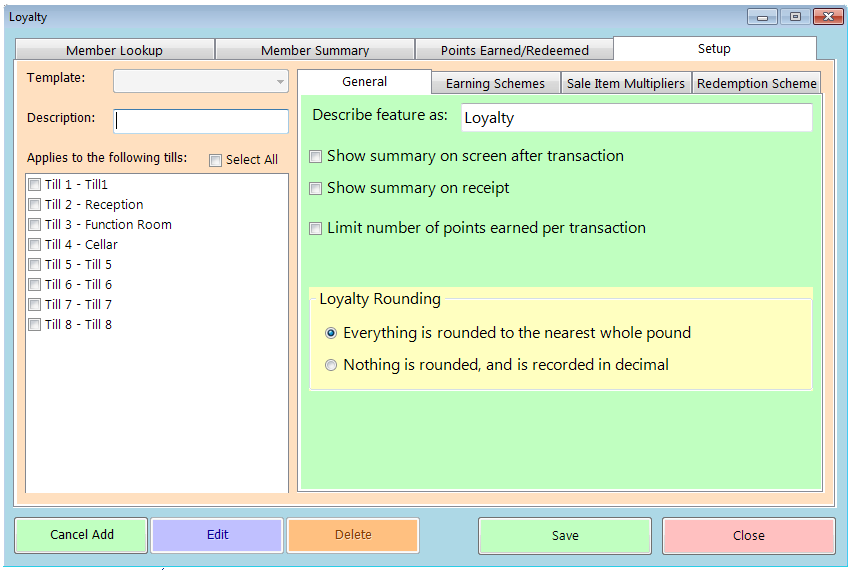
Give the template a name and select which tills it will apply to. Unless you have a particular reason to differentiate between customers in different areas (e.g. you may want to reward restaurant customers more than bar customers) a single template should be enough. In that case, select all tills.
Under the General tab you have the option of renaming the scheme. You could add your site name so that points would be ‘My Site Loyalty Points’ on printouts etc. or you could rename the scheme ‘Rewards’ or even something abstract such as ‘Ambrosia’. You can also choose whether to display a message on the till screen after each transaction. This would allow your staff to inform the customer how many points they’d earned on the transaction and what their total is now;
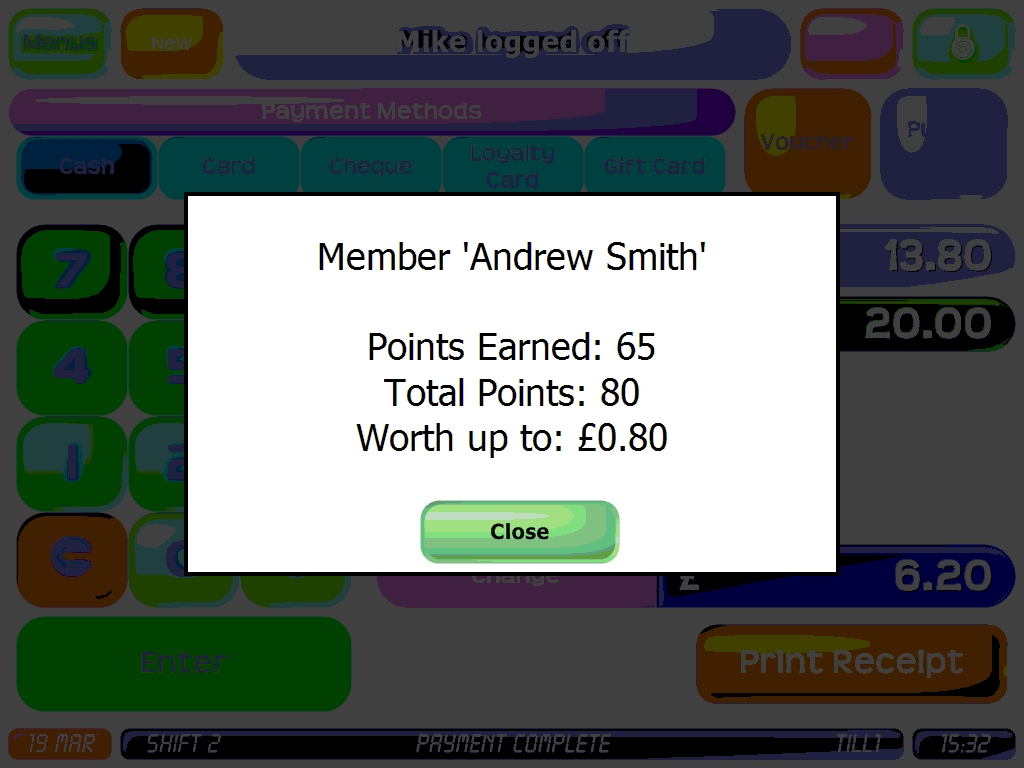
Another option under the General tab is to have the same sort of summary added to any receipt that’s printed after a loyalty transaction.
In situations where a single loyalty card holder might be associated with a particularly large transaction such as a table tab for a large group, you can set a maximum number of points that can be earned in a single transaction.
Next, the Earning Schemes tab is where you’ll set the basic parameters of your Loyalty scheme. There are two sections, the first is the main scheme and the second is for any temporary variations you may want to apply. Click the top ‘Add’ button to create your basic scheme. You’ll need to set a start date, an end date, the number of points to award per £ spent and whether this scheme can override others. How many points you award per £ spent is entirely up to you but do bear in mind that it is the relationship between number of points per £ spent and the redemption value of each point that determines the value of the scheme to the customer (and hence the cost of it to you). See further down for details on how to configure redemptions.
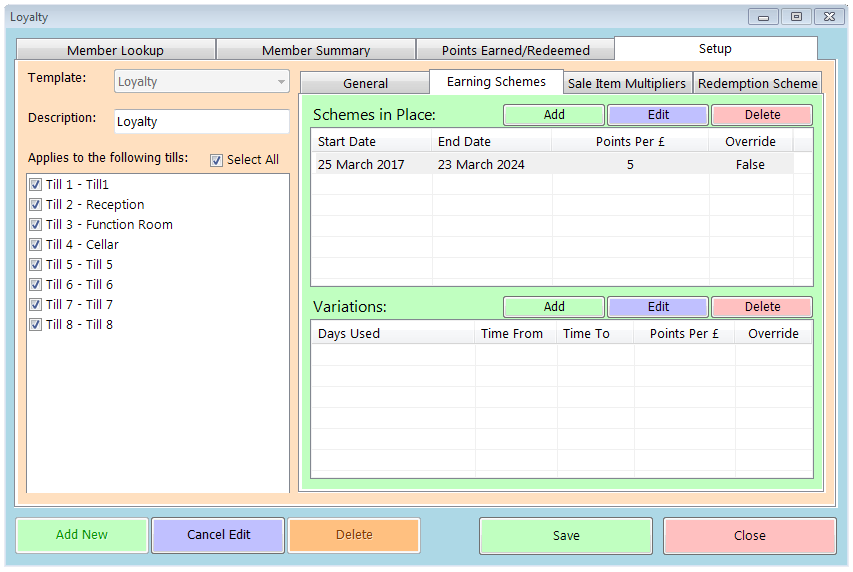
The lower section of the Earning Schemes tab allows you to configure periods of the week where the points per £ can be varied. This allows you to increase rewards for customers who visit during quiet periods or conversely to reduce the points awarded to visitors in busy times. To add a variation period simply click the lower Add button and choose the relevant days, times and points values.
The third tab is Sale Item Multipliers. Each individual item you sell can have a different multiplier value if required. Normally you’d have most or all items with a multiplier of 1 but if you wanted to reward customers who purchased a particular item more you could increase the multiplier for that item.In the tree view you can see categories to begin with but these can be expanded out to show first products and then again for sale items, each of which has its current multiplier value shown in brackets.
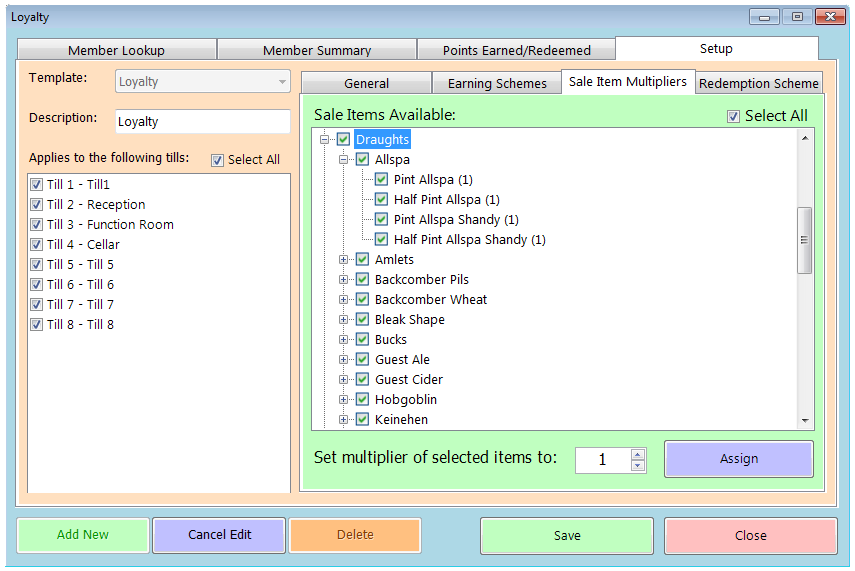
To begin with all items have a multiplier of 0, meaning they’re not automatically in the scheme. As such you should select all the categories for which you want to reward expenditure and set the multiplier to 1 by clicking the ‘Assign’ button before considering any individual items.
Finally then the redemption scheme. This too shows a tree view of all sale items and again you should select only those items that you want your customers to be able to ‘spend’ their points on. Often this means excluding any higher value, lower margin items that you don’t wish to discount.
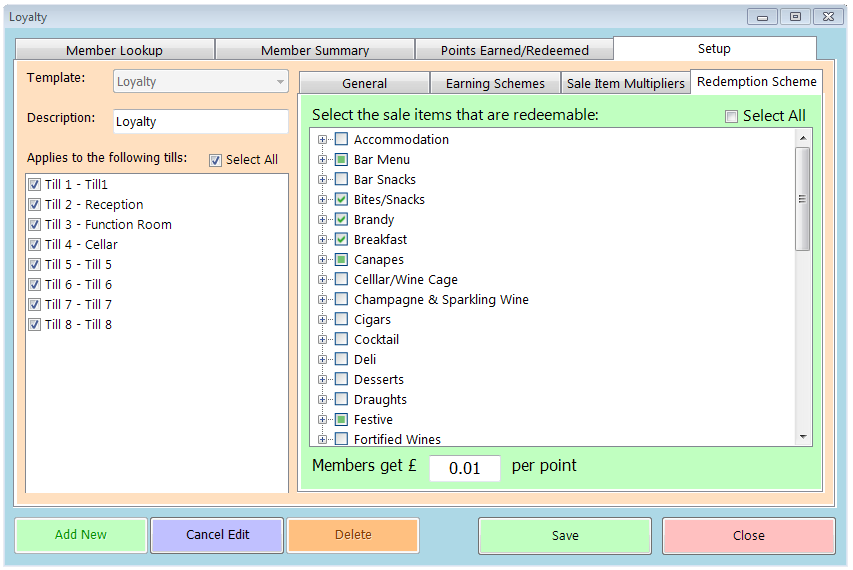
The last and perhaps most important step is to set the value of each point. As mentioned above, it’s important to keep in mind the relationship between the point value you assign and the number of points awarded per £ spent. If you award a single point per £ spent then a value of £0.10 per point would mean that the scheme would be offering a 10% discount – for every pound spend they’re getting back 10p. Therefore if you set a higher number of points per £ you may want to reduce the value of each point – offering 5 points per £ and 2p per point redemption is exactly the same 10% discount but if you still offered £0.10 per point you’d be giving items away half price!
Till Operation
Once your scheme is in place your customers need to be able to use it. This usually means issuing them with swipe cards. We can produce these for you or you can go to a specialist card producer. Ours is a bespoke service whereby we can print individualised cards for your customers with their name and even their photo. Specialist manufacturers aren’t able to do that but can produce larger batches of cards at lower cost. If you have pre-existing membership or loyalty cards that don’t have magnetic encoding please speak to us and we can usually allow you to assign and enter the card numbers manually, though this is much less secure.
To assign a member to a sale, either swipe their card or press the ‘Check Member’ button. This will again prompt you to swipe their card but will also give you an option to search or manually assign a card to the current sale. Once a member is assigned you’ll see their name and/or card number at the top of the sale list.
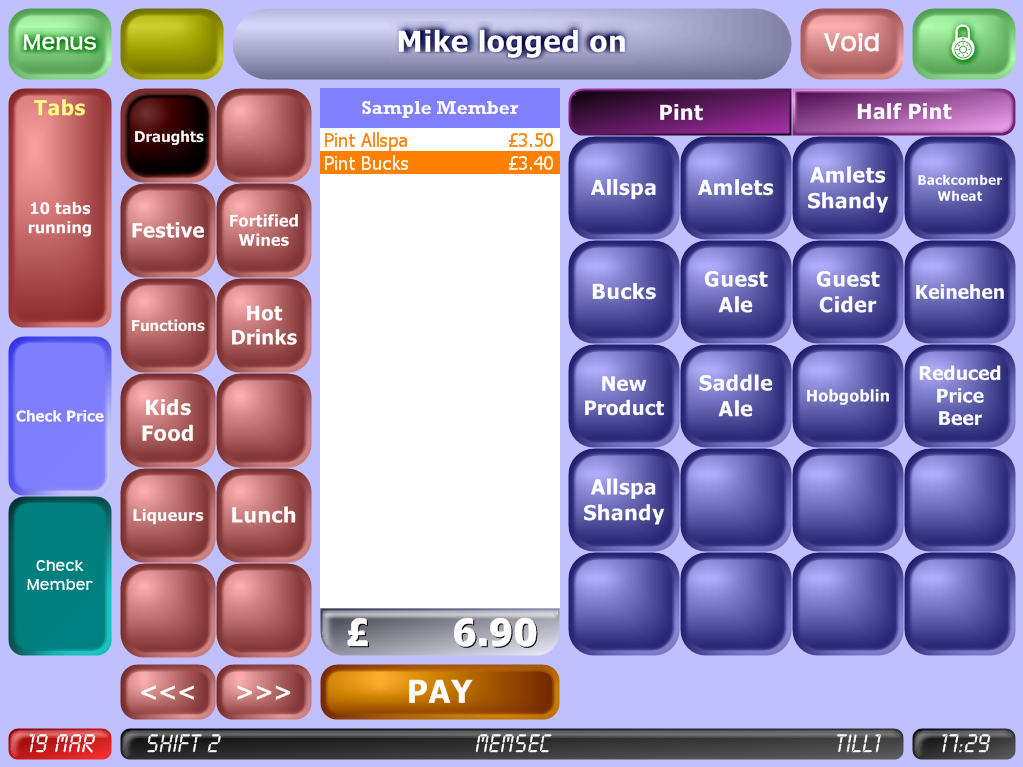
With the member assigned to the purchase their points will automatically be added on normal completion of the transaction. If you’ve chosen to display an on-screen summary it will appear once the payment is complete;

The redemption process follows exactly the same process of assigning a member to a sale. At the point of payment, if they’ve requested a redemption of some points, press the payment button ‘Loyalty Points’ (or if you’ve changed the description in the basic setup, the word Loyalty will be replaced by your description). You’ll see a message telling you how many points the current member has and how much that’s worth in the current transaction. This figure is based on how many points they have, the basic redemption calculation described above and the items they’re currently purchasing. As such it may not always be the case that the amount available on a transaction equates to all the points held.
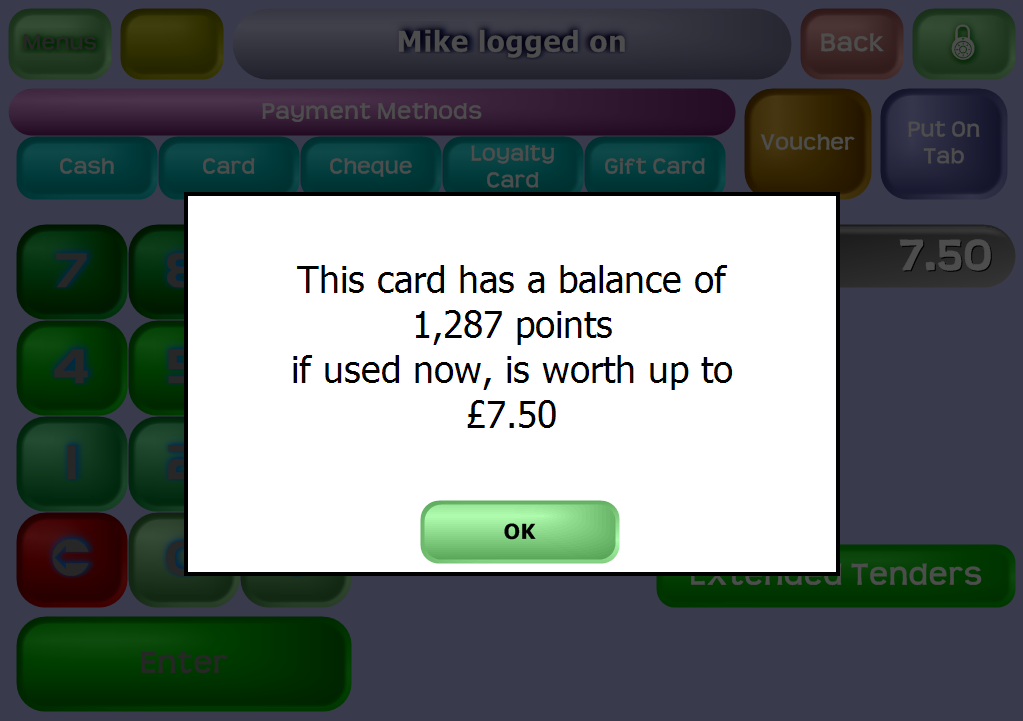
After pressing OK, the payment method will be set and it’s then up to the customer to decide how much of the amount shown they want to redeem. If they choose to use all of the available points the till user can just press ‘Exact Amount’, otherwise they’ll need to enter the chosen sum. Any balance remaining should then be paid for as per any other transaction (cash, card etc.). If there are any items in the sale that haven’t been redeemed against but can earn points they will still do so.
Reports
Once your scheme is up and running you’ll be able to view details of each card holder, their points and what they’ve earned or redeemed them on. This is where you’ll use the other tabs in the Till>Till Features>Loyalty screen where you set the scheme up originally.
On the first tab, as shown at the top of this page, you can look up an individual member and view their entire loyalty history. Simply type their card number into the box and click ‘Search’
You’ll see a list of every transaction they’ve made using their card, whether earning points or spending them. In the points column each entry has an expand icon [![]() ] which you can click to view details of exactly what was purchased in that transaction, as shown below.
] which you can click to view details of exactly what was purchased in that transaction, as shown below.
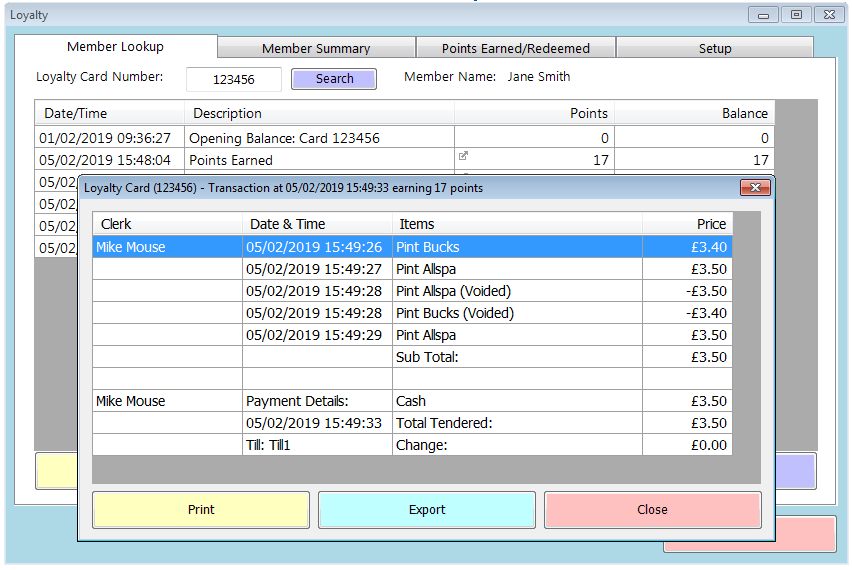
This tab also has a button that will allow you to add points to the selected cardholder’s account. Simply click on Manual Top Up and enter the number of points you wish to add. This must be a points total and not a financial amount, so if you wish to give the customer, e.g. £5, calculate how many points that translates to at the value per point you have set in the redemption setup screen.
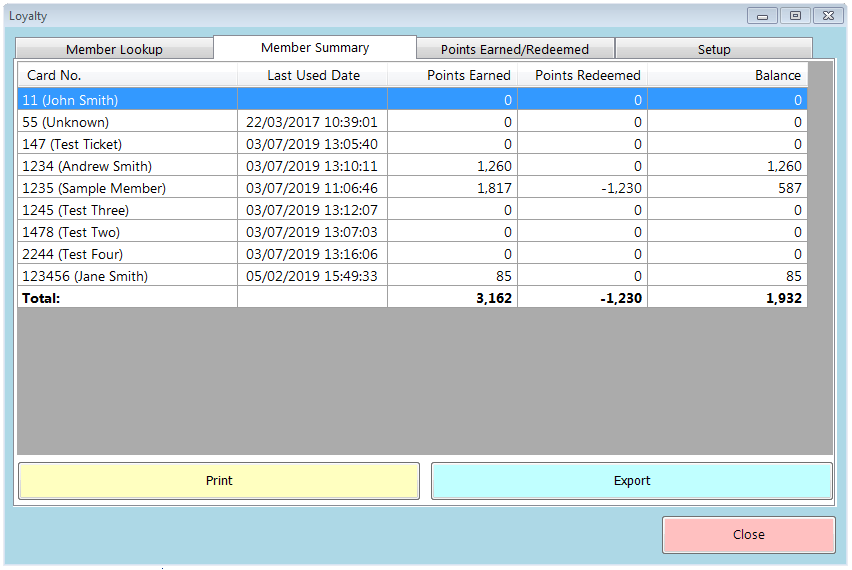
The second tab, Member Summary, lists all live loyalty members and their balances. Double-click on a line to view the history for that member in the lookup tab.
Finally the Points Earned/Redeemed tab offers the chance to view exactly how many points have been earned and/or spent in a selected period, and by whom. Simply set the date range from and to and click ‘Search’. You’ll see a report that looks like this;
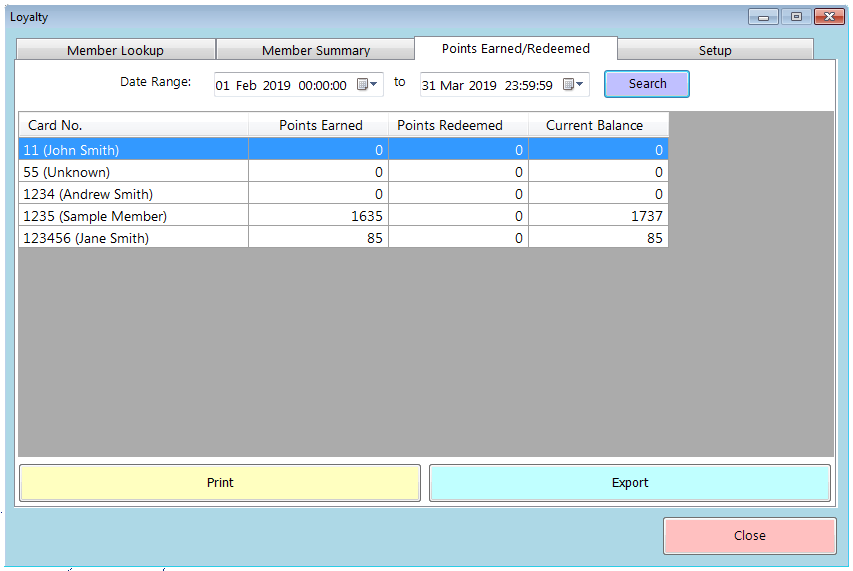
All these reports, like all others in the system, can be printed or exported using the relevant buttons.
