Mode Selection
There are two possible menu modes in the WebApp – Order at Table and Takeaway. The Takeaway menu serves both Collection and Delivery orders. This means that you can always offer your customers the appropriate mix of products for their order type.
Category Availability
The first step in making an item available under whichever of the two menus you’re configuring is to make categories available. To do this, select the category you want in the ‘Categories NOT available’ drop-down and then click ‘Make Available’.
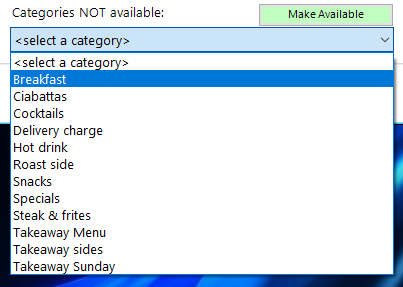
The category will then move out of this list and will be added to the bottom of the list of available categories. You can change its position using the Up and Down arrows to the right, or by clicking the Sort A-Z button in the top, right-hand corner.
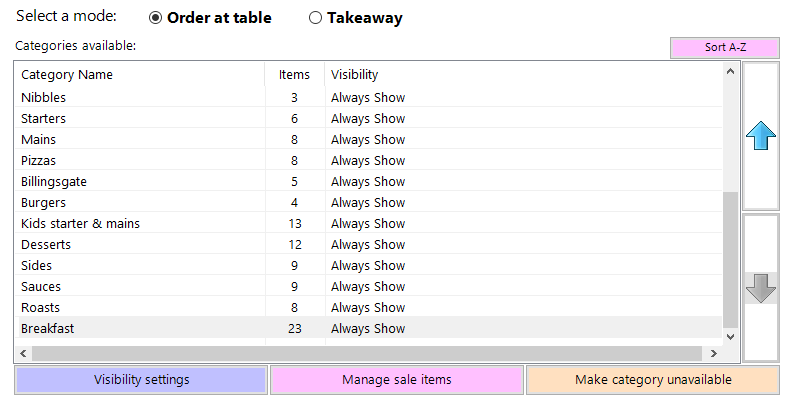
The list also shows the number of items within each category and the visibility status of each category. By default all items within a category are included, and its visibility will be Always Show.
Visibility
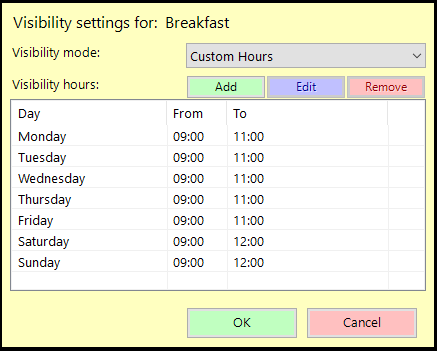
You can change the visibility of a selected category to reflect the hours that you want to make them available via the webapp. Highlight the category in the list and click ‘Visibility settings. You’ll see this screen;
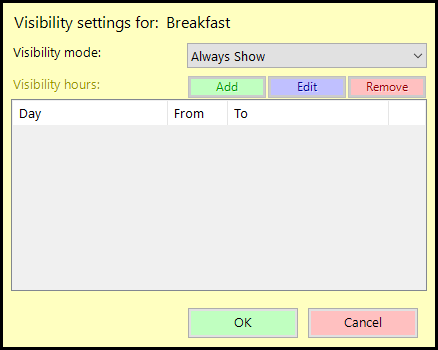
The mode will default to Always Show, so to change this click the drop-down. You can select ‘Never Show’ as a means of temporarily disabling a category or ‘Custom Hours’. Clicking this will enable the Add, Edit and Remove buttons. Click Add to set a day and time range for this category to be available.
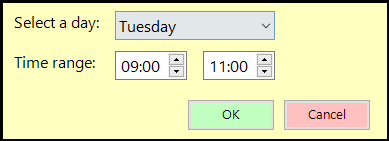
This should of course be within the time range set on the Availability tab. As with those settings, you can have multiple ranges on any given day of the week, so for example if your kitchen opens only at lunchtime and in the evening, you can set food categories’ availability to reflect this while allowing drink categories to be always shown. Once you’ve set all the hours required, the list should look something like this;
Manage Sale Items
Once you have added a category to the menu and set its availability, you will need to make sure that the items within that category are shown in the way you require. To do this, click on the Manage Sale Items button. The screen will change to list all the items within the selected category, like this;
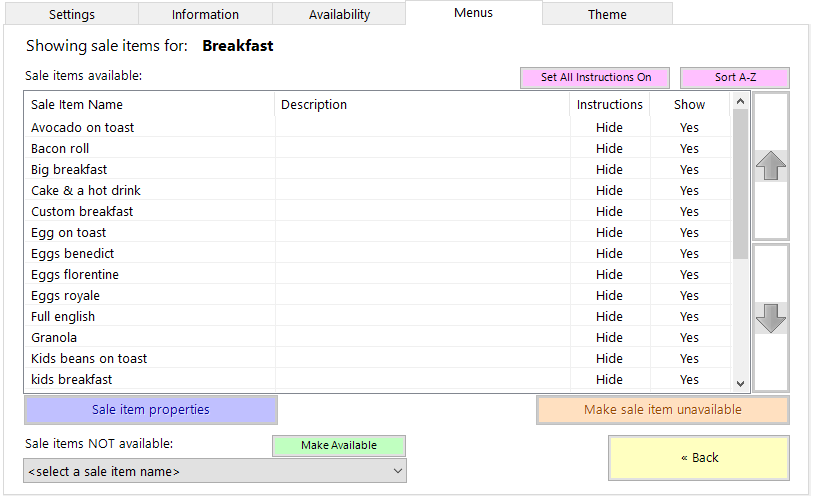
As you can see, as well as the names of the sale items there are columns for Description, Instructions and Show. Please note that there is no distinction between different sizes of a sale item in this screen. If you have multiple sizes for a sale item (e.g. Pint and Half Pint, Single and Double) then they will all be available in the app if you set the item to be shown.
To change any of the settings for a Sale Item, highlight it in the list and click ‘Sale item properties’. You’ll see a screen like this;
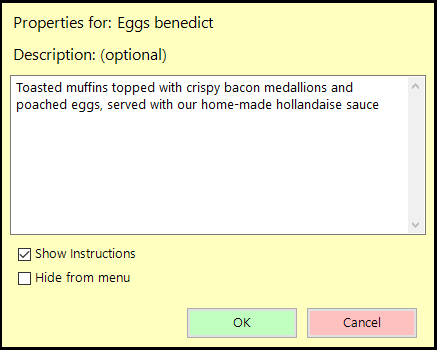
The description field allows you to type a menu-style ‘advert’ for the item in question, which will be displayed under the item name in the app, like this;

The tick-box ‘Show instructions’ determines whether the customer will be able to choose from any modifiers associated with the item on your system. Normally this option should be enabled only for items where it’s absolutely necessary, such as specifying how a steak should be cooked or where there’s a choice between bread types etc.
The last option, ‘Hide from menu’, gives you the option of not selling a particular sale item on the app. This can also be achieved by clicking the button to the bottom, right-hand side of the previous screen, marked ‘Make sale item unavailable’, with the unwanted item highlighted in the list. In this instance the item will be removed from the list entirely and will instead be in the drop-down list at the bottom left of Sale items NOT available. To restore it to the list, select it in the drop-down and click ‘Make Available’.
Similarly, if you wish to ensure that all sale items within a category display modifiers, click the button at the top of the list ‘Set All Instructions On’.
Changing the Order
As with the category order, you can use the Up and Down arrows or the Sort A-Z button to order the sale items within a category. This will determine the order the items are listed in the app.

