You may well be familiar with the process of adding a new product in Memsec7 – if not, please see our guide here. At the end of that process we provide a shortcut which lets you also set up the price at which you’ll sell the new item, in whichever form is the usual for the category it’s in.
When it comes to changing that price, however, it’s necessary to look elsewhere in the system. There are two basic options for this, outlined below.
The first and most direct option for changing a price is to amend it in the Sale Items form. While products in Memsec7 deal with items that you purchase, who you purchase them from and then how you count them in a stock take, the associated items that you sell are maintained in the separate Sale Items section. This is accessed via Tills>Sale Items.
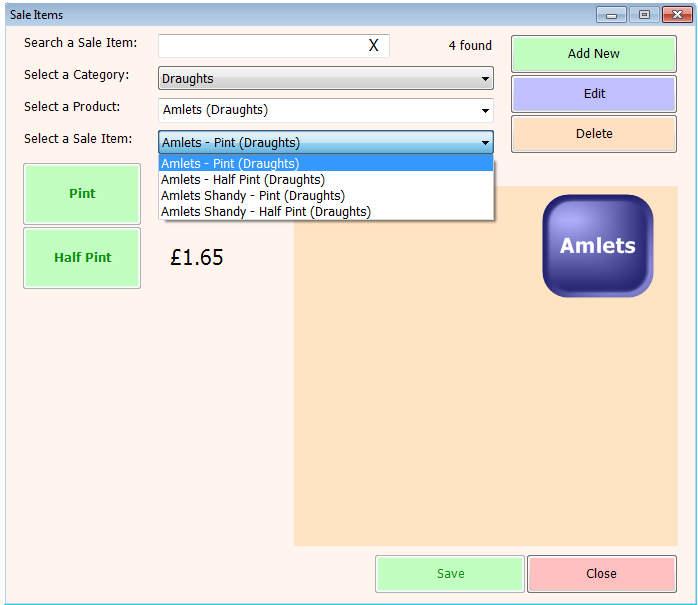
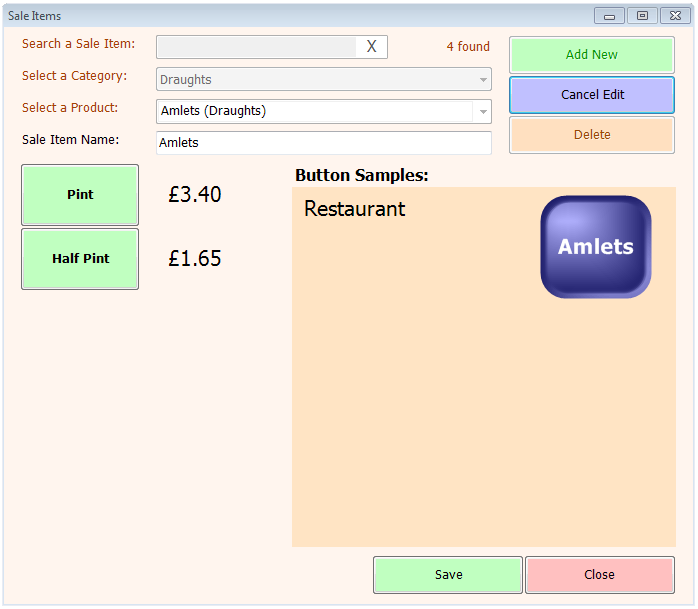
Find the item you want to change the price of by either typing the name into the search box at the top or navigating to the item in the Category, Product and Sale Item drop-down lists. Once you have the required item selected in the Sale Items list, click on the Edit button in the top right hand corner. This will enable the size buttons on the left hand side and the Sale Item drop-down will be replaced with a text box with the name of the item.
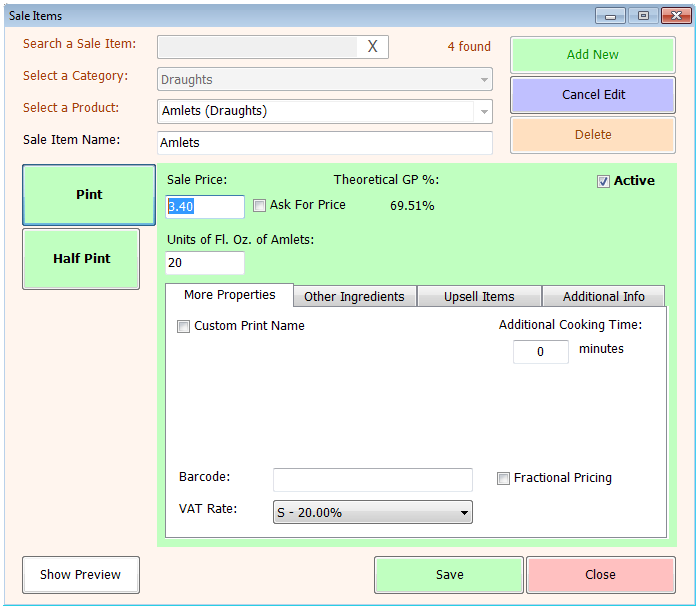
Simply click on the relevant size button and the details of the Sale Item will be shown, starting with the sale price. You can now type in the new price and click Save at the bottom. If there’s a cost price stored for the main product (and any other ingredients listed under that tab) there will be a Theoretical GP % shown to the right of the price. This will change to reflect the new price as soon as you click away from the price box. If you wish to change the price of more than one size of the item you can do so without saving each simply by clicking on the different size buttons on the left.
Multiple Changes
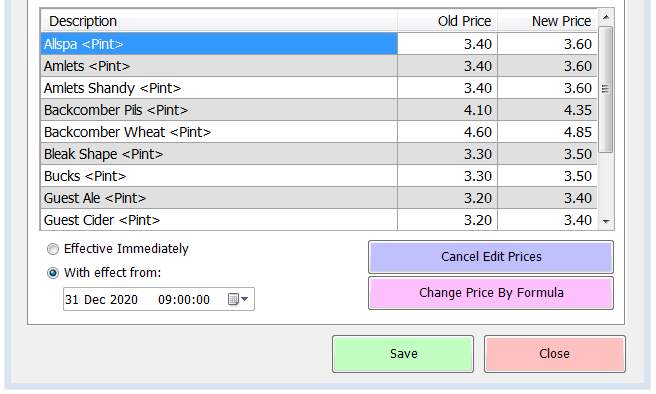
Whilst the above is ideal for individual price changes, it’s often the case that you want to change multiple prices at once. In this circumstance it’s best to use the Price Change form found under Till>Tools>Price Changes. This allows you to change prices of an entire category at a time, either immediately or at a future date & time, and either manually or by applying a formula.
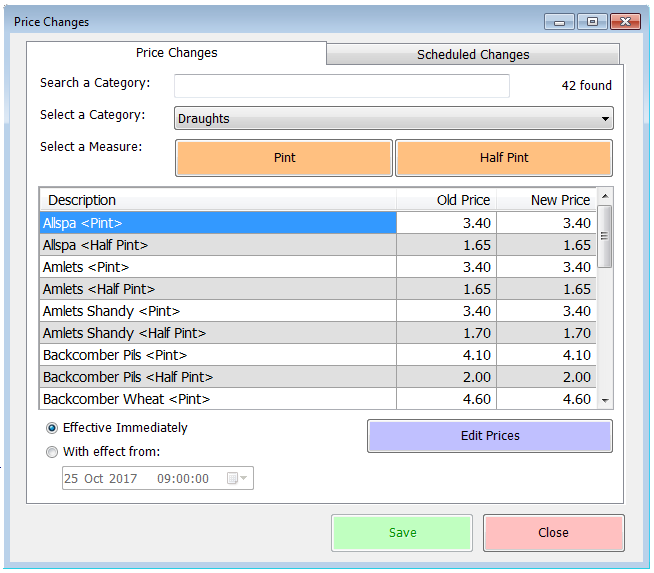
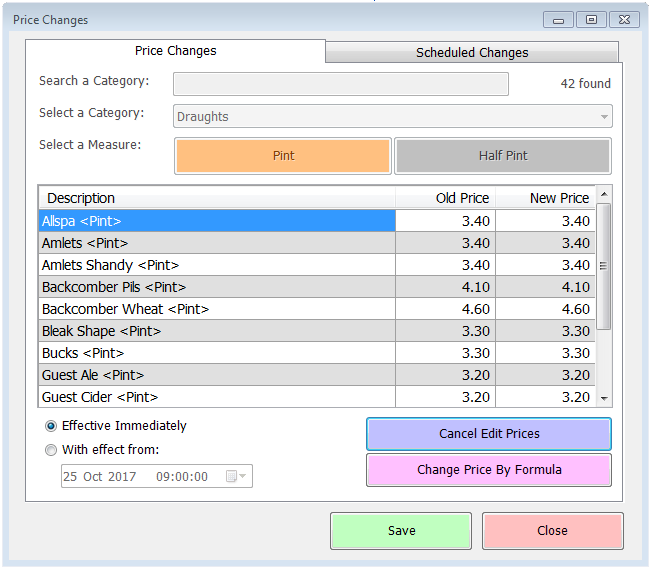
When you select a category all its sale items will be listed, together with filter buttons for the different sizes. Clicking one of these buttons will turn it grey and will remove all the corresponding items from the list. In the above example, you might want to change just the pint prices, hence clicking the Half Pint button would leave just the Pint prices listed. At this point, click Edit Prices to start making changes. This will activate the list under the New Price column, allowing you to click on a row and type in the new price. Alternatively you can click on the newly displayed ‘Change Price By Formula’ button to change all prices at once.
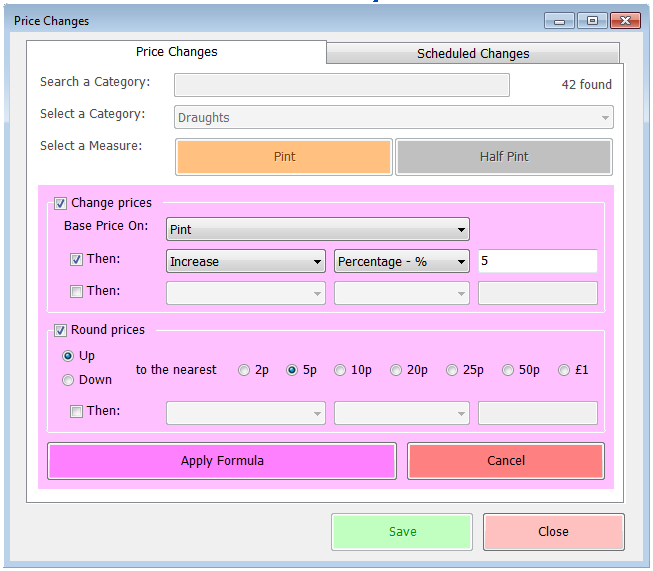
This option allows you to set simple rules for the system to follow to change the selected prices. Start by deciding what to base the price on. By default this will be the size you’re changing, but there’s nothing to stop you using a different size. You then have two separate lines where you can instruct the system to amend the existing price. Each line has an option to increase or decrease, an option to choose between percentage and amount, and finally a text box for the relevant number. Typically you’ll use just one line, perhaps to request an increase of 10p for each item, but equally you could choose to increase the price by 10% and then a further 5p for example.
Next you can choose to round the new prices, up or down. There are preset figures for rounding to the nearest 2p, 5p, 10p, 20p, 25p, 50p or £1, but by using the final adjustment line underneath the rounding options you can effectively round to any amount by deducting from the rounded number (e.g. round up to the nearest pound then take away 1p to leave all prices ending in 99p). Click on Apply Formula to set the prices according to the instructions you’ve set.
With the new prices displayed in the grid, all that remains is to commit the changes by clicking Save. By default this would apply immediately but if you’d like to defer the changes, select the option at the bottom left and set the date and time you’d like them to come into effect before clicking Save.
