One of the most commonly used features of Memsec7 is the Button Positions screen. This allows you to determine the layout of your till. There are various aspects you can alter, each applicable to one or more tills at your discretion. You can decide how many category and item buttons will be shown, in which order they appear and the colour of the button and its text. You save each combination as a layout template so you can have multiple configurations and switch between them.
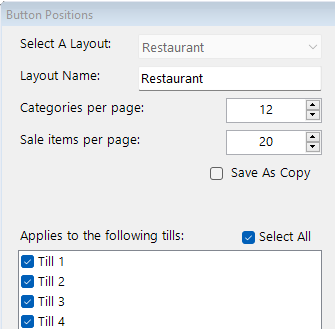
To access the button position screen go to Tills>Till Setup>Button Positions in the back office program. There you can choose to edit an existing layout or add a new one. The number of buttons displayed under a layout is set using the number boxes at the top left just under the layout name, which you can of course also change. You can also select which tills a template should apply to.
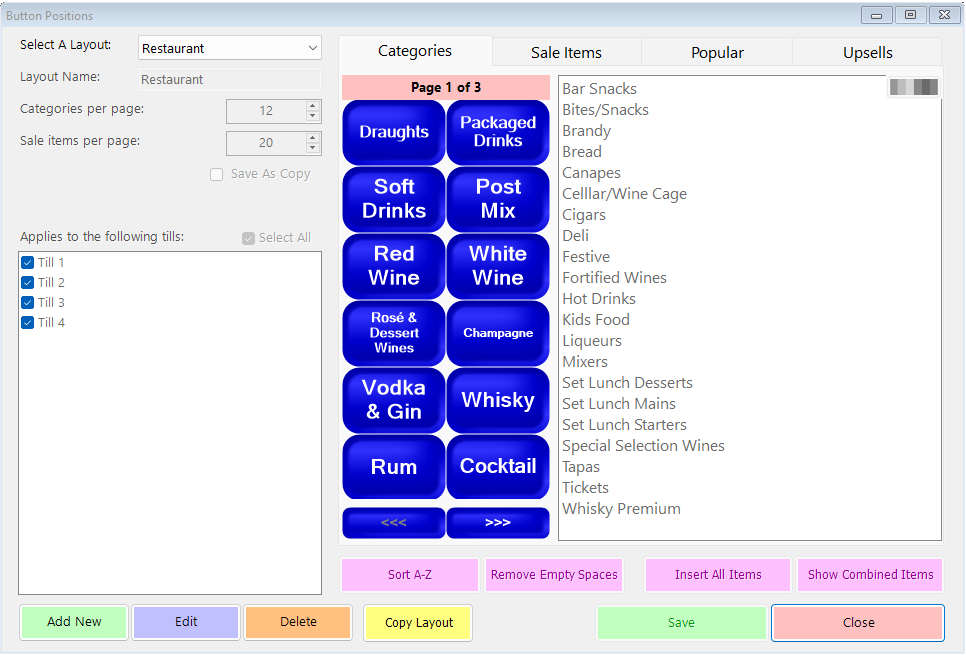
At the top right of this screen you have 4 choices of button types to configure. Categories is the first and is selected by default. The second is Sale Items, the third is for Popular Items and the last is Upsells. You should select the required tab before clicking Edit.

Click on categories to move and colour your category buttons. You can also use the Categories per page control to alter the number of category buttons shown in the current template, with a minimum of 12 and maximum of 24 buttons (in steps of 2, since there are two columns).
The Sale Items button will show a drop-down box underneath to allow you to select one category at a time and then move and colour the buttons in that category.
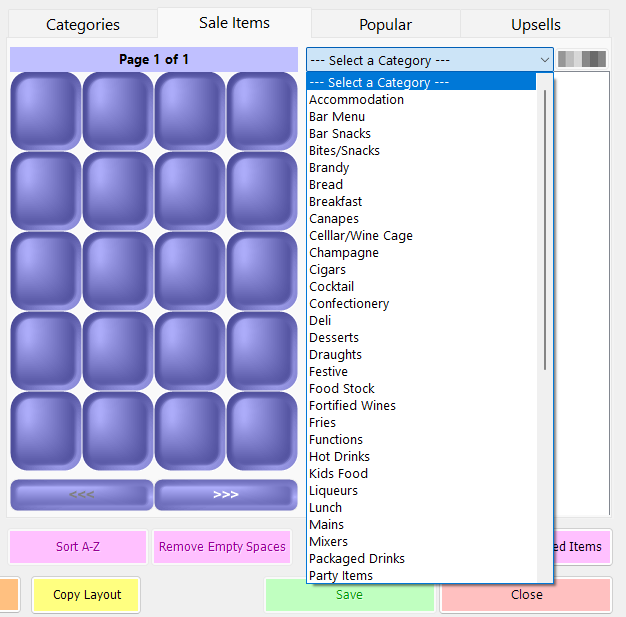
As with categories, you can alter the number of sale item buttons shown in each template, the default is the minimum of 20 but this can be increased in steps of 4 up to 40.
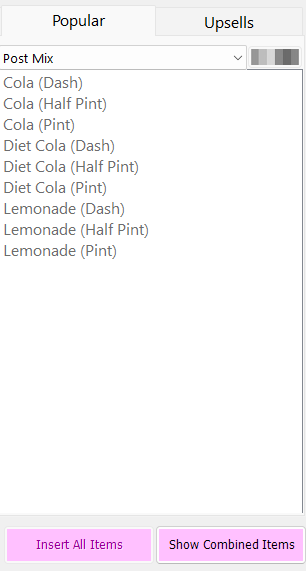
The Popular tab allows you to select different categories in the same way, and then add items from those categories to your list of most commonly sold lines. Each sale item and measure is listed for each category, so that you can select the required size as well as item.
This will make a change to the Category button layout too, since Popular Items becomes the default button at the top left of the Categories so that it’s immediately selected and available when a user logs onto the till. You’ll need to save the template each time you select items from a You can choose to move the category buttons so that the top button is immediately to the right of the Popular Items ‘category’ (shift by 1), or you can leave a blank space at the top-right and start your category buttons on the second row (shift by 2).

Finally, there’s an option to order the buttons in each of your Upsell templates. This will always be a grid of 5 rows of 4 buttons, since it’s a pop-up screen rather than the main till screen.
Some general tips on moving buttons:
- Double-click on an item in the unused items list to add it to the next unoccupied button.
- Double-click on a button to remove that item from the current button layout and place it into the unused items list.
- Click on an item in the list or an existing button then drag it to a new position or off into the list of unused buttons.
- Drag a button to another occupied position to swap the two items around.
- To move a button to a different page, place it into the unused items list, change the page using the arrow buttons at the bottom then drag it onto the new page
- There are buttons at the foot of the page to sort alphabetically, remove any empty spaces, insert all items and show combined items.
- To remove all items, right-click on one of the buttons and select ‘Remove All Items’ from the menu that appears. The same menu offers options to delete the current button or to insert a blank button at the current location, shifting others left or right by 1 place respectively.
- You can copy an existing button template using the yellow ‘Copy Layout’ button at the foot of the page or by editing an existing layout and ticking the ‘Save As Copy’ box shown in the top image above.
It’s possible to have different colour category buttons and different colour item buttons within each category. There are a number of reasons why you might benefit from doing this;
- Colour food and drink category buttons to differentiate them.
- Highlight lines you want your staff to up-sell.
- Wine colours – help staff find wine buttons more easily by colour-coding them.
- Do similar for beer buttons, e.g. Stout in black, Lagers in gold etc.
- Vegetarian dishes can have green buttons, beef or lamb dishes red, poultry dishes white.
- Use different colours for starters, mains and desserts, especially where they’re together in a single category.
- Group items into price bands and colour them accordingly
At the top right corner of the unused items list there’s a small colour palette. Click on this to switch from the list to the new colour selection tools.
The selector offers you a range of 48 different colours for the button background and text colour. These are shades of red, orange, yellow, green, light blue, dark blue and pink, plus a greyscale from white to black. There’s a test button so you can see what your choices might look like before you apply them. Once you’ve set the colours simply click on the relevant button(s) on the layout to change them. There’s also a set all option and a reset button in case you change your mind. There’s also a button to restore the current colour choice to the default. Each button, once coloured, retains its colour no matter where it’s positioned.

The colours make up part of the till template just like the positions. This means you can have multiple layouts for different tills.