Booking Settings
Before you can use the Bookings module it will need configuring to match your site’s operation. This page will help you to do that.
In the back office program, click Bookings>Booking Settings. The tabs on that screen are replicated below, albeit that here we’ve arranged them in a more chronological order and added Download PDFs and Activating on Till. In each of the tabs below there’s a guide to the contents of that tab in the system, which you can also download.
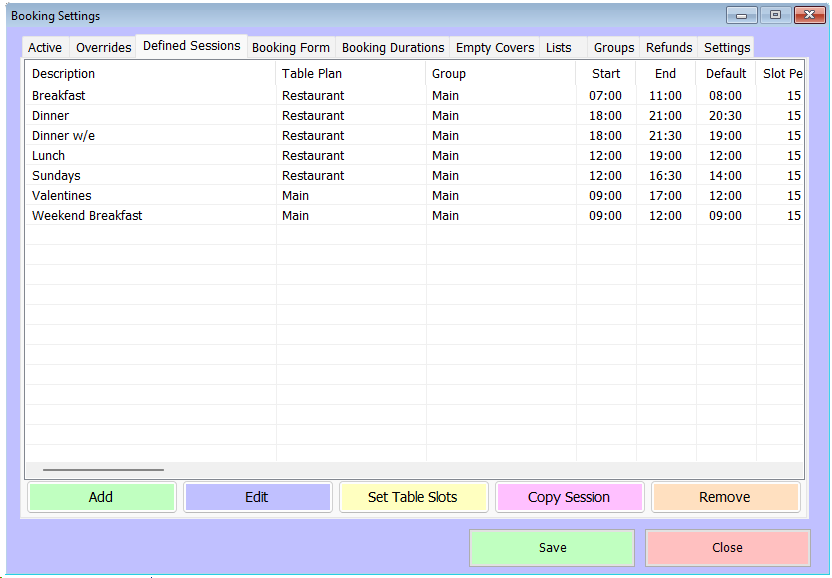
Bookings are arranged in sessions. A session could be a sitting such as lunch or dinner, or it
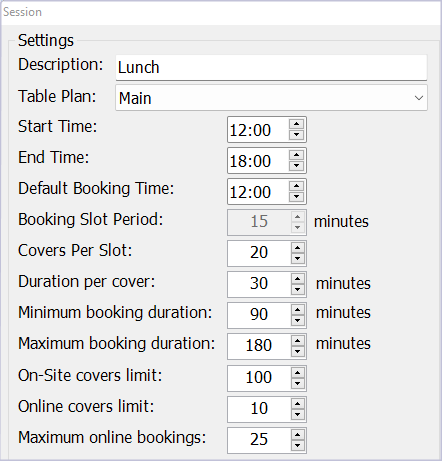
could cover an entire day. To create a new session, click ‘Add’. You’ll see a form like this;
![]()
Settings
First, give the session a name in the Description field. Next, select which table plan this
session will use from the drop-down. For help with table plans, click here. Next, if you’re running bookings for more than one group of tills (see Groups tab) then select the Group you’d like this session to apply to.
The next 3 settings will dictate the period of the day this session will cover – the start and
end times, and the default booking time. The default time must of course be somewhere
between the start and end and should reflect the time customers are most likely to want to
book at.
Next you define the booking slot period. This is the interval between bookings, so would
typically be between 10 and 30 minutes. A 10-minute slot period would allow bookings at 0,
10, 20, 30, 40 and 50 minutes past the hour, a 15-minute slot would be on the hour, quarter
past, half past and quarter to, etc. The interval will also have an influence on the next value
to set, the covers per slot. If you know you can seat around 30 people each hour then covers
per slot would be 5 for a 10 minute interval, 7or 8 for a 15 minute interval. Covers per slot is
only a guide, the system will allow you to make bookings for more covers if required, though
it will not offer any online bookings for full slots.
The system also needs to be able to calculate how long a booking will be seated for. There
are a number of ways this can be set, but the simplest is by using the next 3 fields. Duration
per cover allows you to allocate an amount of time for each person on a table, since larger
tables are typically seated for longer. This figure is applied within the boundaries of the next
2 fields, minimum and maximum duration. A typical configuration would be a minimum
duration of 60 minutes, a maximum of 180 minutes and a duration per cover of 30 minutes.
That would allow an hour for a table for 2, 1½ hours for 3, 2 hours for 4, 2½ hours for 5 and
3 hours for all larger parties.
Next are the covers limits. There’s a separate figure for on-site and online bookings, since
it’s often the case that very large tables need special planning that can’t easily be
automated. Again, a typical configuration might be 8 covers online and 50 on-site.
The maximum online bookings figure limits the number of separate bookings (regardless of
covers) in each instance of a session that can be made online, which can be useful if you
have a relatively small capacity or large quantity of walk-ins or telephone bookings.
Here’s how a typical Lunch session might be configured in terms of these numbers;
Next there are a few options to choose from;
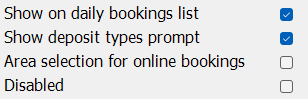
‘Show on daily bookings list’ is normally true, since otherwise it’s less easy to keep track of
bookings. However, certain sessions might need to be excluded so this option is offered.
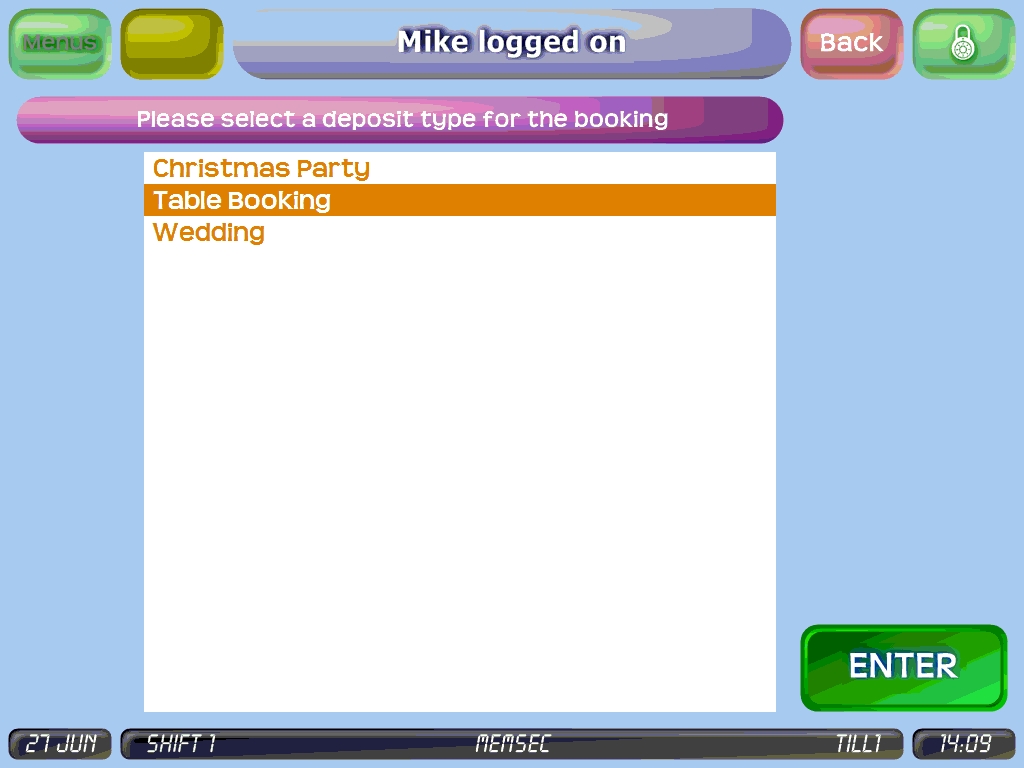
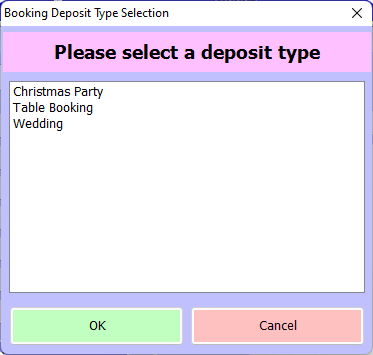
‘Show deposit types prompt’ relates to different deposit types available within the system. If
a booking is made on-site and a deposit added, ticking this box will generate a prompt for
the user to select the deposit type, like this;
Or if in the back office, like this;
Or if in the back office, like this;
‘Area selection for online bookings’ relates to the different areas in a table plan. With this
option selected, customers booking online for this session will be asked which area they’d
like to sit in. For further detail on this, see here.
‘Disabled’ – this option will prevent the session being offered for any future bookings. Any
bookings already made for future instances of this session will still be available and valid.
Template Selection
This section relates to email templates and allows you to select an email template for each
of the types of email that can be sent when a booking is made or altered. For more on email
templates, see here. There are 6 different emails that can be sent relating to a booking, and
you can have a different template for each if necessary (and indeed different sets of
templates for different defined sessions if required). The different emails are as follows;
• New Booking Template – this email will be sent whenever a new booking is made on-
site. It should be considered as a confirmation that the booking will be honoured.
• Edit Booking Template – this email will be sent, if you have the option selected,
whenever a booking is altered. Again, as this happens on-site it should convey that
the booking will go ahead in the altered form.
• Cancel Booking Template – this email will be sent whenever a booking is cancelled,
either on-site or online. If a deposit may have been paid with the booking it should
clarify your refund policy.
• Online Received Template – this email will be sent to customers who book online
and should let them know that the booking has been made but is subject to
confirmation unless you have chosen to automatically accept all online bookings.
• Online Confirmed Template – once you confirm an online booking, this email will act
as a follow up to the Received email.
• Email Reminder Template – this email is sent to remind the customer of their
upcoming reservation, regardless of whether the booking is made online or on-site,
if you choose to have this option activated.
Where emails are optional, please see the Settings tab on this guide to find out how to
activate them.
Online Deposit Options
With no-shows becoming ever more damaging, taking a deposit with an online booking is a
useful safeguard. We provide this setting on a per session basis so that you can allow
bookings at certain times without a deposit if required. There are 3 options to consider
here. Firstly, you can set a number of covers as a trigger. If all bookings must pay a deposit
this will be 1, but if you only want a deposit from larger tables you can set this figure to
whatever level you need. The second and third options dictate the amount of deposit.
There’s an amount per cover, then a fixed amount. You can set the amount per cover to
zero, and have a fixed deposit amount only, or you can have a zero fixed amount and a
deposit per cover, or you can combine the two so that the deposit will be £x per cover + £y.
Sale Items
For online bookings you can choose to offer a selection of sale items for customers to pre-
add to their booking. This might be a cake or bottle of champagne for a party, or items from
a menu specific to this session (e.g Christmas Dinner). To apply this feature to a session, tick
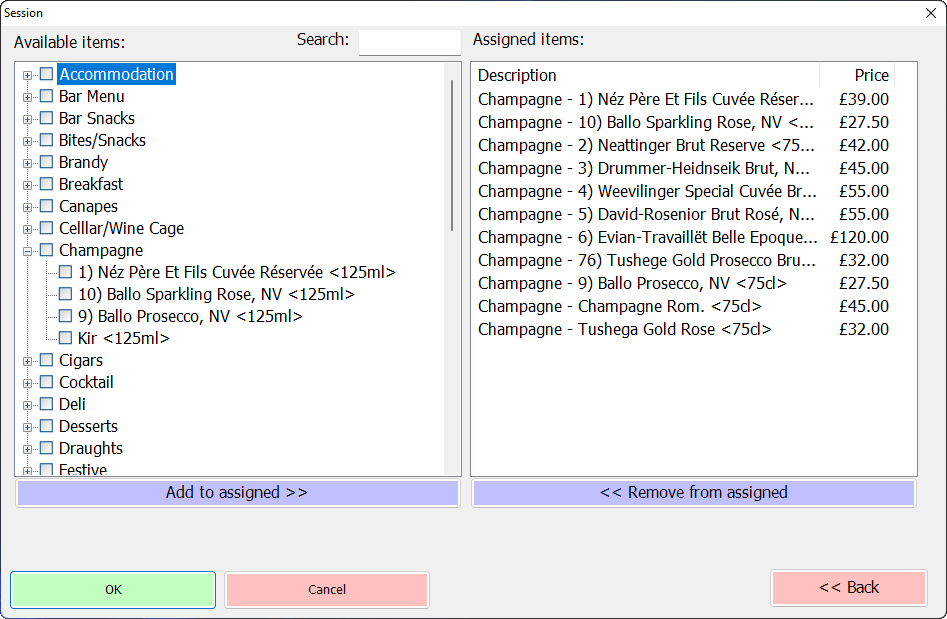
the option ‘Allow purchasing of sale items’ and then click ‘Set up items’. You’ll see this screen;
![]()
You can search for the items you want to make available in the search box at the top, or you
can expand the categories in the list on the left by clicking on the ‘+’ sign to the left of the
category name. Put a tick in each item you’d like to make available and click ‘Add to
assigned’. Below we’ve added all the bottles of sparkling wine from the Champagne
category.
If you wish to remove an item simply highlight it in the list on the right and click ‘Remove
from assigned’. Once you’re happy with the list of assigned items, click OK. This will return
you to the main list of defined sessions, so you may wish to leave this element to last when
defining or editing a session.
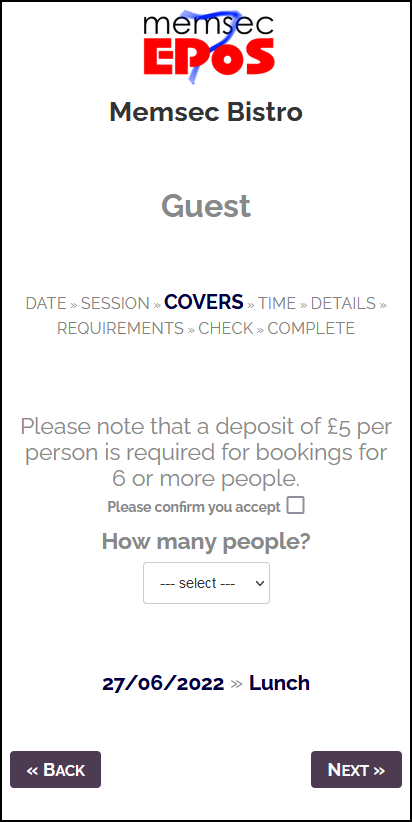
The last section in the session definition screen is the Terms & Conditions. When a customer
books online they will see these as soon as they’ve selected the date they want to book (and
chosen this session if there is a choice of sessions on the day selected). You can leave this
section blank or use it for general booking terms. If you’ve set a deposit requirement it’s
best to explain that here so that the customer is aware they’ll need to pay before they
proceed any further. In order to ensure that they’ve read the terms and conditions you can
select the option ‘Require Customer Confirmation (Online Bookings)’. They will then need to
tick to acknowledge the terms and conditions before they can select the number of covers.
Below is an example of how this might look online;
Once you’re happy with the configuration of a session, click ‘OK’ and you’ll be returned to
the list of defined sessions. PLEASE NOTE THAT THE SESSION IS NOT SAVED UNTIL YOU
CLICK ‘SAVE’ ON THE BOOKING SETTINGS SCREEN. You will need to save a session before
you can utilise any of the other options listed below.
On the defined sessions tab, in addition to the Add and Edit buttons which allow you to
configure your sessions, there are buttons for Set Table Slots, Copy Session and Remove.
Set Table Slots
This option provides the ability to pre-determine which tables can be booked at which times
within a session, rather than allowing a free choice of tables as is the default. You can set
different durations for different tables, stagger bookings to help manage service and leave
times blank in order to create quieter periods. To set table slots, select the session you want
to configure in the defined session list and click Set Table Slots. You’ll see a screen like this;
![]()
On the defined sessions tab, in addition to the Add and Edit buttons which allow you to
configure your sessions, there are buttons for Set Table Slots, Copy Session and Remove.
Set Table Slots
This option provides the ability to pre-determine which tables can be booked at which times
within a session, rather than allowing a free choice of tables as is the default. You can set
different durations for different tables, stagger bookings to help manage service and leave
times blank in order to create quieter periods. To set table slots, select the session you want
to configure in the defined session list and click Set Table Slots. You’ll see a screen like this;
On the left are your table numbers from the table plan applicable to the selected session
and along the top are the time slots as defined by the start, end and slot period of the
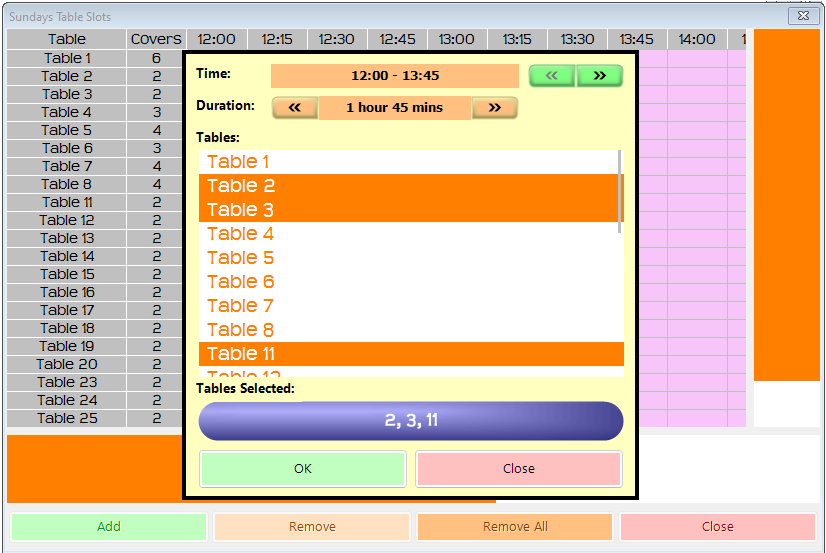
selected session. To begin allocating slots, click ‘Add’. You’ll see this screen;
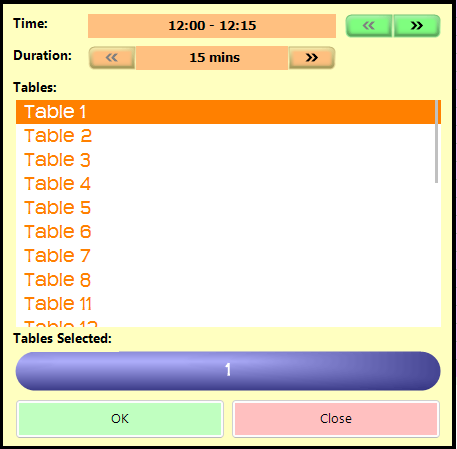
Set the start time at the top, then the duration, then click on each of the tables you wish to
include in this slot in the list. Because duration usually changes with the number of covers, it
will usually make sense to select tables individually or to group together tables with the
same number of covers. In the example below we’ve selected 3 tables for 2 to have a 1¾
hour duration starting at 12pm;
In this scenario you may well repeat this slot every 2 hours, allowing 15 minutes between
bookings to provide time for cleaning the table and perhaps a little overrun. It’s entirely up
to you how you arrange the table slots but as soon as one or more slots are defined for a
session, those are the only booking times that will be available for that session so it’s
important to fill the day to your maximum capacity, while leaving some space for walk-ins as
appropriate. Below you can see an example of a full slot screen;
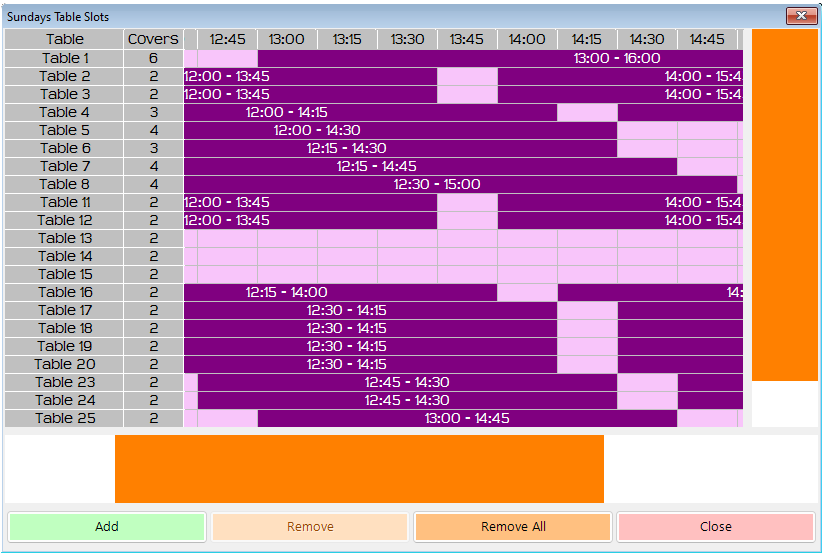
In the above example we’ve kept 3 adjacent tables for 2, numbers 13-15, free so that they
can be used for walk-ins either individually or combined.
In the above example we’ve kept 3 adjacent tables for 2, numbers 13-15, free so that they
can be used for walk-ins either individually or combined.
Copy Session
It may well be the case that although you need separate sessions for say lunch and dinner,
other than the times covered the sessions will have very similar criteria such as slot interval,
covers per slot etc. Rather than creating a second session from scratch you can use the
‘Copy Session’ button. With the original session highlighted simply click this button and
you’ll see a prompt asking you to name the new session;
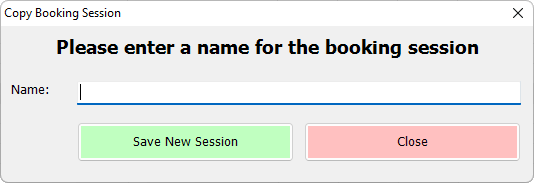
Enter the name and click ‘Save New Session’. All settings, including any allocated slots, will
be copied to the new session. You can then edit the new session to amend start and end
times and any other aspects where the two sessions differ. Naturally if you change the start
and end times then any slots copied over will be removed.
Remove
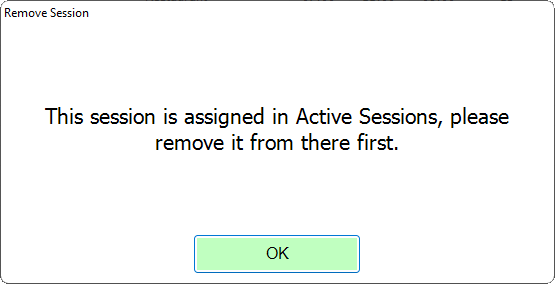
The Remove button allows you to delete a session that’s no longer in use. If you try to
remove a session that’s still in use, you’ll see a warning;
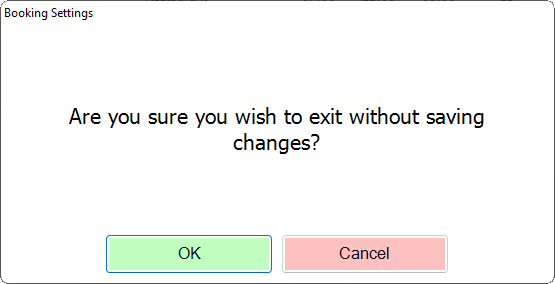
Please remember that any additions or changes you make to a session are only saved when
you click the main ‘Save’ button on the Booking Settings screen. If you click ‘Close’ without
clicking ‘Save’ you’ll see this warning;
Remove
The Remove button allows you to delete a session that’s no longer in use. If you try to
remove a session that’s still in use, you’ll see a warning;
Please remember that any additions or changes you make to a session are only saved when
you click the main ‘Save’ button on the Booking Settings screen. If you click ‘Close’ without
clicking ‘Save’ you’ll see this warning;
Click ‘Cancel’ on here and then click ‘Save’.
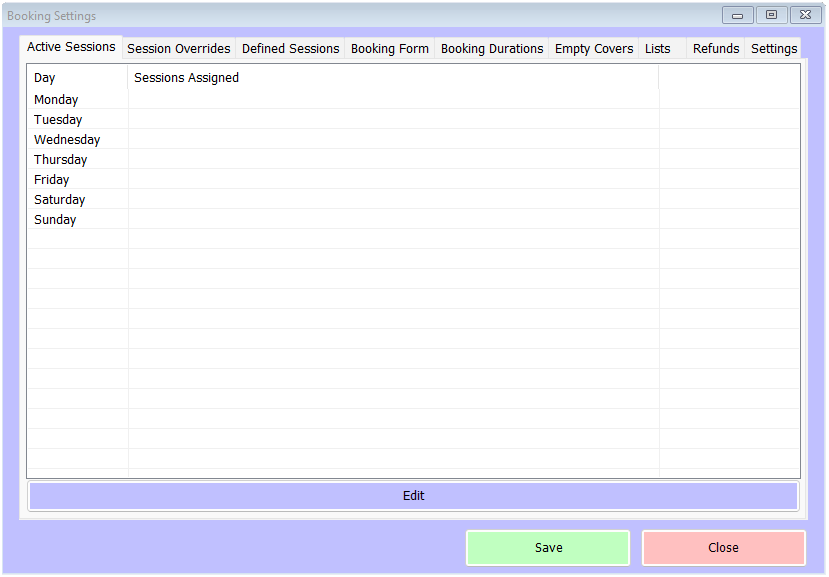
Having created sessions, you next need to allocate them to the relevant days of the week. To do so,
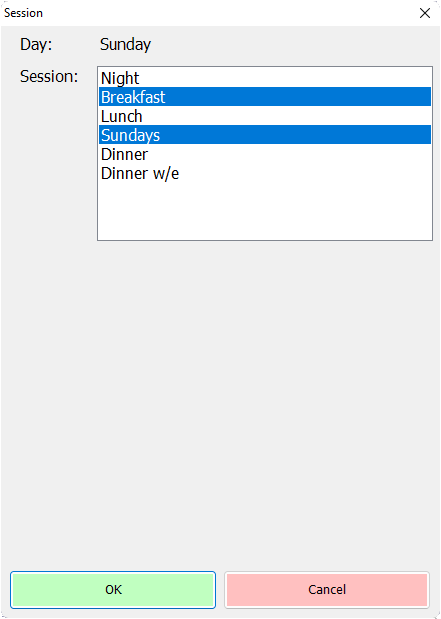
highlight each day and click ‘Edit’. You’ll see a screen like this, with all the sessions you’ve defined
listed;
![]()
Simply click on each session that you wish to apply to the selected day. For example;
Click ‘OK’ to confirm your selection. Once you’ve repeated the process for the entire week, you
should see something like this;
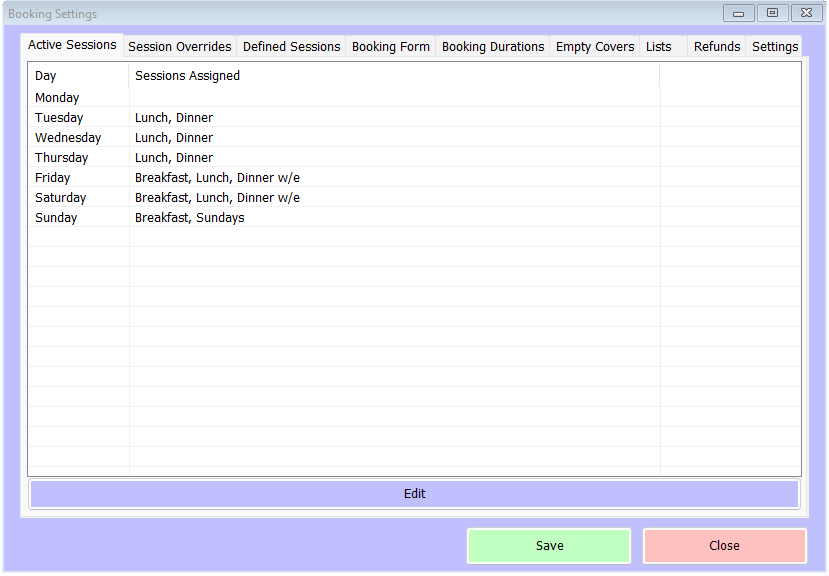
You’ll notice that Monday is blank, meaning that no bookings will be able to be made. This might be
useful if you close on a particular day of the week or if you need to allow for all walk-ins on a
particular day. If you’re happy with your allocations, click ‘Save’.
![]()
While your allocation of sessions should be what’s required for day-to-day trading, sometimes you
may find that specific days require a different configuration. For example, very busy restaurant days
such as Valentine’s Day, Mother’s Day or Christmas may well mean you need to alter the way you
trade on those days. If those changes require different sittings, you’ll need to create a session to
reflect this (or use an existing session that normally applies on a different day of the week). You can
also create a different table plan specifically for such a session – for more on this see here. PLEASE
NOTE – you need to make sure that the slot period of any special session is compatible with the
session normally in place on the day(s) that you plan to apply it. This is so that any bookings made
prior to the override session being configured will still display on the diary alongside the new
session’s bookings.
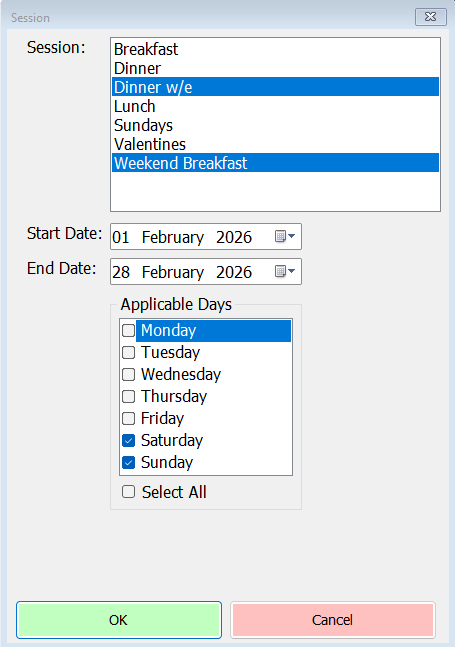
With the new session created, to allocate it to a specific date or date range click ‘Add’ on the Session
Overrides tab. You’ll see a screen like this;
![]()
Select the session(s) you wish to use, the start and end date and, if applicable, which days of the
week between those two dates the override should apply on. In the example below we’ve chosen
1st to 28th February 2026, but we’ll only apply the Dinner w/e and Weekend Breakfast sessions on the Saturday and Sunday;
Click OK and you’ll see the selected date(s) and session(s) in the summary list;
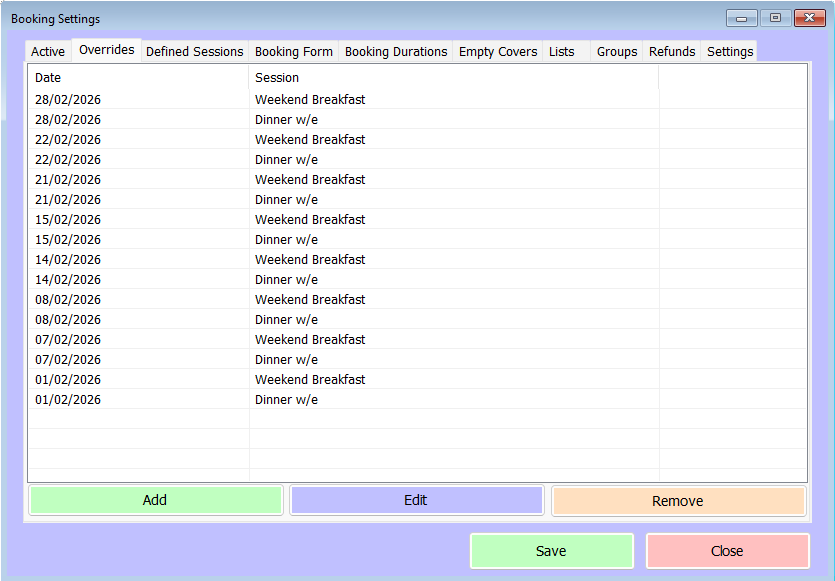
On the dates shown in this list only the sessions configured here will be available for bookings. As
such, if the special session only covers the evening and you intend to provide normal daytime
bookings then you’ll need to add your daytime sessions as Session Overrides as well as the special
session. If you normally have just one, all-day session you’ll need to create a truncated version of
that session to cover the period up to the start of the evening session. This is simply achieved by
using the ‘Copy Session’ button on the defined sessions screen and altering the finish time.
As with all booking settings, override selections won’t apply until you click ‘Save’ on the main
Booking Settings form.

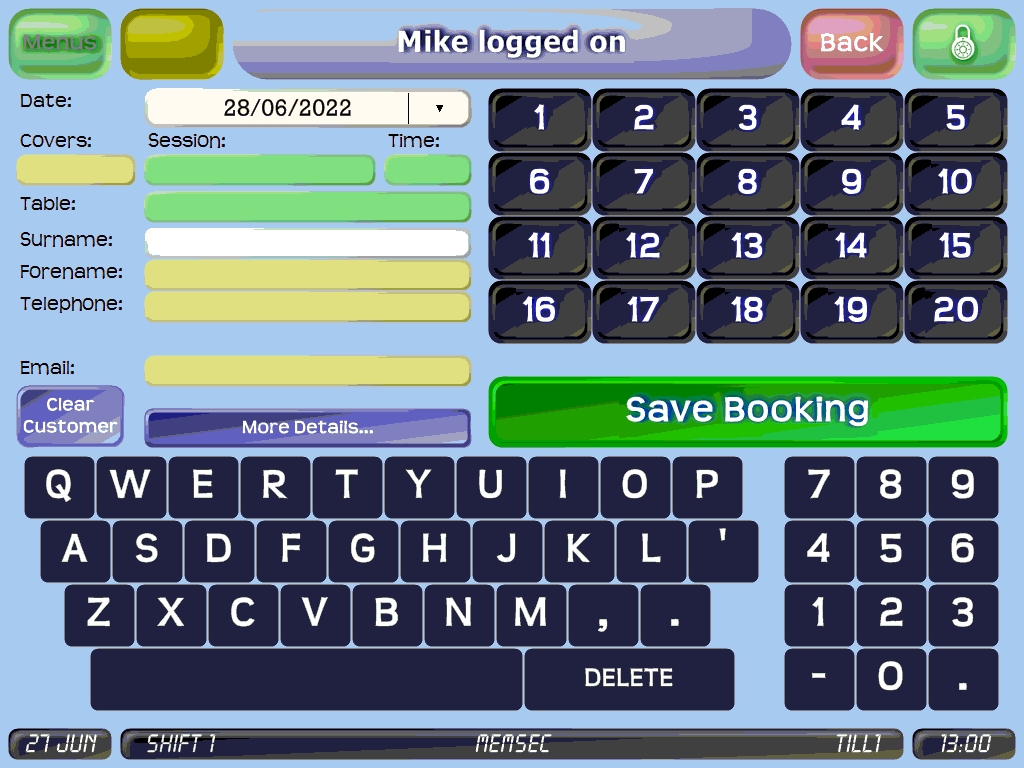
The booking form tab is the simplest of all the tabs on the Booking Settings screen. Here you can
decide what information to record about a customer who’s booking a table. You have 5 fields to
choose from; Table Number, Telephone Number, Customer Name, Post Code and Email Address.
You can decide for each of those fields whether the information should be Compulsory, Optional or
Disabled. In the image above, we have left the Table Number optional at the time of booking.
Customer Name and Telephone Number are compulsory, as you would expect, while Post Code has
been disabled. Email Address is optional. If you set a field as compulsory and an attempt is made to
save a booking without that field being populated, a message will be displayed;
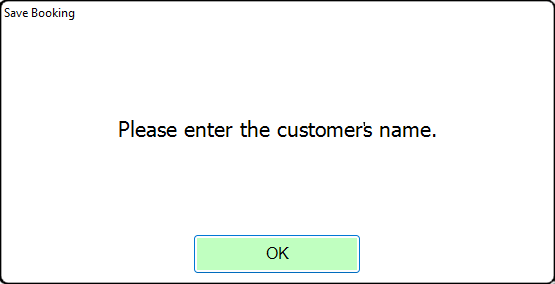
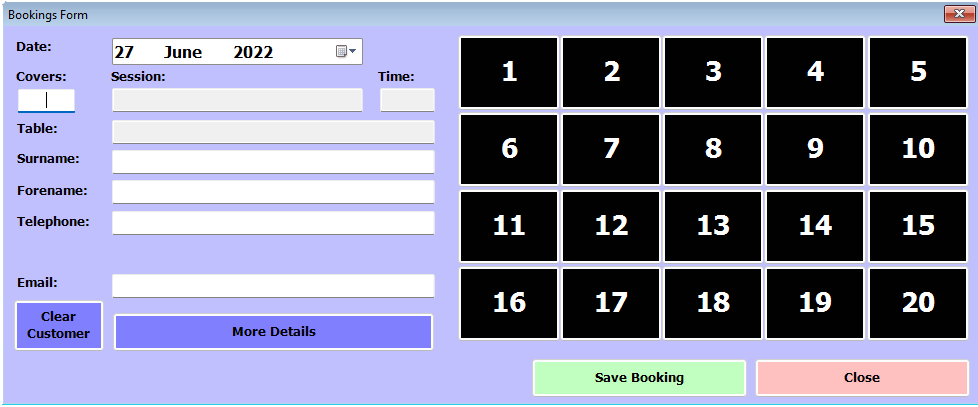
Optional fields are not prompted in the same way. Any fields that you set as disabled will not show
when making a booking. In the images below you can see the gap where the Post Code would
otherwise be requested, firstly from the back office booking screen and secondly on the till;
![]()
While the definition of a session allows you to set the minimum and maximum durations for
bookings, with a variable duration per cover to provide some scaling, it may not always be possible
to configure sessions to give sufficient time to certain sizes of booking. You can allocate table slots,
but that’s not always appropriate for every environment. As such, we provide the Booking Durations
screen so that you can set durations for each table size. Simply click ‘Add’ to create a booking
duration. You’ll see a form like this;
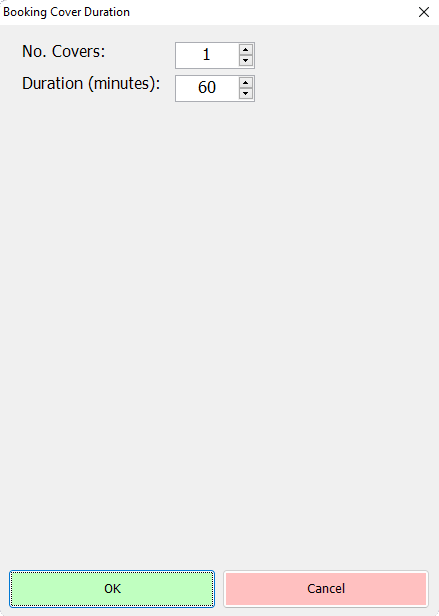
Select the number of covers, then set the appropriate duration in minutes for that number of people
and click ‘OK’. Your selection will be added to the list. You can add as many specific durations as you
want, but do bear in mind that the maximum duration on any given session can’t be exceeded, just
as the minimum duration can’t be reduced. In the image below you can see a list with specific
durations for covers all the way between 1 and 10;
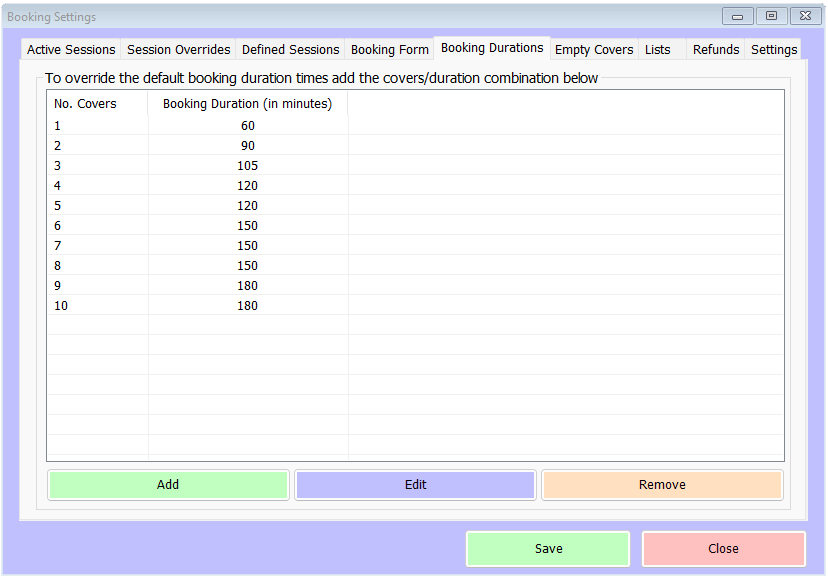
Unlike table slots, which are specific to a session, these duration values will apply to all sessions that
don’t have their own table slots assigned. As with all other aspects of the Booking Settings screen,
these values aren’t saved until you click the main ‘Save’ button.
![]()
This section of the booking settings allows you to set more specific values for the number of empty
covers allowed on a table than the generic setting available under the Settings tab. That setting will
still apply to any table sizes not specified here, but if you do add values here, they will take
precedence.
To add a table size, click Add. You’ll see this screen;
![]()
Simply set the table size and the number of empty covers using the up and down arrows (you can
also overtype the number) and click OK. You can repeat this for as many table sizes as you wish. In
the example below table sizes from 5 covers and up are specified, and override the default setting of
2 empty covers;
![]()
These settings will apply to all online bookings and on-site bookings using allocated table slots as
soon as you click ‘Save’ on the main Booking Settings screen.
![]()
The lists screen serves a dual purpose. It contains lists of Occasion Types and Dietary Types or
requirements that can be applied to bookings. This screen allows you to Add, Edit or Remove entries
in either list. Both entry types can be added when making a booking on-site too, so this screen is as
much about managing and often consolidating those entries added with individual bookings as it is
about creating entries.
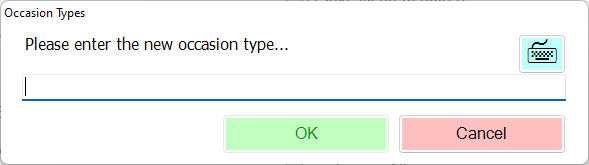
To add a new item to one of the lists, just click its ‘Add’ button. You’ll see an input screen like this;
The lists screen serves a dual purpose. It contains lists of Occasion Types and Dietary Types or
requirements that can be applied to bookings. This screen allows you to Add, Edit or Remove entries
in either list. Both entry types can be added when making a booking on-site too, so this screen is as
much about managing and often consolidating those entries added with individual bookings as it is
about creating entries.
To add a new item to one of the lists, just click its ‘Add’ button. You’ll see an input screen like this;
Naturally the Dietary Type version shows ‘Dietary’ instead of ‘Occasion’. Simply type in the
description and click ‘OK’. The new item will be added to the relevant list and once you click ‘Save’
on the main Booking Settings screen will be available to staff making new bookings. Below is a
typical example of this screen when populated;
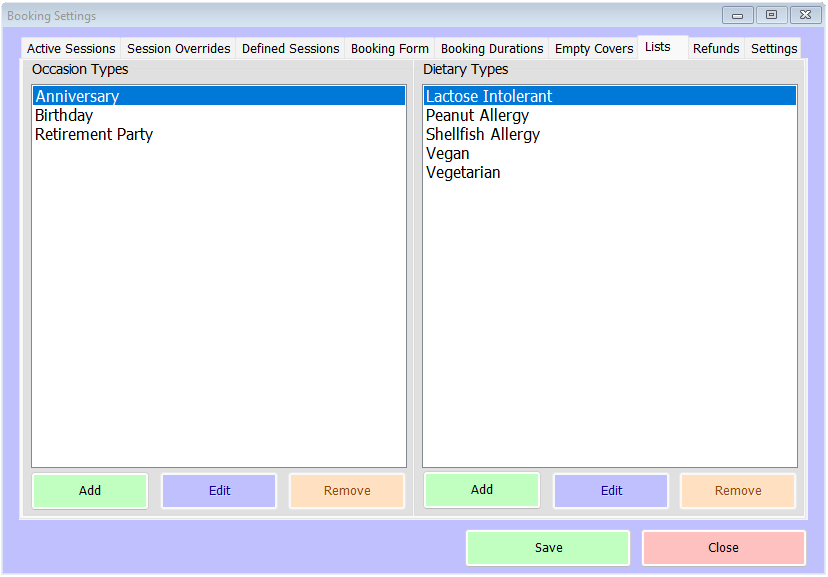
The Edit and Remove buttons on each side are similarly self-explanatory. Over time, entries will
doubtless be made when bookings are recorded that perhaps aren’t spelled correctly, or which
duplicate existing entries. The Edit and Remove buttons will allow you to correct or delete any
entries that fit that sort of criteria.
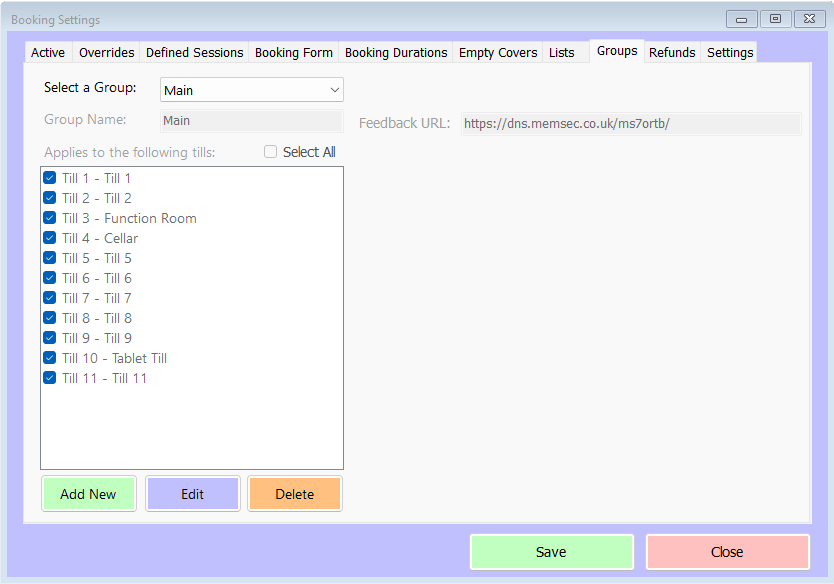
By default, all tills are included in the ‘Main’ booking group. If in your venue you have more than one area where you’d like to take bookings, under separate identities as though they’re separate venues, then you can achieve this by creating another group. Click ‘Add New’, then give the new group a name and select which tills are to be included in the new group. You can also add a separate Feedback URL, so that customers who dine in the new area can give more specific reviews.
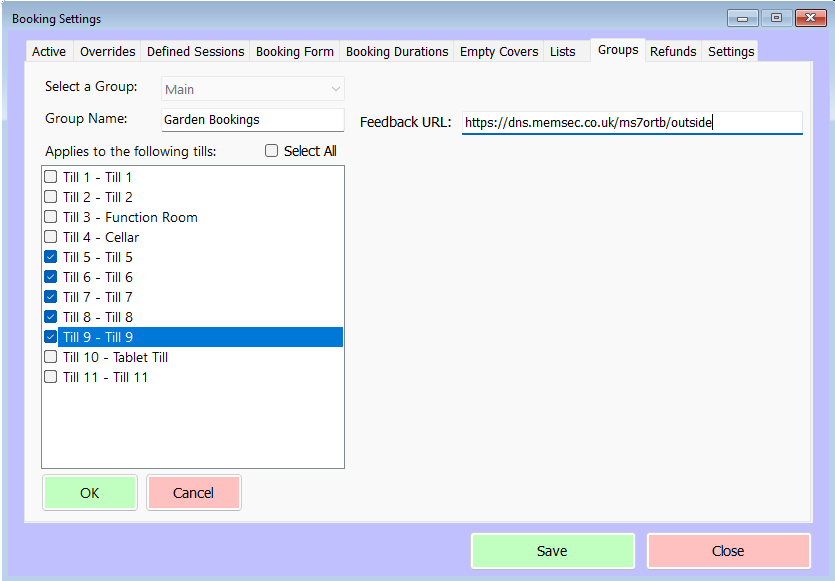
Once you’ve created the group, click OK and then Save. You’ll then be able to create and allocate sessions for the new area. Please contact us for Online booking setup of new Groups/Areas.
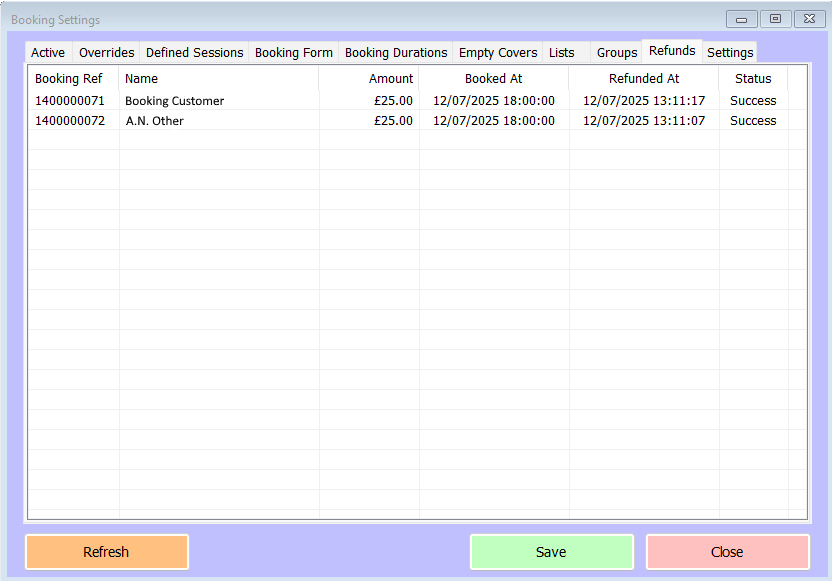
This tab simply provides information on any booking deposits that have been refunded due to the customer cancelling a booking where they paid a deposit online.
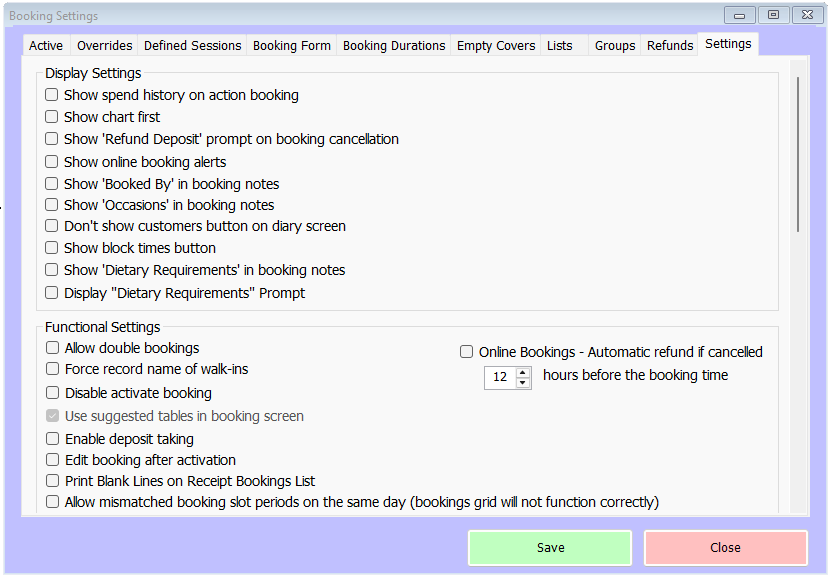
The settings tab has lots of options that will affect how the booking system appears and behaves.
These are broken down into 3 sub-sections; Display Settings, Functional Settings and Notification
Settings. Many of the settings relate to the table plan and the way it interacts with the Bookings
module. For more help on the table plan, see here.
Display Settings
▢ Show spend history on action booking
▢ Show chart first
▢ Show ‘Refund Deposit’ prompt on booking cancellation
▢ Show online booking alerts
▢ Show ‘Booked By’ in booking notes
▢ Show ‘Occasions’ in booking notes
▢ Don’t show customers button on diary screen
▢ Show block times button
▢ Show ‘Dietary Requirements’ in booking notes
▢ Display ‘Dietary Requirements’ Prompt
These settings will change how the bookings module appears, both on the till and in the back office
where applicable. The options here are as follows (click on each heading in the list above to jump to its explanation);
-
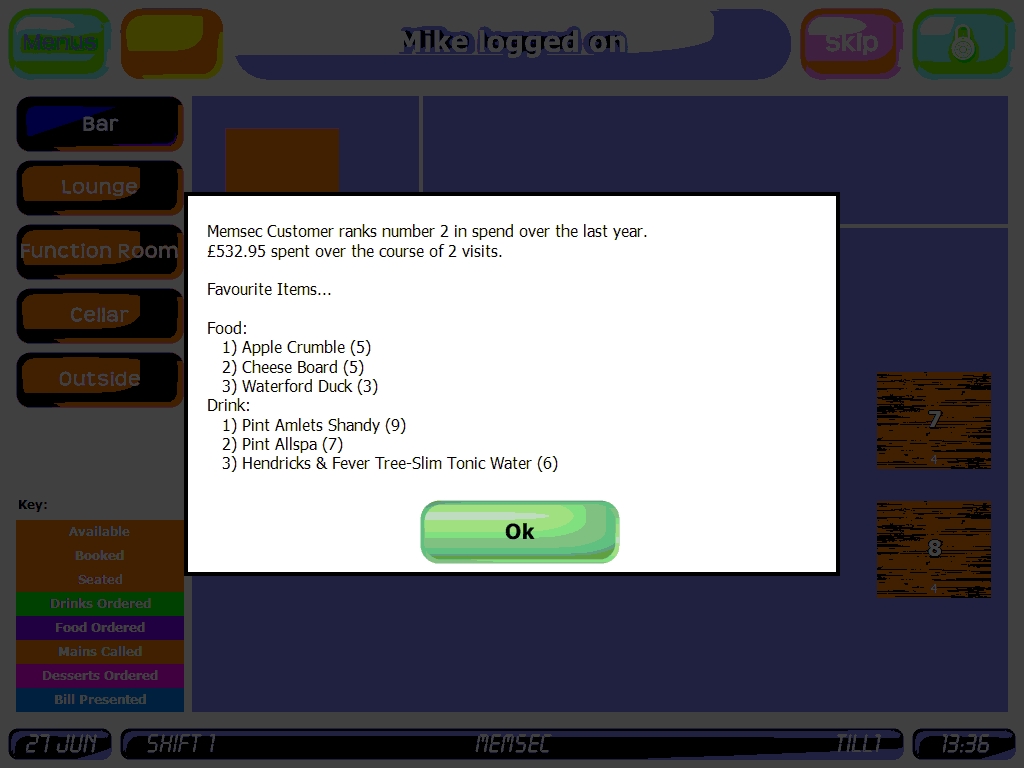
Show spend history on action booking – when activating a booking with this option set, the staff member will see a summary of the customer’s spend history on previous bookings, like this;
If a customer has never booked before, you’ll see this message;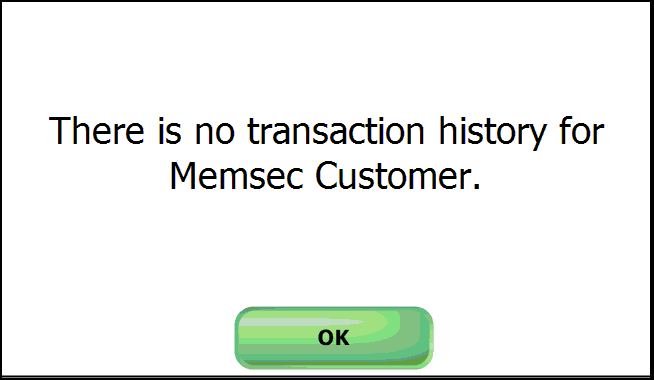
- Show chart first – this relates to the diary view in the till or back office. When you select a date and click ‘View Bookings’ you’ll normally see bookings listed like this;
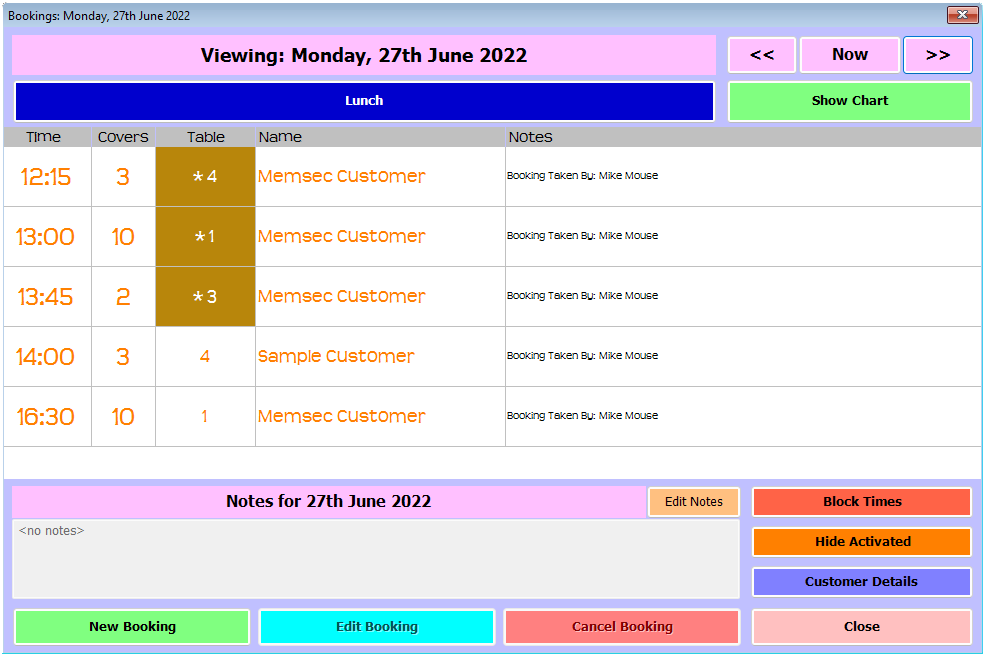
You can see the ‘Show Chart’ button in the top, right-hand corner of this screen. Pressing that changes the display to the Chart View;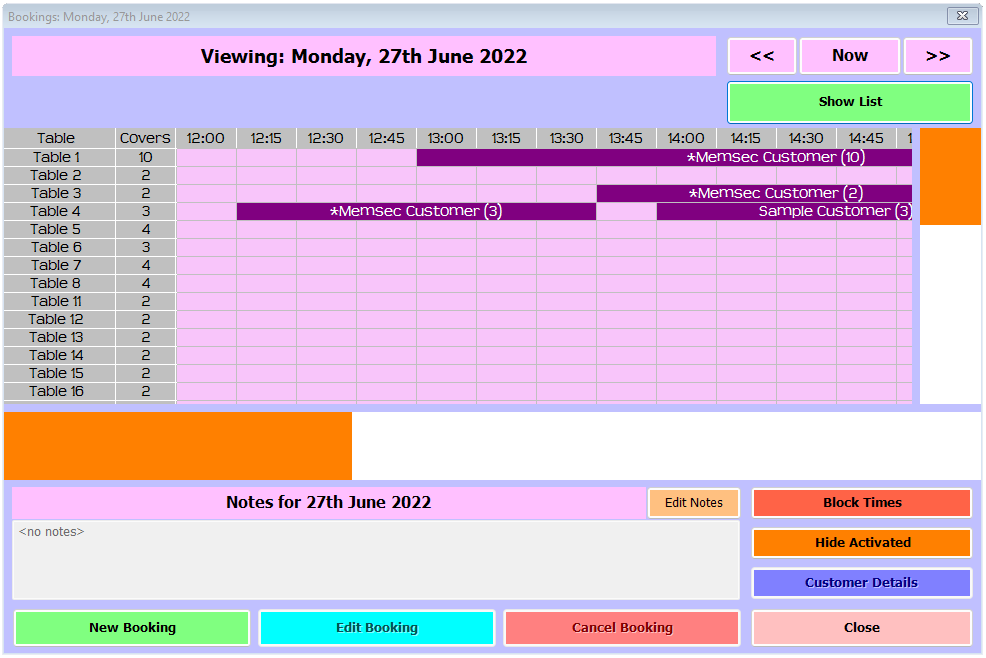
This provides a graphical representation of the bookings for that day, including their expected durations. If this is your preferred layout, selecting the ‘Show Chart First’ option will mean that the display will default to this view when you press ‘View Bookings’. - Show ‘Refund Deposit’ prompt on booking cancellation – this option will ensure that if there’s a deposit associated with a booking, and a till user cancels that booking they will be asked whether they wish to refund the deposit at that point. If they say ‘Yes’, the deposit will be marked as refunded, they will be asked to refund the relevant amount and they’ll be taken directly to the pay screen to do so.
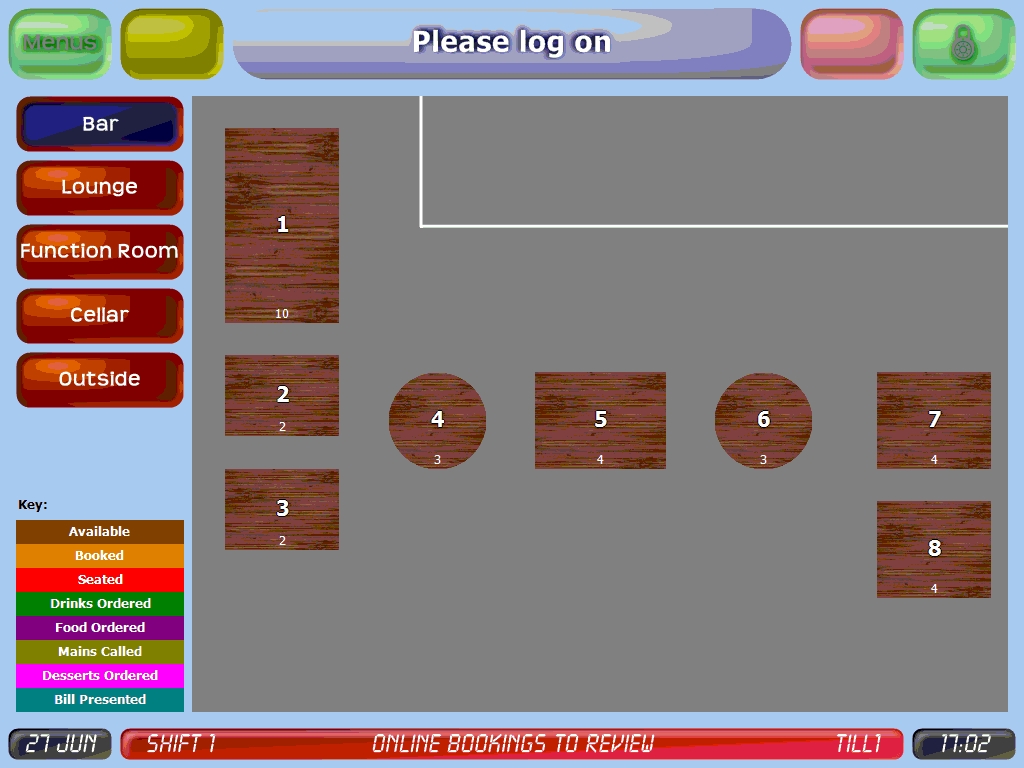
- Show online booking alerts – ticking this check box will ensure that when an online booking is made, the till screen(s) will show a message at the bottom to alert users to the fact that a booking needs to be reviewed. As you can see in the image below, the footer bar turns red and the text ‘Online bookings to review’ will flash;
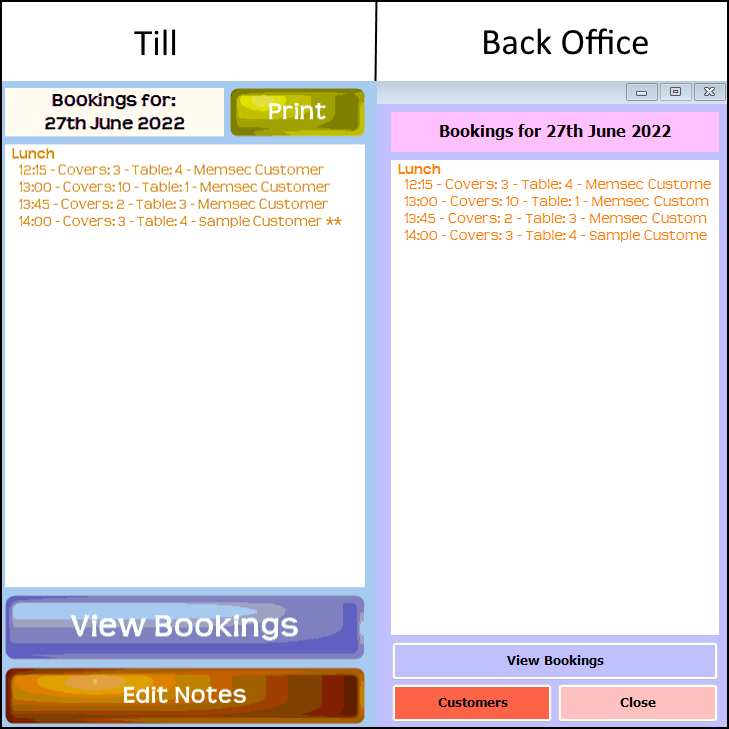
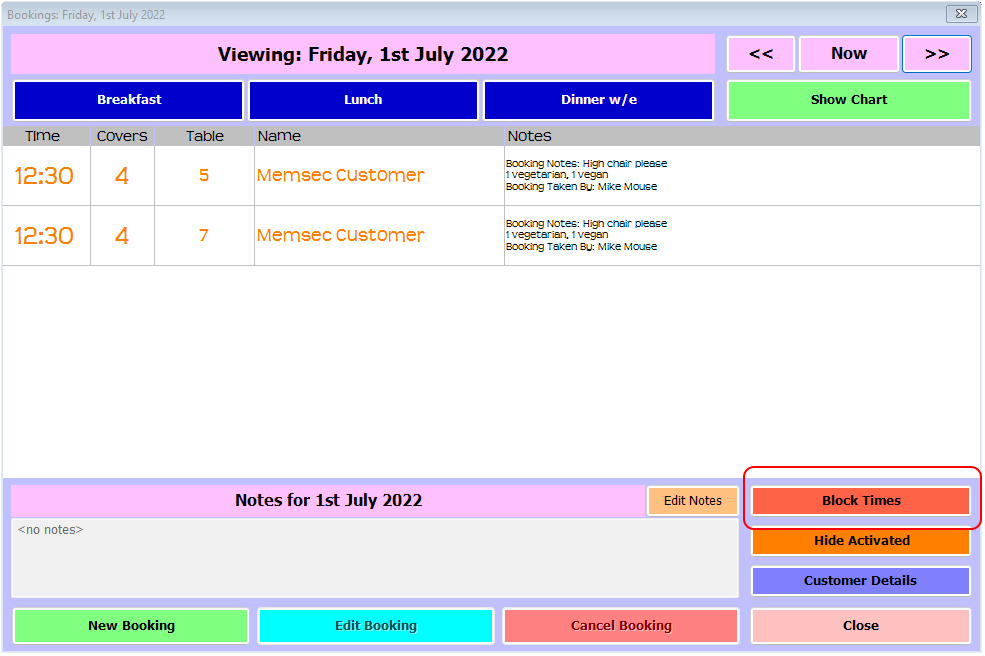
- Show ‘Booked By’ in booking notes – ticking this option will show the name of the person who recorded a booking in the notes displayed on the right-hand side of the daily bookings list view, as can be seen in the image below. Having this information immediately to hand when activating or editing a booking makes it easier if there are questions about the booking that that person may be able to answer.
- Show ‘Occasions’ in booking notes – you have the option to record details of any special occasion with a booking. Ticking this option will ensure that any such occasion information is shown on the daily booking list, not just within the booking notes, as in the image below.
- Show ‘Dietary Requirements’ in booking notes – as with Occasions, this option makes any allergy or other dietary requirements visible in the daily booking list. See image below.

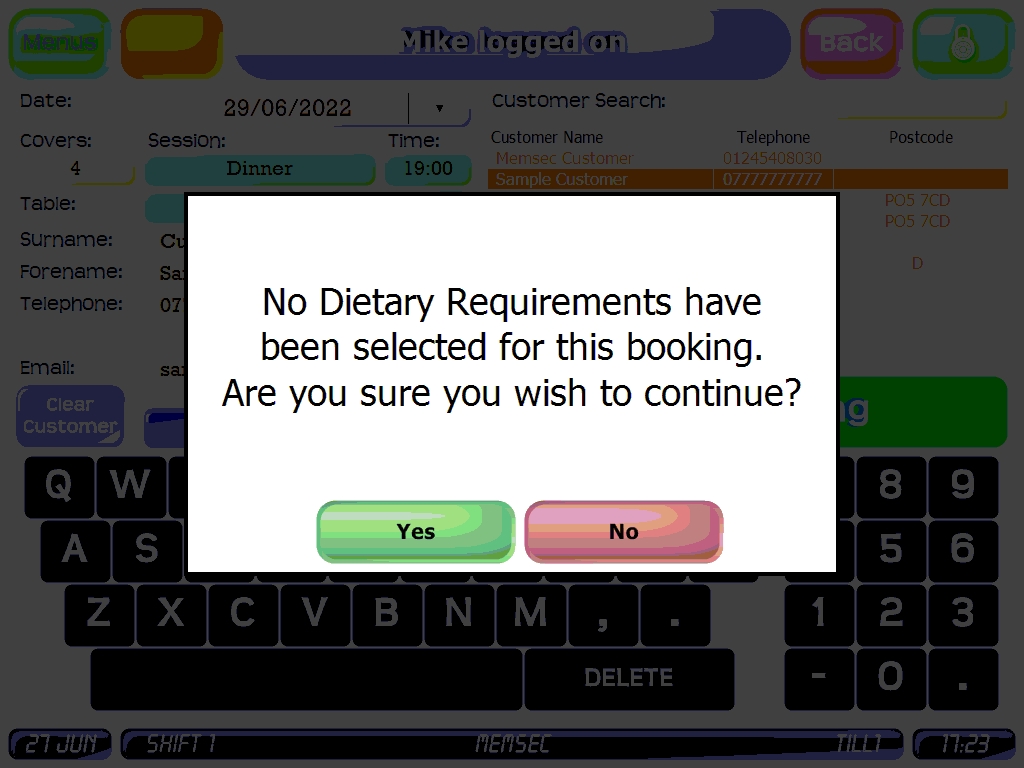
- Display ‘Dietary Requirements’ prompt – ticking this option ensures that for every booking your staff make, if they don’t record any dietary requirements, they’ll be prompted to confirm that there are none for this booking;
- Don’t show customers button on diary screen – if you don’t wish staff to be able to view or edit customer details on the till, ticking this option will remove the Customers button from the main diary display. You will still have that button on the equivalent back-office screen (as shown on the right-hand side below)
- Show block times button – sometimes you will need to prevent bookings being made for part of a session. For example, if you have a function such as a party that will continue beyond normal booking durations. You can use session overrides to achieve this but a simpler method is to block times. With this option selected, a button appears on the daily booking page that will allow you to do this;
Click that button to show a screen with each time-slot on the selected day, along with session buttons at the top. By default, all sessions are selected but by clicking them you can deselect sessions to allow you to focus on the times you need to block. Each time slot in the selected sessions is listed, as well as the number of covers remaining in that slot;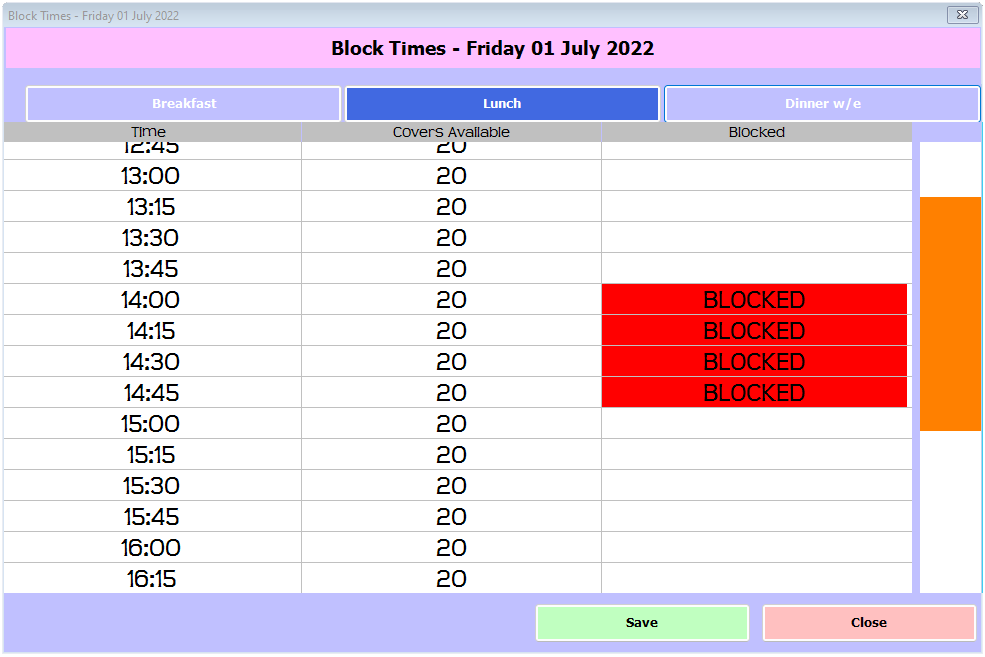
Clicking in the ‘Blocked’ column against a slot will show that slot as blocked. You can block any number of slots on any given day or session, and they do not need to be consecutive. Once you’ve selected all the required slots just click ‘Save’ and the block will take immediate effect. Any bookings already made for slots that you block will remain valid, so it’s best to do this before any bookings are made, or to rearrange any pre-existing bookings.
Functional Settings
▢ Allow double bookings ▢ Online Bookings – Automatic refund if cancelled
▢ Force record name of walk-ins ![]() hours before the booking time
hours before the booking time
▢ Disable activate booking
▢ Use suggested tables in booking screen
▢ Enable deposit taking
▢ Edit booking after activation
▢ Print Blank Lines on Receipt Bookings List
▢ Allow mismatched booking slot periods on the same day (bookings grid will not function correctly)
▢ Generate Walk-In on Tab Creation (as long as the table is on the table plan)
▢ Create Walk-In from the table plan at login ▢ Use Multi-Table Walk-Ins
▢ Activate bookings from the table plan at login
▢ Disable session button if no tables are available
▢ Online Bookings – Hide non-online sessions
▢ Online Bookings – Allow bookings just based on the number of covers ▢ Don’t assign a table to the booking
▢ Online Bookings – Disable booking approval
▢ Only show time slots with available tables
Only show joined table slots if no single tables in the session are free for ▢ Online Bookings ▢ Onsite Bookings
Minimum number of covers for bookings: Online ![]() On-Site
On-Site ![]()
Maximum allowable empty covers per table: Online ![]() On-Site
On-Site ![]()
Maximum number of tables that can be joined for bookings: Online ![]() On-Site
On-Site ![]()
Flag table as booked ![]() minutes before booking start time (show on idle)
minutes before booking start time (show on idle)
Online Bookings – Bookings must be made ![]() minutes before booking start time
minutes before booking start time
These settings affect the behaviour of the booking system, both on-site and online where applicable.
The options here are as follows (click on each heading in the list above to jump to its explanation);
- Allow double bookings – by default, once a table is booked in a session it can’t be booked again until the following session. By ticking this option, you will allow multiple bookings for a table within each session. As such, it’s best to ensure that table durations are long enough to allow for the relevant number of covers to finish their meal and for the table to be cleaned, since there’s no option to have a pause between tables.
- Force record name of walk-ins – with the booking system in operation you will always have the option to record Walk-Ins on tables that aren’t booked. The walk-in screen looks like this;
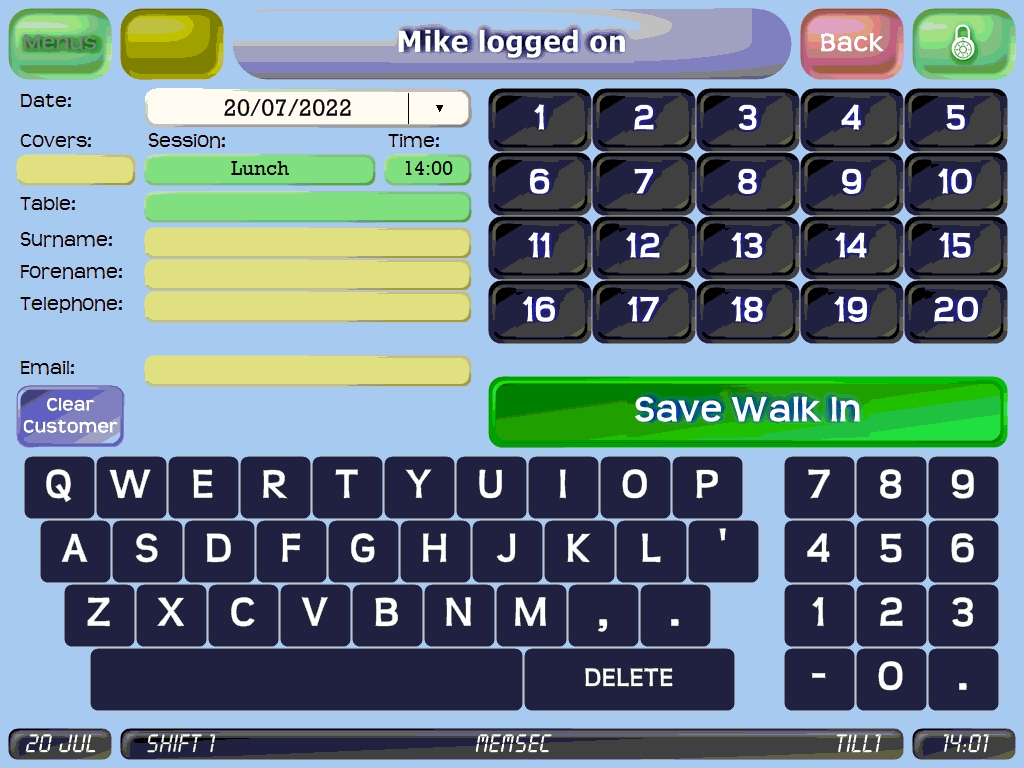
Normally, just the covers, and table number(s) need to be recorded for a walk-in (the current session and next available slot are automatically set). Ticking this option ensures that staff will have to ask and record the name of the customer as well. - Disable activate booking – if a site has bookings but doesn’t run tabs, this setting is necessary, since activating a booking automatically creates a tab.
- Use suggested tables in booking screen – this feature hasn’t yet been implemented.
- Enable deposit taking – to try to avoid no-shows, it’s increasingly common to ask for a deposit on a booking, especially for a large number of covers. Ticking this option will enable deposits to be recorded on both the till and the back office. Deposits recorded on the back office are assumed to have been paid outside of the till system, so the funds won’t be expected to be included in any z-read. The deposit itself will show on the next z-read for till 1, with a payment type of ‘Paid Elsewhere’.
On the till, the user will be asked whether the deposit is to be included in the z-read or not;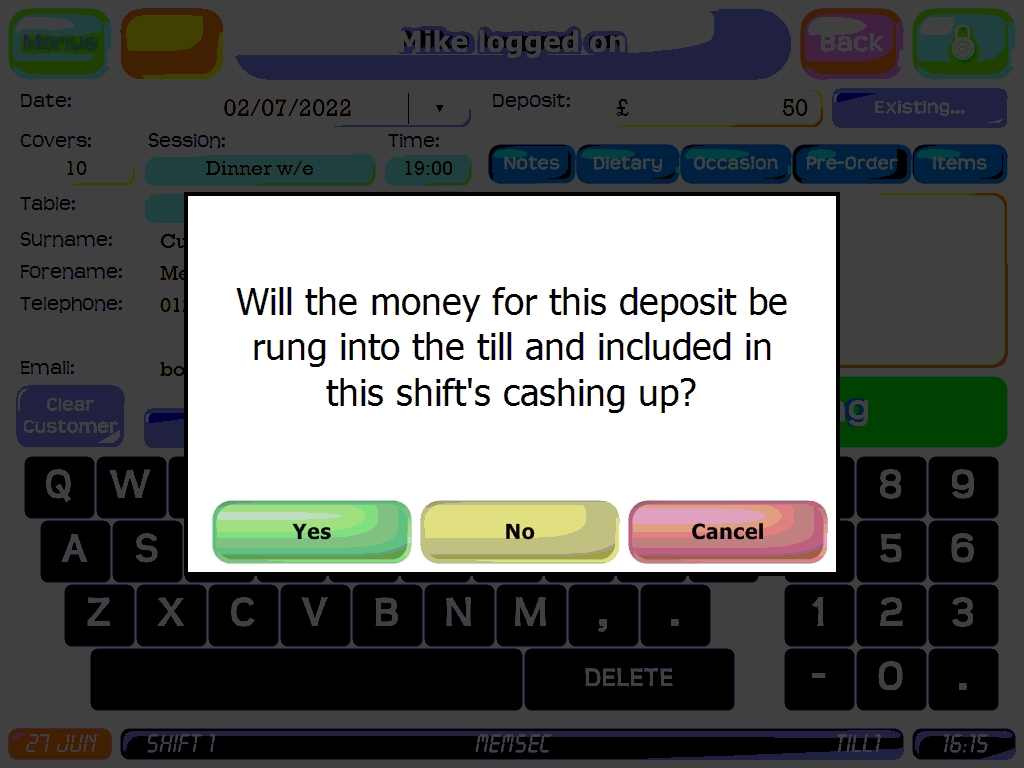
If they confirm that it is, they’ll be taken to the pay screen on completion of the booking in order to record the payment method. If you have online payments, there are further options related to deposits;- Online Bookings – Automatic refund if cancelled n hours before the booking time – activating this option and setting the required notice period will allow customers to automatically receive back any deposit they’ve paid should they cancel the booking at least the required number of hours ahead. You can still refund them manually if they don’t provide sufficient notice if you so wish – please see our guide to deposits for more information.
- Edit booking after activation – ordinarily, activating a booking would mean it can no longer be edited, since it has then happened. However, if the size of the party has changed you may wish to alter the booking so that your reports etc. are more accurate when looking back. If this is the case, tick this option and you’ll still be able to edit a booking even after it’s been activated.
- Print blank lines on Receipt Bookings List – on the till there is an option to print the daily bookings list to the receipt printer. By default, this will print a list of bookings received so far for the selected session(s), but with this option activated, every table is printed with 3 slots, whether booked or not;
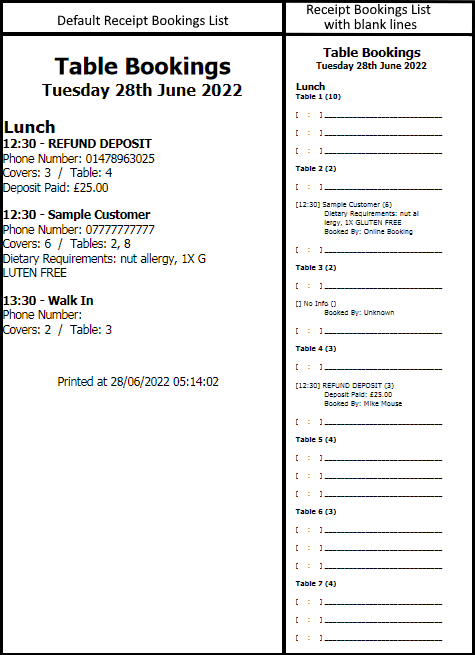 Please be aware that if you have a large number of tables this report can become very lengthy.
 - Allow mismatched booking slot periods on the same day (bookings grid will not function correctly) – Ordinarily, booking-slot durations would be identical for all sessions, whether bookings are taken every 5, 10, 15 or 30 minutes. However, for venues where as well as the main restaurant there’s a separate area for functions or parties, it may be necessary to space bookings there differently. This is only possible if this option is selected. As indicated, having sessions running on a single day with different booking slot timings will cause the diary grid view to be unreliable.
- Generate Walk-In on Tab Creation (as long as the table is on the table plan) – whenever a tab is created on the till, ticking this option will add the tab to the bookings for the day as a walk-in, unless the tab is of a type that isn’t on the table plan, such as a bar tab.
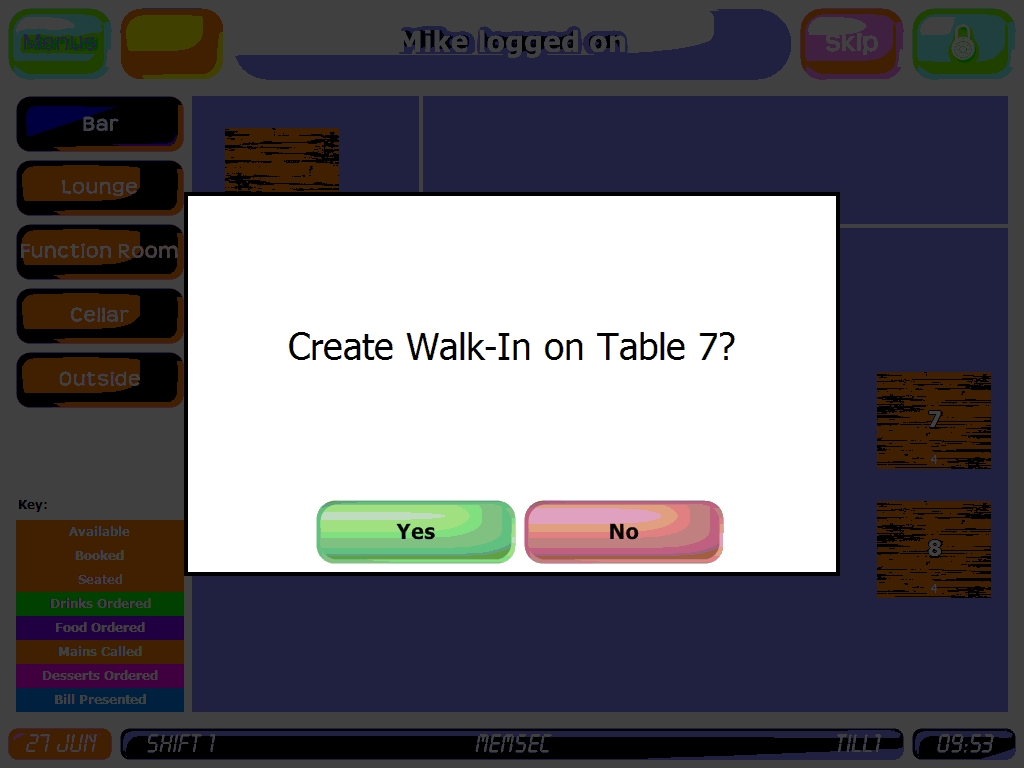
- Create Walk-In from the table plan at login – while the above option will generate a Walk-In if a tab is created from the table plan at login, the details will be assumed from the tab. Selecting this option generates a specific prompt when selecting a new table from the table plan;
If the user answers ‘Yes’, a new form will be displayed. If the option ‘Force record name of walk-in’ is active, then the form will look like this;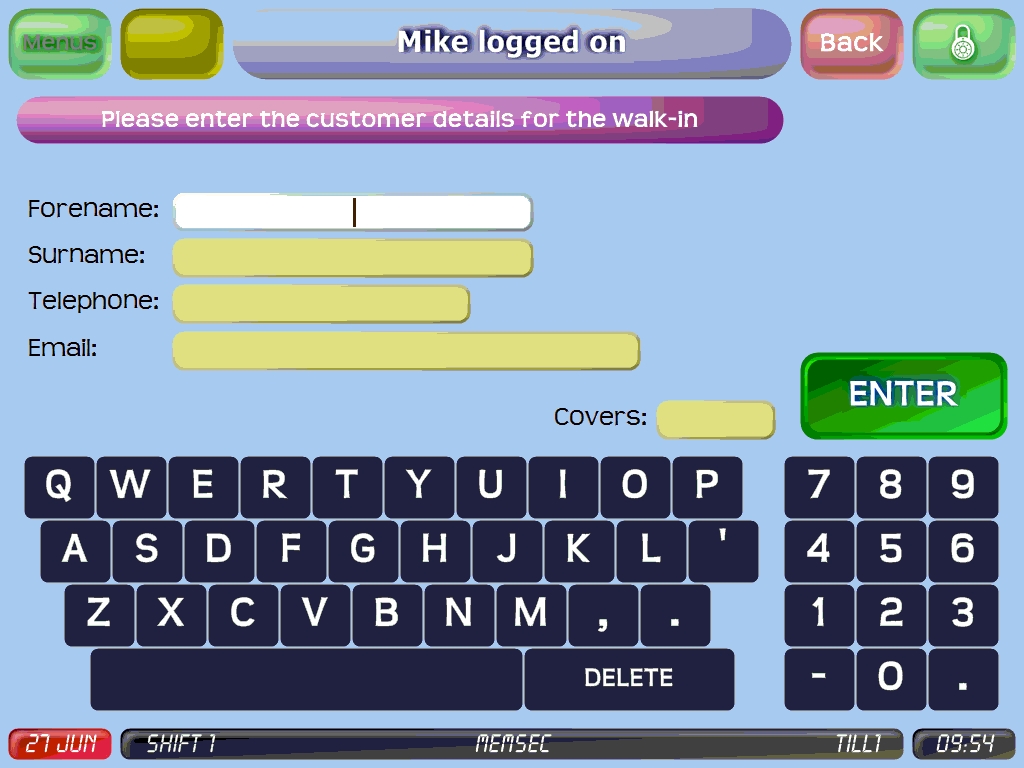
In addition to the name, in this form either a Telephone number or an email address is required. If the option to ‘Force record name…’ is not active, the user will simply be asked to provide the number of covers.
- Use Multi-Table Walk-Ins – this sub-section of the previous setting will alter its behaviour. Instead of simply offering the option of creating a walk-in on the selected table, this prompt will appear;
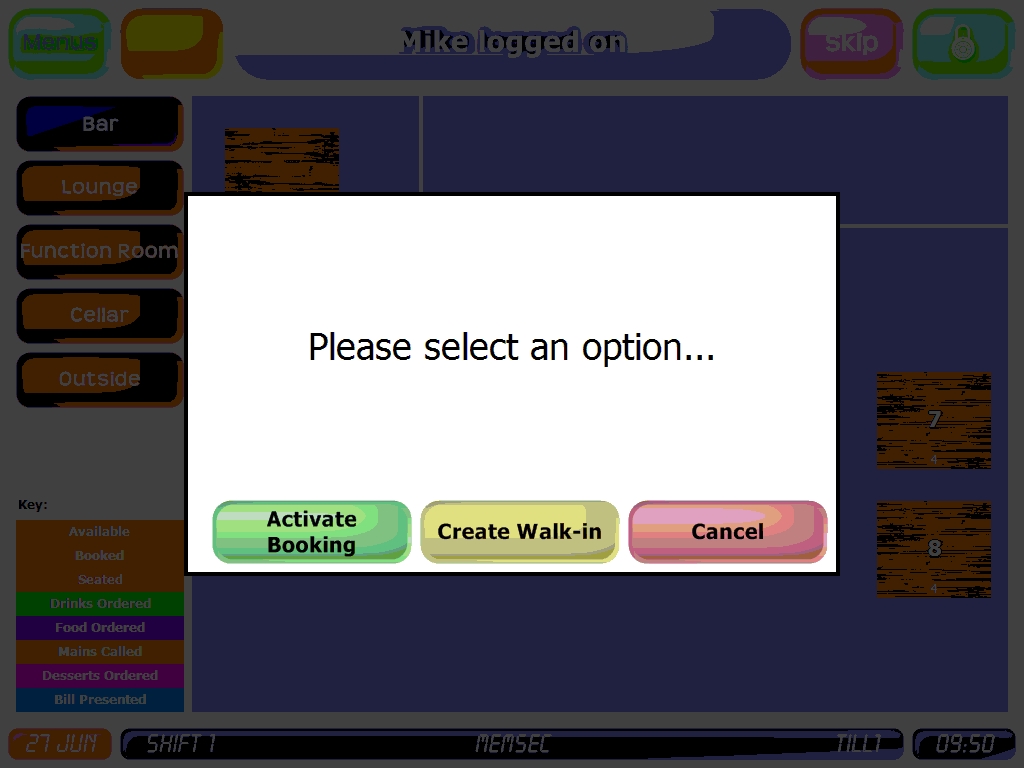
Cancel will return the user to the table plan. Activate Booking will display the bookings list for the day, where the user can select a booking and click ‘Activate’;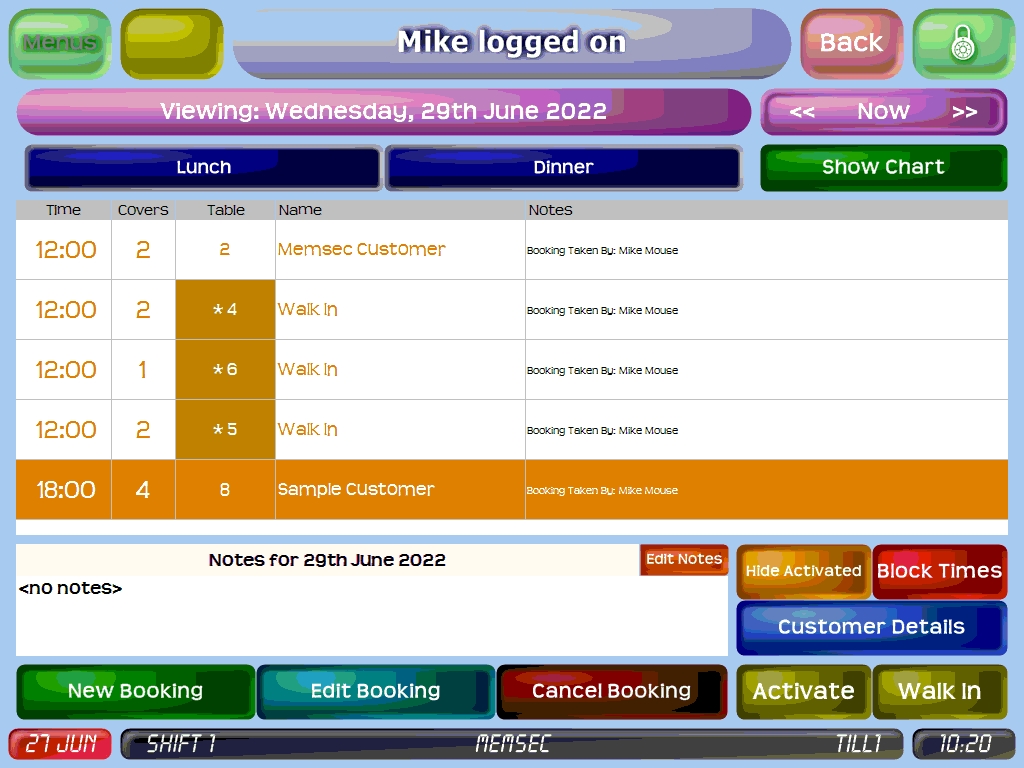
Create Walk-In will show the normal Walk-In screen;
You’ll notice that there is no table pre-selected, even though this process began with the selection of a table from the table plan at login. This is because the multi-tables option requires the user to specify which table or tables should be used.
If more than one table is selected, the lowest numbered table will be used for all selected tables on the plan once this walk-in is created, so that there’s just one tab, but the other tables will show with an asterisk to indicate that they’re joined to that table;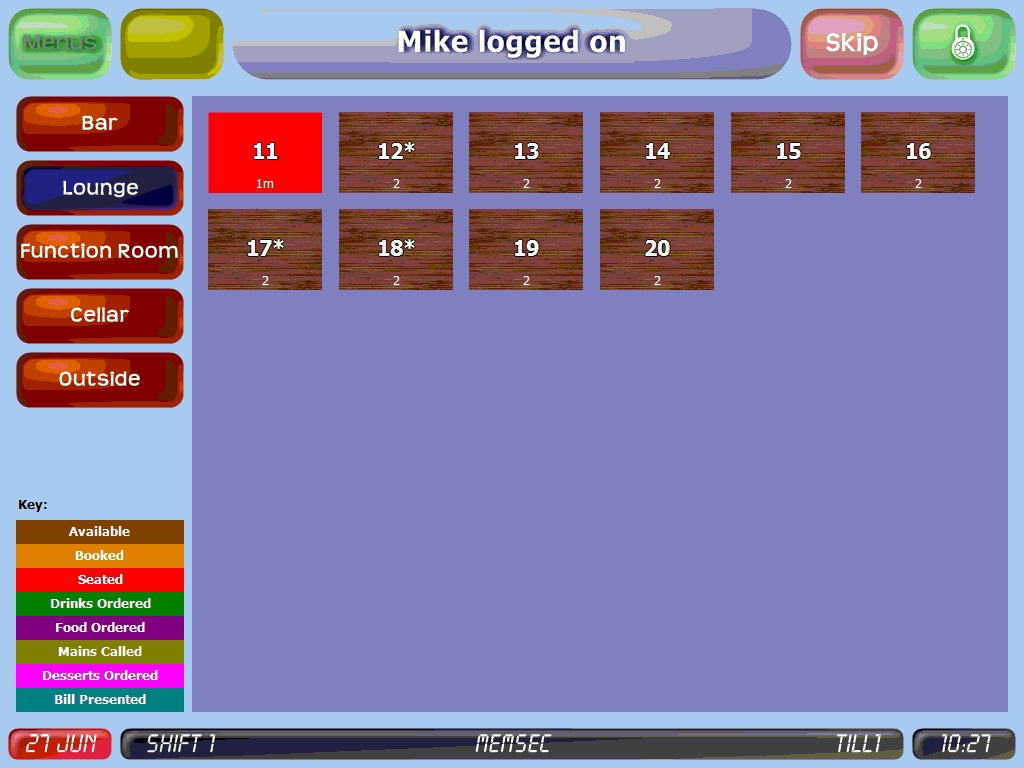
- Use Multi-Table Walk-Ins – this sub-section of the previous setting will alter its behaviour. Instead of simply offering the option of creating a walk-in on the selected table, this prompt will appear;
- Activate Bookings from the table plan at logon – clicking on a table on the table plan at logon, even one which is shown in orange to indicate that it is booked, will start the process of creating a tab for that table. With this option selected however, clicking on a table that is showing as booked will generate a prompt showing the booking details and asking the user whether they wish to activate the booking;
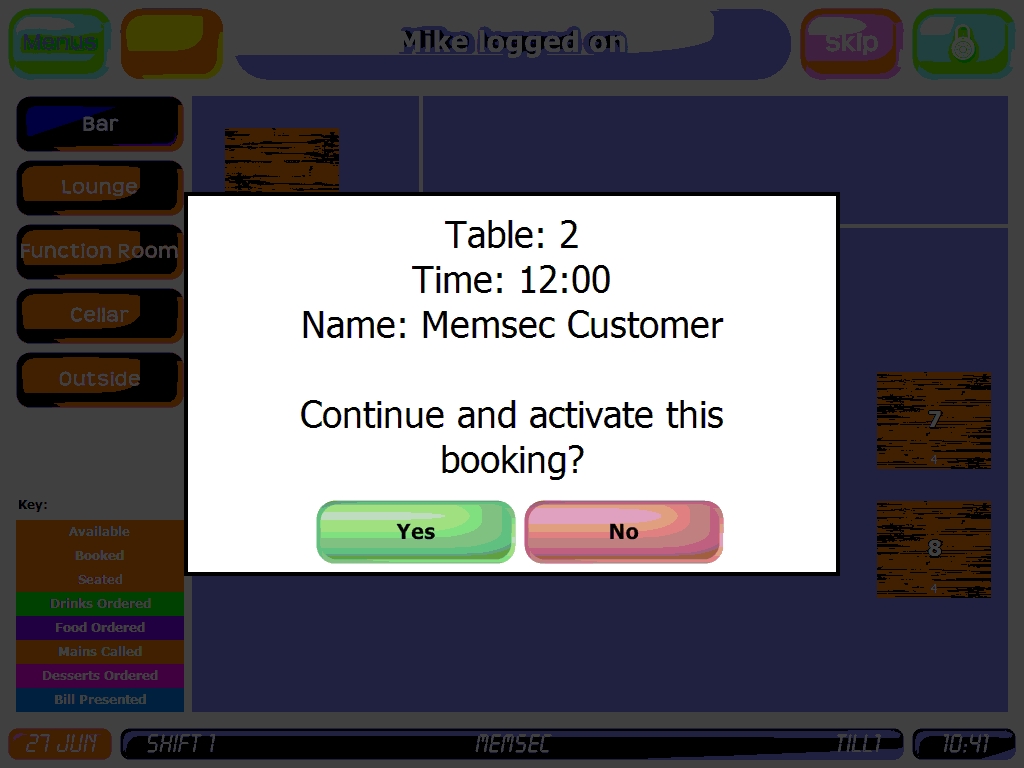
Clicking No will return the user to the table plan. ‘Yes’ will automatically activate the booking and display confirmation;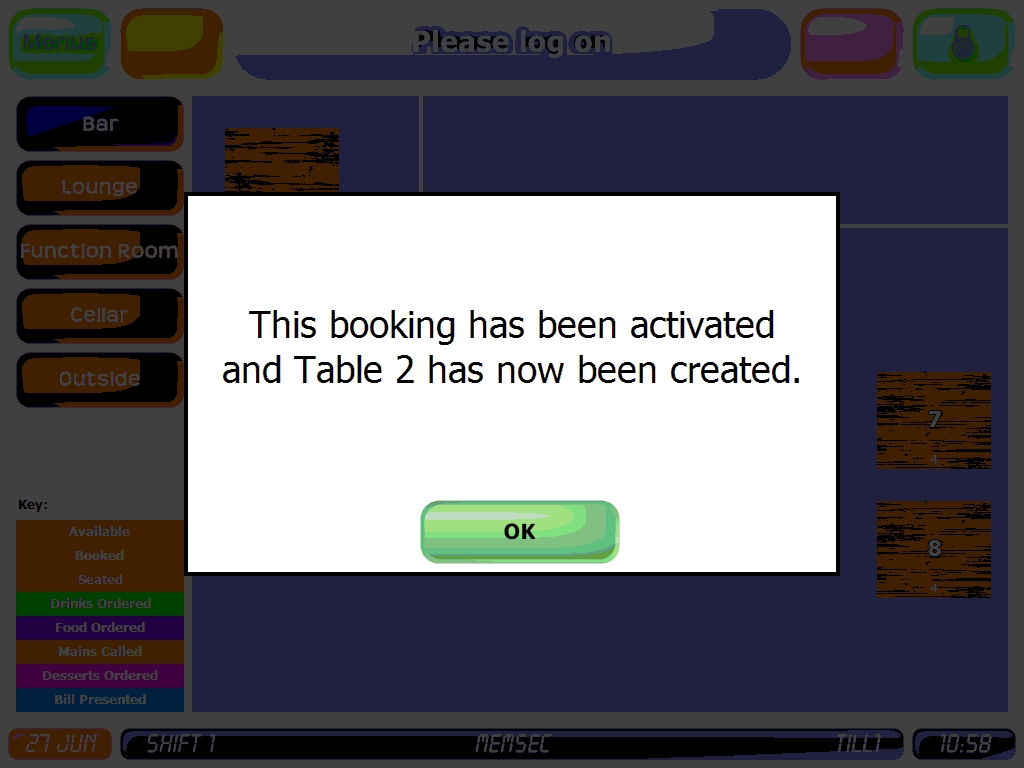
- Disable session button if no tables are available – this option relates only to sessions with table slots allocated. When a user creates a booking, the first selection they make is the number of covers. The system then checks to see which table (or combination of tables) can accommodate that number of people on the selected day, given capacity in the table slots and any existing bookings. If it finds that there are no (remaining) tables that can fit the required number of covers, there will normally be a message displayed to this effect on the session buttons;

The user may still select a session, though they’ll not be able to select a slot since none are available. With this option selected, however, the session buttons will instead be disabled, making it clearer that the booking is not possible.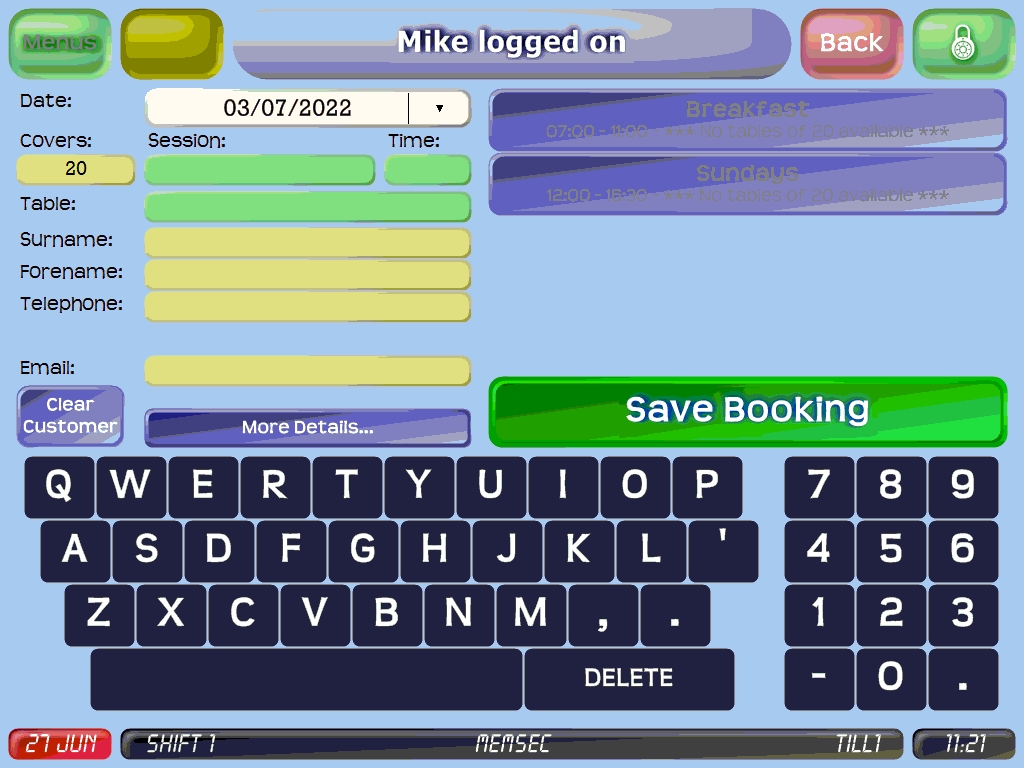
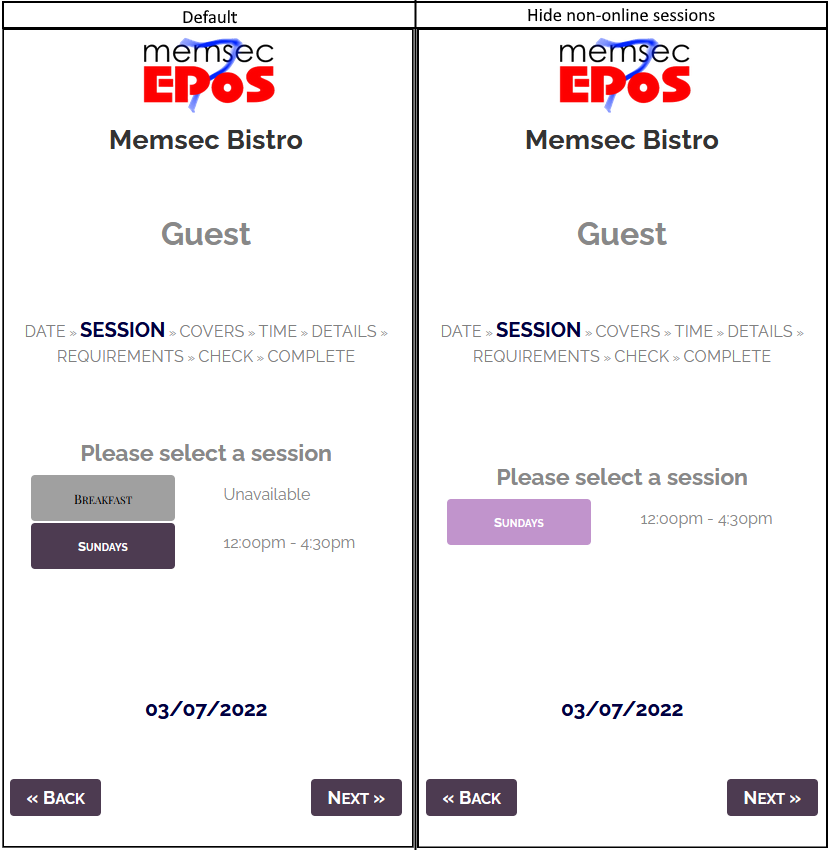
- Online Bookings – Hide non-online sessions. This option relates to the online booking screen as seen by customers. If there are multiple sessions in a day, but one or more of them doesn’t allow online bookings, ordinarily the online booking form will show the session but mark it as Unavailable. With this option selected, the session won’t be shown at all, and if only one other session remains then that will be selected automatically;
- Online Bookings – Allow bookings just based on the number of covers. Ordinarily the online bookings module will use your table plan, including any joins you’ve configured, and existing bookings to try to identify an available table or combination of tables in the selected session, and will then present the customer with a list of available booking times. If there are no tables or groups of tables large enough the customer will see a message telling them there are no slots available. However, if this option is selected and there are enough covers available on the table plan, even from tables that aren’t necessarily set to be joined, slots will be offered with a caveat;
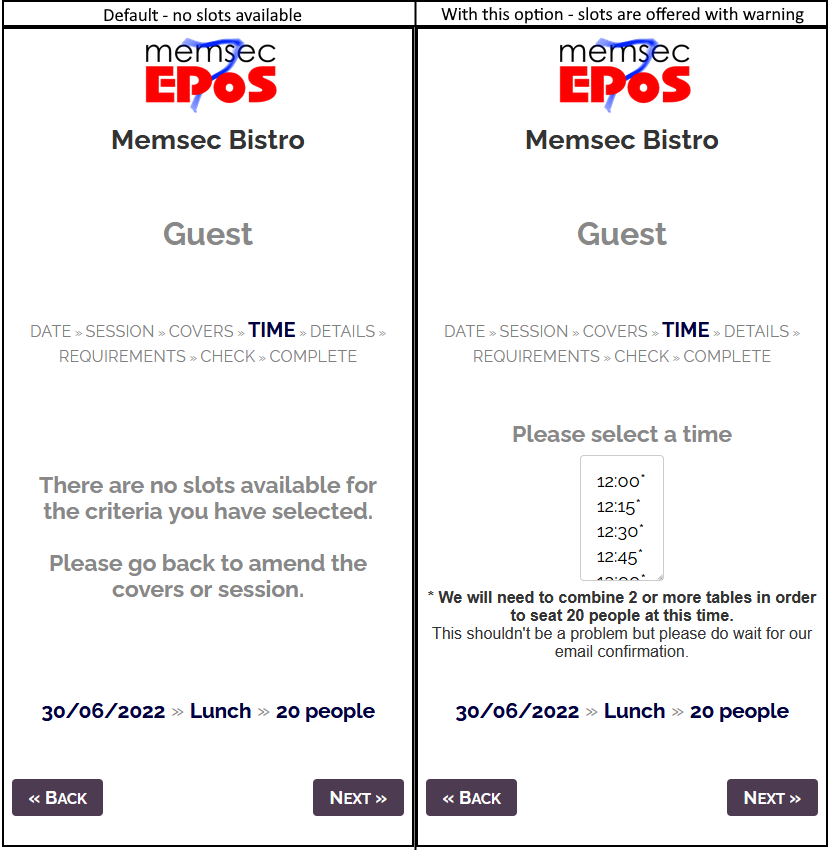 Bookings made in this way, where the system is unable to identify a table or joined tables that will accommodate the required party size will have no table number allocated. Naturally, you will need to review any such bookings to ensure that it’s feasible to combine tables that are close together, since with this setting in operation it’s possible that the tables the system identifies as totalling sufficient covers might be some way apart or even in different table plan areas.
- Don’t assign a table to the booking – this sub-setting of the previous option means that all bookings will be made without a table being allocated, even for small numbers of covers. This means you’ll need to review every booking an allocate it a table.
- Online Bookings – Disable booking approval. This setting is almost the opposite of the previous setting, since it removes the need to review and approve online bookings entirely. All online bookings will be automatically accepted, so it’s not advised to use this option if you’re likely to receive any bookings that haven’t got a table allocated.
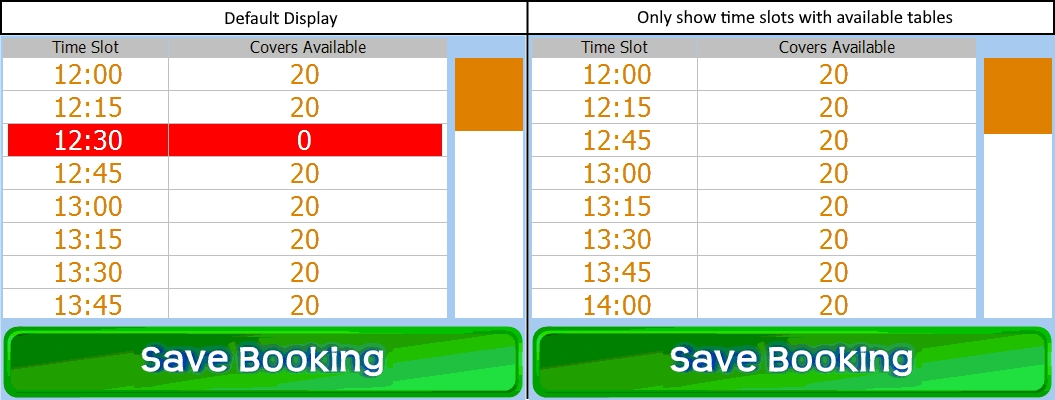
- Only show time slots with available tables – if all the available covers for a slot within a session are filled, the default behaviour is for that slot to be shown with 0 available covers. If this setting is ticked, it will instead be hidden;
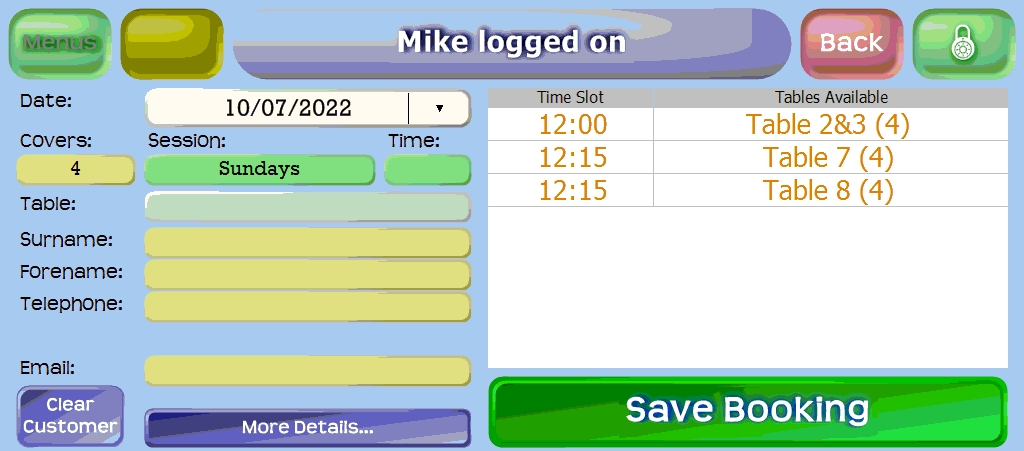
- Only show joined table slots if no single tables in the session are free for Online/On-Site bookings – with the option to hide full table slots activated, this further extension applies to sessions where table slots are defined. For on-site bookings, no slots will be shown for joined tables until such time as all available single tables are booked. In the images below, the join between tables 2&3 is offered as well as the single tables 7 and 8. With this option selected for on-site bookings, only the single tables will be offered at first. Once they are booked, the joined tables will be offered (unless of course either or both have been booked individually.
Default Behaviour, all table slots offered
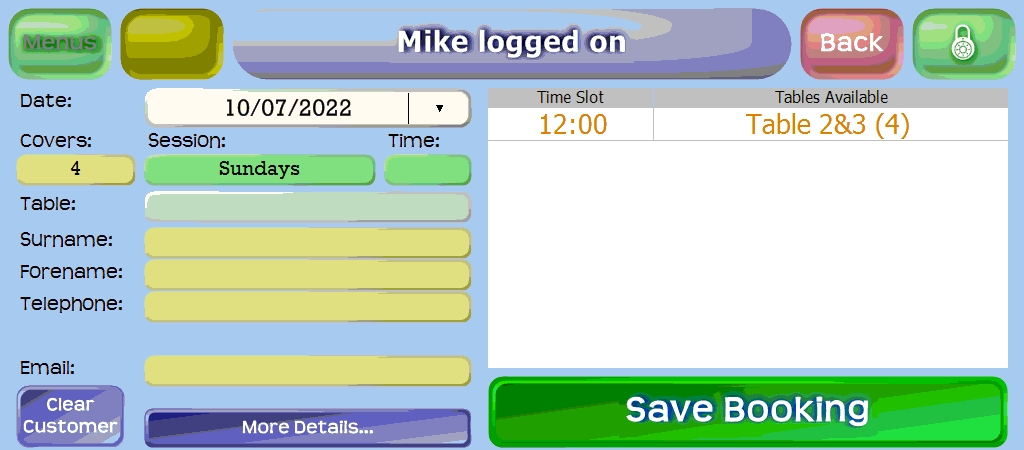
With this option activated, only single tables are offered at first

And joined tables are offered only after single tables are all booked
 With the online option of this switch the time slots will be offered to the customer
to select as above but the table number or numbers will be hidden.
- Only show joined table slots if no single tables in the session are free for Online/On-Site bookings – with the option to hide full table slots activated, this further extension applies to sessions where table slots are defined. For on-site bookings, no slots will be shown for joined tables until such time as all available single tables are booked. In the images below, the join between tables 2&3 is offered as well as the single tables 7 and 8. With this option selected for on-site bookings, only the single tables will be offered at first. Once they are booked, the joined tables will be offered (unless of course either or both have been booked individually.
- Minimum number of covers for bookings – this setting, for which you can set separate values for Online and On-Site bookings, is self-explanatory. The on-site setting will only apply to sessions where table slots are assigned. Online, this setting will always apply.
- Maximum allowable empty covers per table – also configurable differently for on-site and online, this setting determines which tables can be used for bookings. Again, on-site this will only be applied where table slots are assigned to a session but online it will always be taken into account when offering available times. Please see also the Empty Covers tab above.
- Maximum number of tables that can be joined for bookings – this setting can also be set to different values for online and on-site bookings. You can set a value between 2 and 4 for the number of table joins that can be used. For on-site bookings this only applies to sessions where table slots are assigned, but online it will always apply
- Flag table as booked n minutes before booking start time (show on idle) – this setting relates to the table plan, and especially when it’s shown if the till isn’t in use. Its purpose is to ensure that sufficient notice is given to till users of future bookings so that they don’t allocate walk-ins to tables that may be needed for a booking before the walk-in party is finished. As such it’s usually going to be at least the length of a typical table duration in your venue.
- Online Bookings – Bookings must be made n minutes before booking start time – this setting dictates the minimum amount of notice you wish to have for online bookings. If used in conjunction with the option to show alerts on the till you might find you can set a lower value here than if you have bookings automatically accepted.
Notification Settings
▢ Automatically send email confirmation Email confirmation for: ![]()
▢ Include Notes in Email for On Site Bookings Booking Confirmation Email Address:
▢ Receive copy of booking confirmation email ![]()
▢ Receive copy of booking cancellation email ![]()
▢ Receive copy of booking edit email ![]()
▢ Allow re-send booking confirmation email prompt upon booking edit
▢ Automatically send booking reminder email ![]() hours before the booking
hours before the booking
▢ Automatically send booking review email ![]() hours after the booking completion
hours after the booking completion
▢ Automatically send SMS confirmation SMS Confirmation for: ![]()
(Charge of 5p per message applies)
▢ Add a cancel booking link to the end of the SMS
(Additional charge of 5p per message applies)
▢ Automatically send SMS booking reminder ![]() hours before the booking
hours before the booking
(Charge of 5p per message applies)
▢ Add a cancel booking link to the end of the SMS
(Additional charge of 5p per message applies)
The Notification Settings determine how and when emails will be sent when bookings are made, and to which address. Please note that these options relate to the default email formats that can be generated by the system. If you’d like to create your own email templates you can do so – please see our help guide here. The options here are as follows (you can click on each heading in the list above to jump to its explanation);
- Automatically send email confirmation – this is the primary switch for notifications. By selecting this option, you will enable all the others in this section. Having activated this switch, you can then decide whether to send emails when people book online, on-site or both (this is the default).
- Include Notes in Email for On Site bookings – this option is fairly self-explanatory. Ordinarily the default email doesn’t include notes, but with this option set it will. If you generate your own email template you have the option to include notes as one of the merge fields, so this setting won’t have any effect in that circumstance.
- Receive copy of booking confirmation email – this setting will mean that as well as sending a confirmation email to the customer, the system will also send a copy to the address you specify here. If you don’t specify an address, the site email address will be used (you can set this under General>Site Settings). If no email address is specified there either then naturally no email will be sent, even if this option is ticked.
- Receive copy of booking cancellation email – as above, but this email will only be sent when a booking is cancelled. The address you enter here can be different to the confirmation address.
- Receive copy of booking edit email – as above, but this email will only be sent when a booking is edited.
- Allow re-send booking confirmation email prompt upon booking edit – with this option selected, whenever a booking is edited in the till or back-office, the user will be asked whether to re-send the confirmation email. If the detail of a booking that’s changed is immaterial or unknown to the customer, such as a table number change, there is usually no need to resend the email, so selecting this option helps prevent unnecessary and potentially confusing emails being sent.
- Automatically send email booking reminder n hours before the booking – here you can choose to send reminders to customers who have booked, any time between 1 hour and 1 week (168 hours) in advance.
- Automatically send booking review email – with this option selected and a time interval set, an email will be sent to each booking customer following completion of their booking, allowing you to request a review. In order for this to work most efficiently, you’ll need to save your booking review link on the Groups tab, and you’ll ideally also design your own review request email in Email Settings>Templates and then assign that template to all relevant sessions (see Defined Sessions tab).
- Automatically send SMS confirmation – as well as, or instead of, sending emails to booking customers, you can also send SMS messages. In order to do so, you’ll need to have an approved Site ID, which is the name that SMS messages will appear to have come from and can only be 11 characters at most with no spaces. Please email [email protected] with your chosen Site ID and we’ll get that set up for you. If you select this option without a valid SiteID having been set, you’ll see this message;
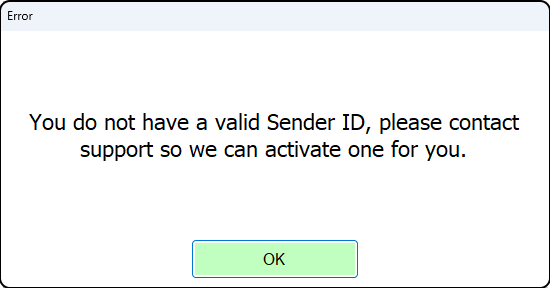 Once your ID is set up, you can select this option and a text will be sent for each booking made, so you should ensure all bookings are made with a valid mobile number. As indicated, there’s a charge (currently 5p) for each text message sent, which we’ll add to your monthly invoices.
- Add a cancel booking link to the end of the SMS
(Additional charge of 5p per message applies) – this option extends the text message length and so incurs an additional cost. The customer will be able to click on the link in the message and cancel the booking online.
- Add a cancel booking link to the end of the SMS
- Automatically send SMS booking reminder – if you have a valid Site ID set you can select this option and, as with the email choice, set the number of hours before the booking that the text will be sent (they can be different if required).
- Add a cancel booking link to the end of the SMS
(Additional charge of 5p per message applies) – as with the confirmation message, the additional text required to include the cancel link means that there’s an additional cost.
- Add a cancel booking link to the end of the SMS
Using the bookings system
Once you have configured the bookings to your needs, you can start to use the diary. It is already available in the back office (Bookings>Booking Diary), but to enable it on your till(s) you will need to change the till settings (Till>Till Settings). Select the template that applies to the till or tills you want to be able to access the bookings on, then click ‘Edit.
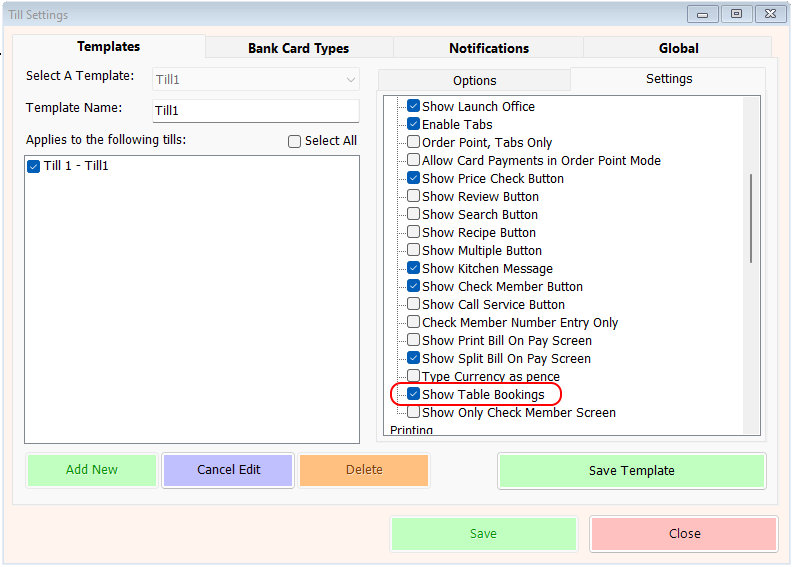
Click on the Settings tab on the right and scroll down until you see the option ‘Show Table Bookings’. Select this option then click ‘Save Template’ and then ‘Save’. Now when you log on to the till the button next to the Menus button will be marked ‘Table Bookings’
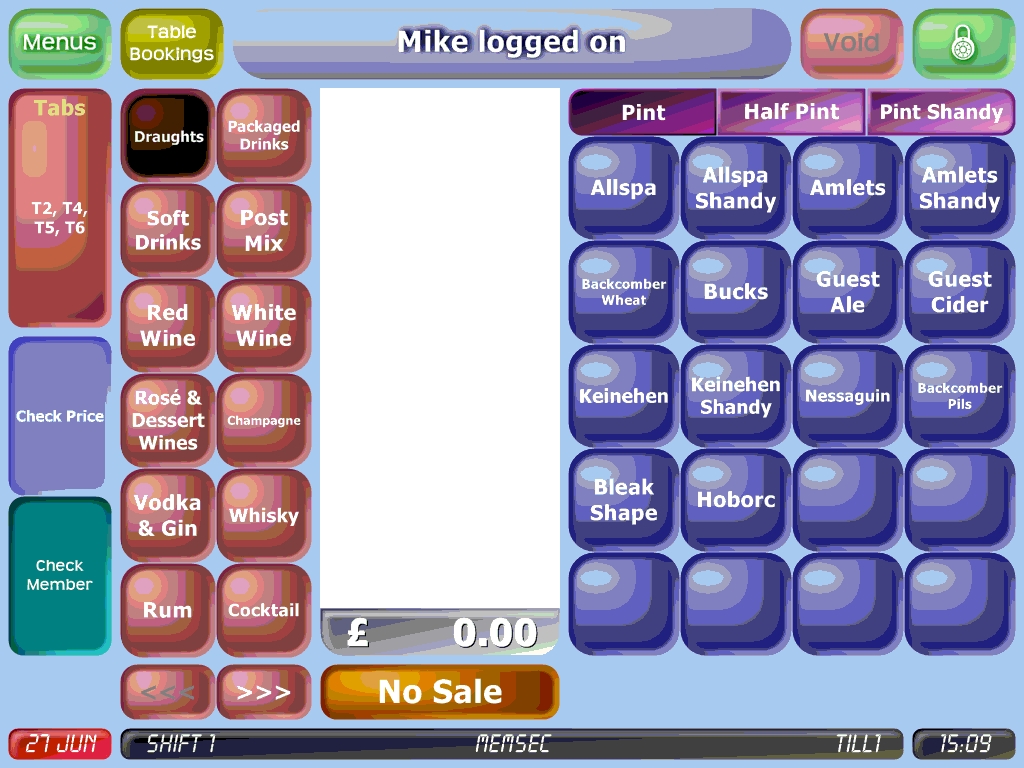
Clicking that button will display the main Diary page. Click here to learn more about that screen.