How to create and configure your table plan
For venues where table service forms part of your offering, a table plan is an extremely useful addition to your Memsec7 system. It allows you to see at a glance what stage tables are at with their meals and makes it much easier to manage tabs. This guide will explain how to create and maintain a table plan. We recommend you do this on a PC with a mouse if possible rather than on a touch-screen, as it’s useful to be able to click and hold the mouse button down while dragging the cursor.
The table plan can be found in the back office program under Till>Till Setup>Table Plan. When you first view it you’ll see a screen like this;
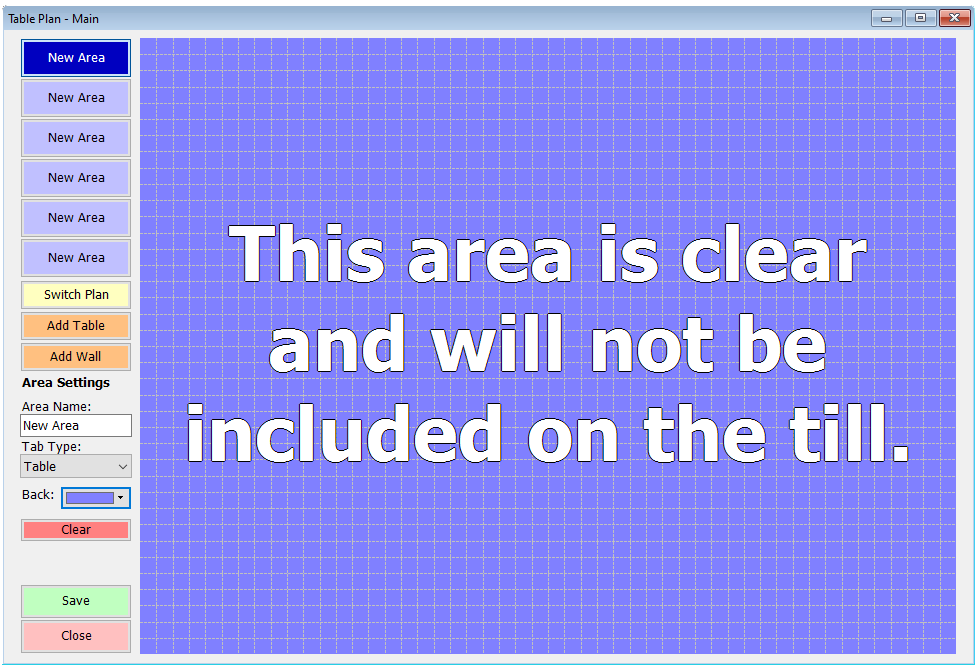
At the top left are 6 area buttons marked ‘New Area’. You can populate any number of these to reflect the different areas of your venue, and you can even sub-divide physical areas to make them easier to manage on the plan (e.g. Restaurant Front, Restaurant Side). To begin to populate an area, click on one of the area buttons and change its name in the Area Name box on the left. Next, select the tab type that tables in this table plan area will use (for help with tab types see here) using the drop-down underneath the name box. You can also change the colour of the background of each area using the colour selector marked ‘Back’.
To begin populating the area click on ‘Add Table’. This will place table 1 at the top-left corner;
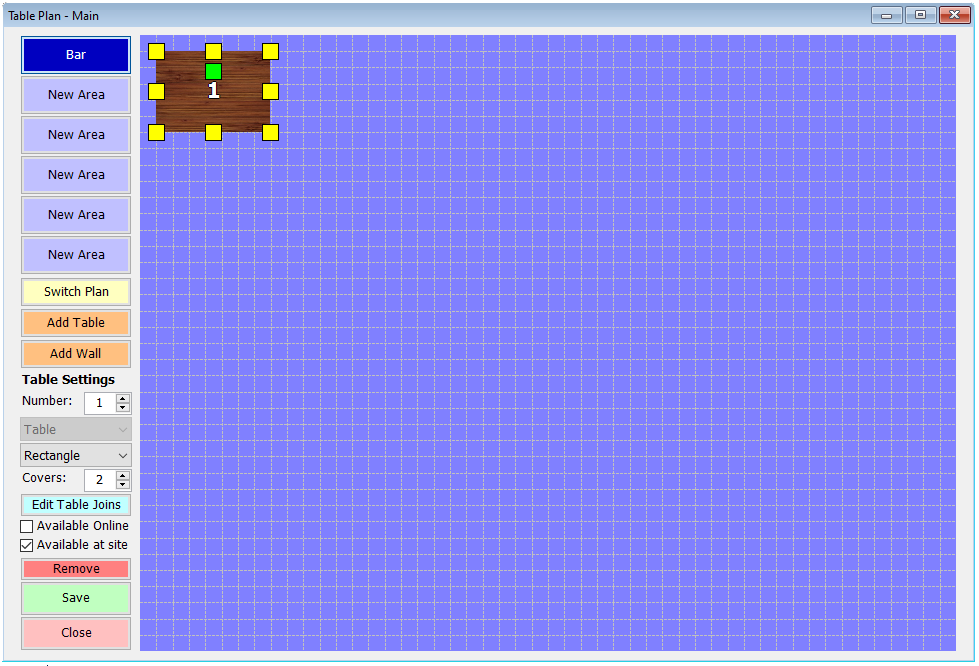
Adding and selecting a table will change the options available on the left hand side. There’s a drop-down allowing you to change the shape of the table from Rectangle to Circle, Semi-circle or Rounded Rectangle. The image below shows each of these shapes.

In the image above you’ll notice yellow squares around the outline of the table, and a green square towards its top. The yellow squares allow you to click and drag them to resize the table – those in the corners can be dragged diagonally to increase both height and width together while those at the edges move only horizontally or vertically. The green square allows you to rotate the table. The image below shows the range of angles available for rectangular (and hence rounded-rectangular) and semi-circular tables. Once you’ve configured one table, click Add Table again to add another. If the previous table is still highlighted, the new one will be a copy of that table in terms of size, covers, shape and orientation, otherwise it will be a rectangular table for 2.
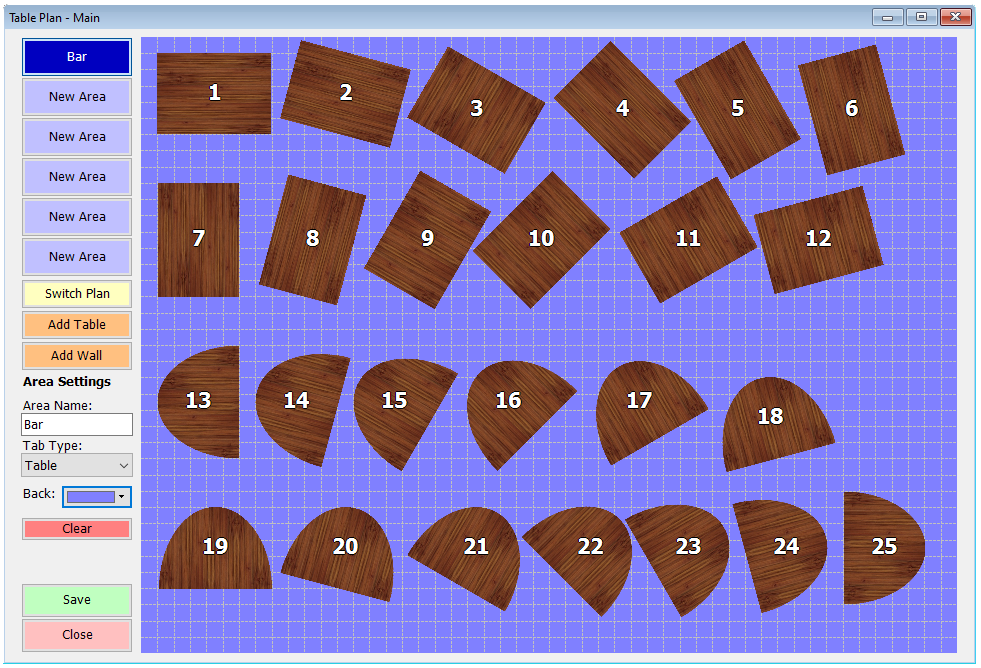
Clicking anywhere within the outline of the table also allows you to drag the table to a different position on the plan.
When populating a table plan area it’s important to orient the layout in a way that can easily be related to the physical space you’re mapping out. One way to help with this is by adding walls. The ‘Add Wall’ button will add a white line to the plan with two yellow squares, one at either end. As with tables these squares can be used to resize the wall and you can click and drag it to a different part of the area. Once again, with a wall selected you will notice that the controls on the left change, so that there’s now just the option to recolour the wall.
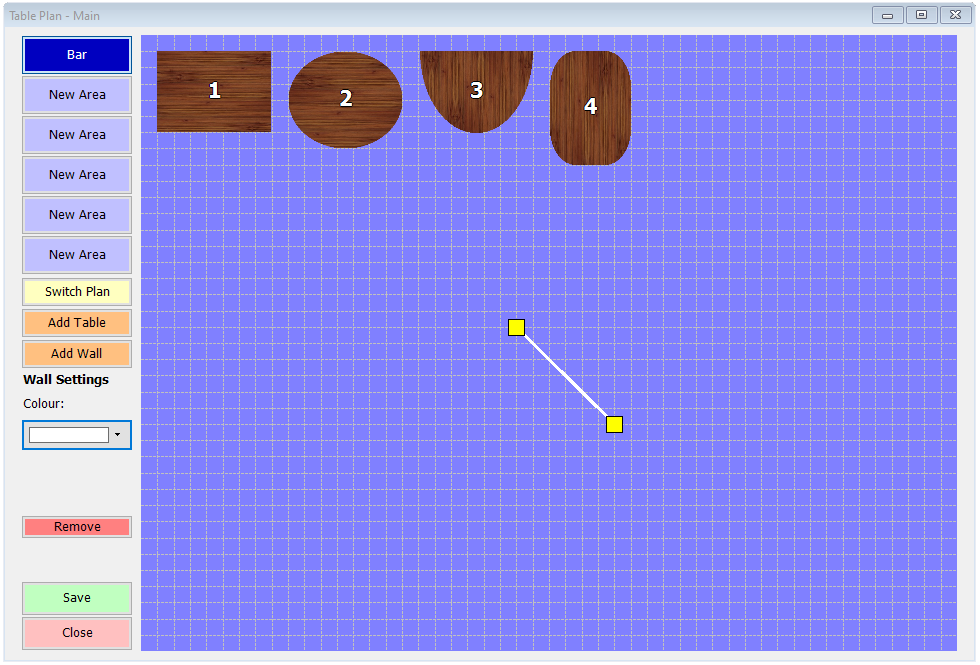
You can use walls to represent the boundaries of the physical space or internal obstructions or features.
If you have different areas on your table plan, and multiple tills or handheld zones, you can choose which area is displayed by default on each till/handheld. To do this, right click on any of the area buttons at the top-left of the table plan editing screen. You’ll then see a context menu;
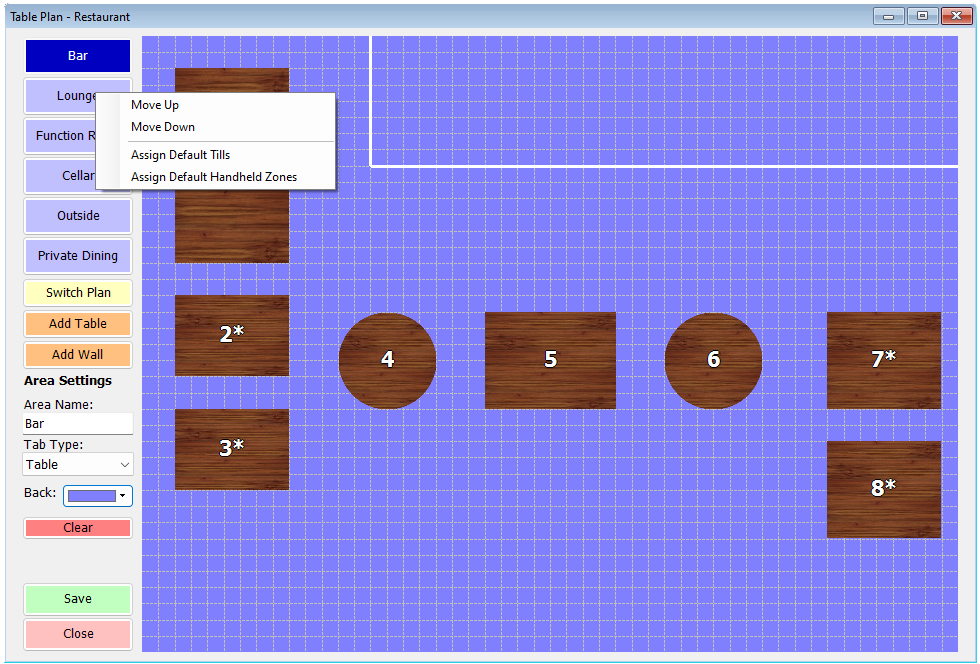
The Move Up and Move Down options will change the position of the area on the plan. Top button is the default display option unless you use the Assign Default Tills or Assign Default Handheld Zones options on this menu. Selecting one of these will produce a list of tills or handheld zones for you to choose from;
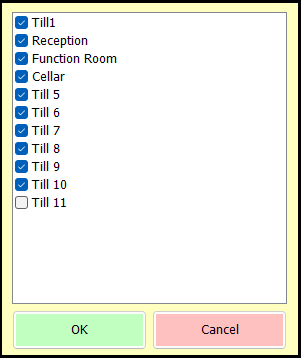
Simply tick the tills or handheld zones where this area should be the default, rather than the top listed area, and click ‘OK’.
Booking Options
With a table selected, under the shape drop-down on the left there are a number of controls that relate more specifically to the optional restaurant bookings module of Memsec7.
Firstly there’s a box for the maximum number of covers the table can accommodate. Under that there is a button ‘Edit Table Joins’. This allows you to configure the table plan so that if a larger table is required, the system knows which tables can be combined to create the necessary number of covers. Normally this will be rectangular tables of course, though any shape can be joined in the table plan.
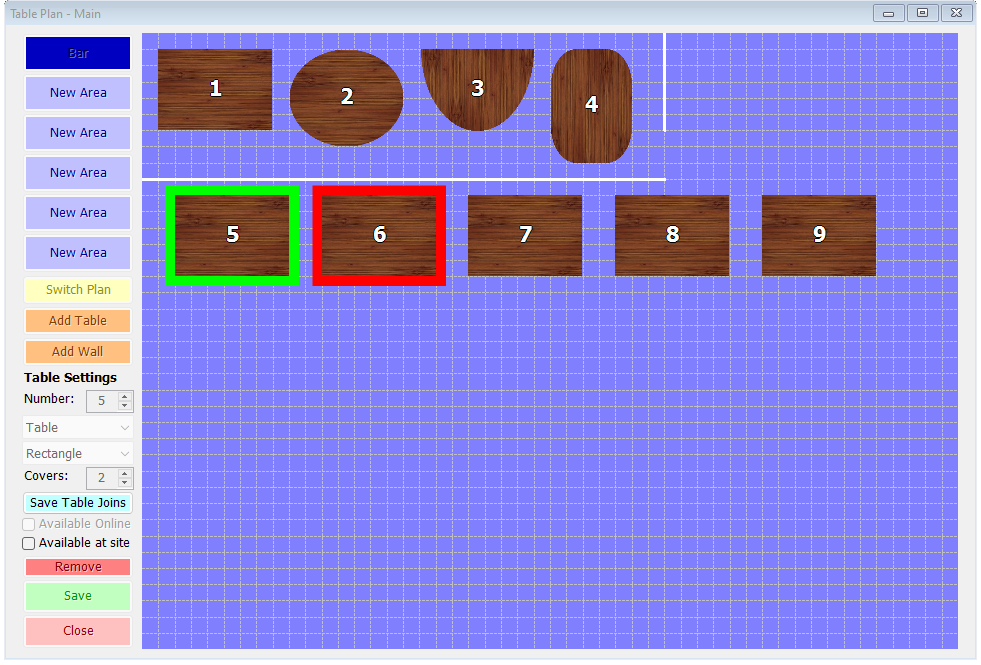
In the above image, table 5 is being edited and we’ve selected table 6 as being able to be joined to 5. Clicking ‘Save Table Joins’ commits this change and table 5 will then have an asterisk against it to show it has joins in the plan.

If table 7 can also be joined, that should be done as a single join for table 6. The system will then be able to ‘daisy-chain’ tables to provide the correct combination, up to a maximum of 4 joined tables.
Next there are check boxes for ‘Available Online’ and ‘Available at site’. These dictate whether the table can be used for bookings in either or both situations. The online facility is where the table joins will also be used so if you add table joins to the plan it’s best to ensure that any table involved in a potential join is set to allow online bookings.
The final option relating to bookings is the facility to create multiple table plans. This can be useful for special occasions such as Valentine’s Day, where you may wish to create more tables of 2 than is normally the case. To create a new table plan, click on the ‘Switch Plan’ button. You’ll see this screen;
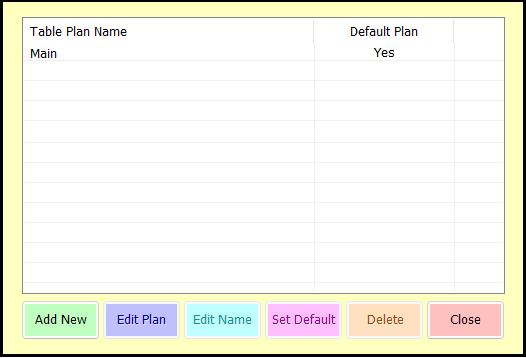
To create a new plan, click ‘Add New’. You’ll be asked to name the new plan;

Enter a name and click OK. You’ll then be asked what you want to base the new plan on;
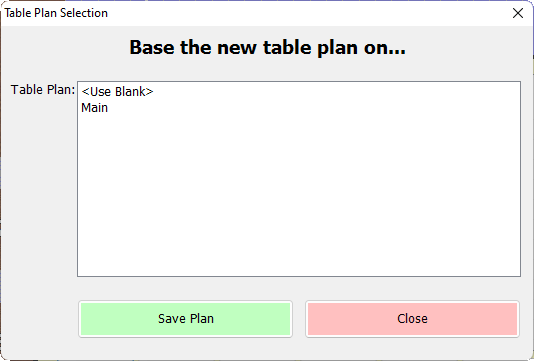
You can start with a blank canvas or you can create a copy of an existing plan to edit. Choose whichever option suits you best and click ‘Save Plan’. You’ll then be returned to the main table plan screen but you’ll now be editing your new plan, as indicated in the caption of the screen at the top left.

Once you’ve created and saved the new plan it will be available in booking settings to be assigned to a session.
Using the table plan
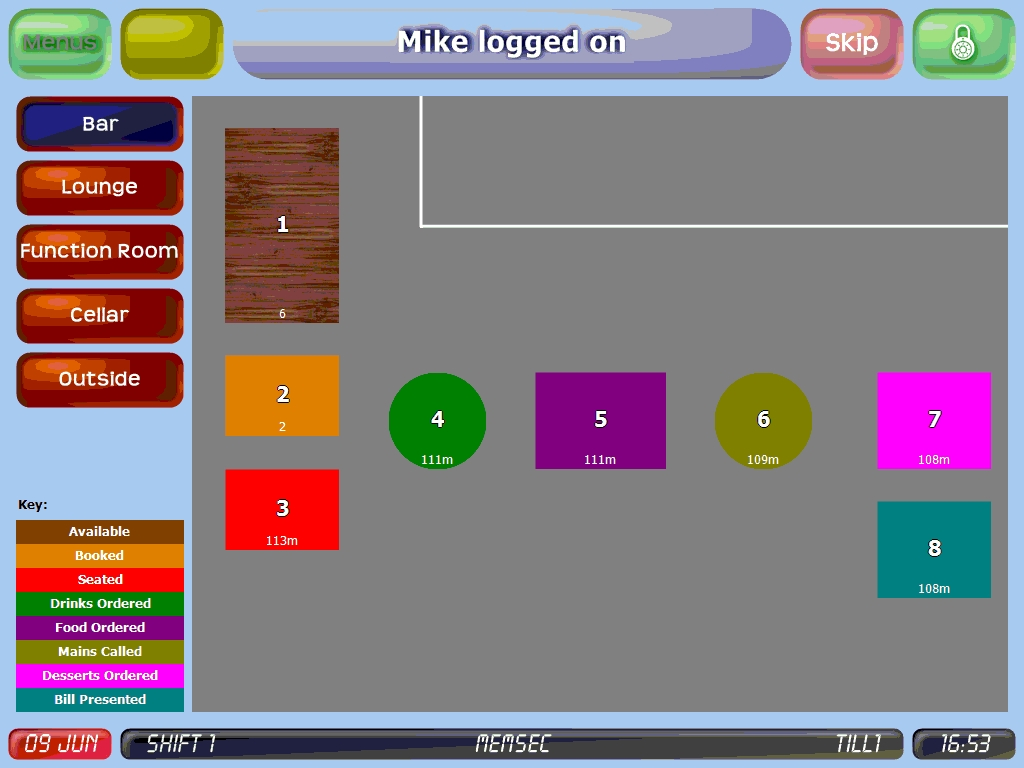
On the till, the table plan interacts with open tabs (of the type specified when creating the plan, as detailed above) to display the current status of each table. There is a colour coded key on the till’s table plan, as seen below, and each table displays its available covers as well as its number;
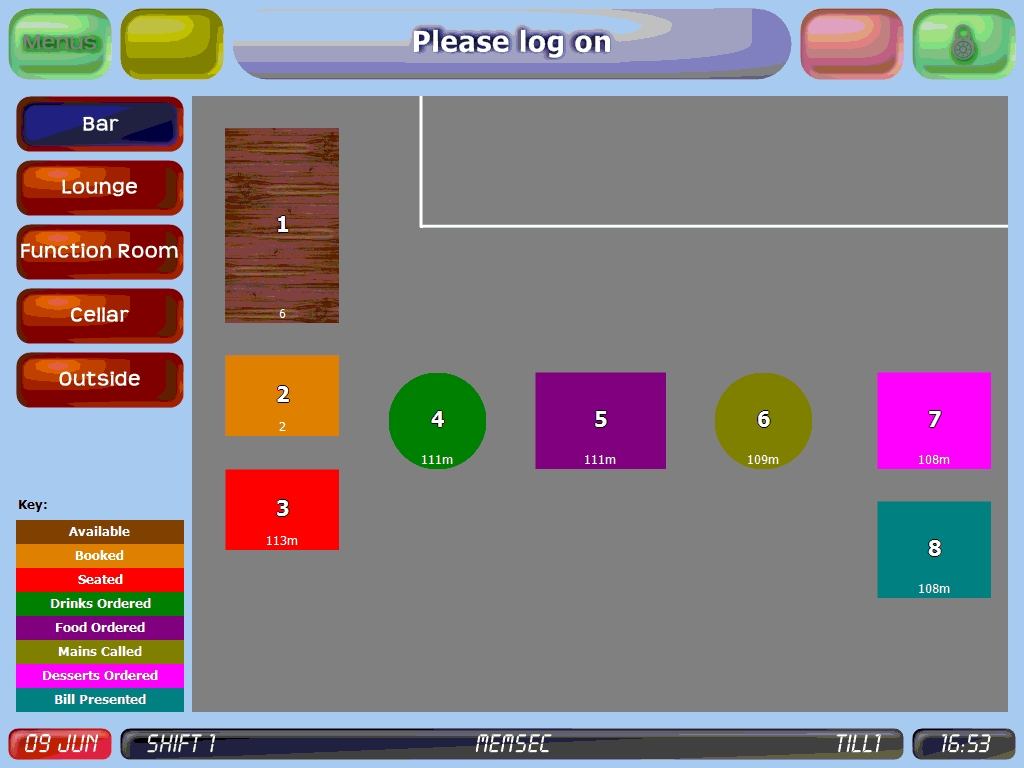
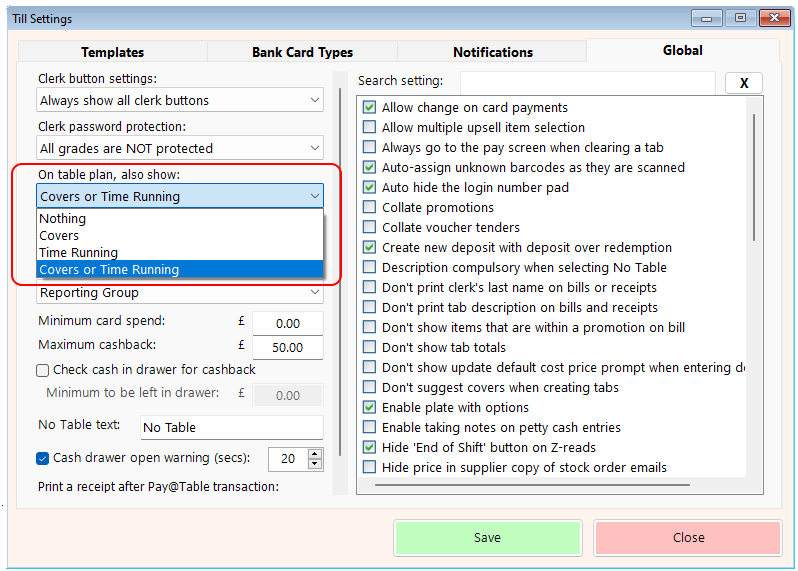
In the above image tables 1 to 8 are coloured in the same way as their corresponding key values, as shown in the bottom left corner – Available, Booked, Seated, Drinks Ordered, Food Ordered, Mains Called, Desserts Ordered and Bill Presented. At the bottom of each active table you can also see how long the table has been running in minutes. Tables 1 and 2 instead display their maximum number of covers, since they’re not (yet) in use. This setting can be altered in Till>Till Settings under the Global tab. On the left hand side there’s a drop-down giving the choice of no additional information, Covers, Time Running or this option, Covers or Time Running.
There are a number of ways in which the table plan can be incorporated into the till and any handhelds on your system. These are dictated by the settings for your till(s) and can be found under Till>Till Settings, on the Settings tab.
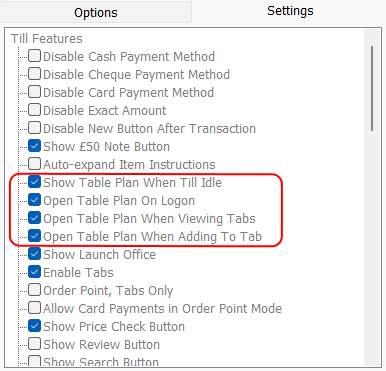
Show Table Plan When Idle – if this option is selected, the table plan will be visible on the till screen when the till isn’t in use. Staff will be able to view the progress of tables without having to log in to the till.
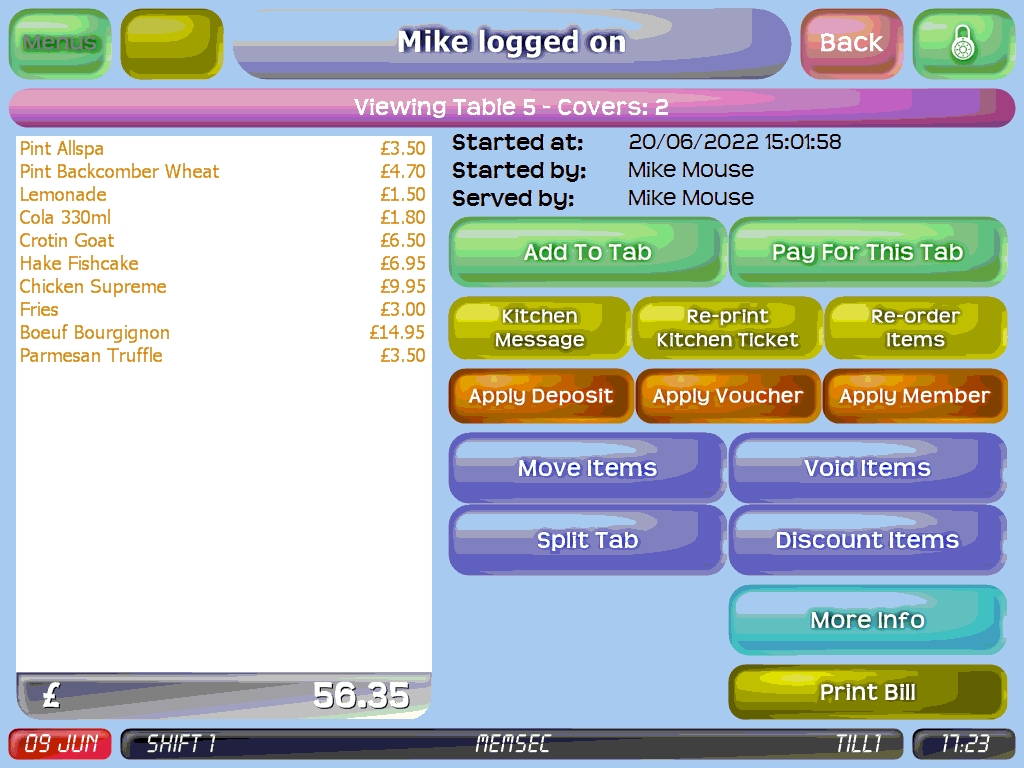
Open Table Plan On Logon – this will display the table plan as soon as you log into the till. This is most often used in a restaurant environment, where there’s little or no till activity outside of table tabs. Clicking on a table number on the plan will select that table for the current transaction. If there isn’t currently a tab for the table, the till will display the normal items screen and along the bottom of the screen you’ll see the message ‘Adding to Table X’. If a tab already exists you’ll be taken directly to the tab view screen where you can choose from the various options to manage the tab;
If the selected table is booked but not yet active, you’ll be asked if you wish to activate the booking;
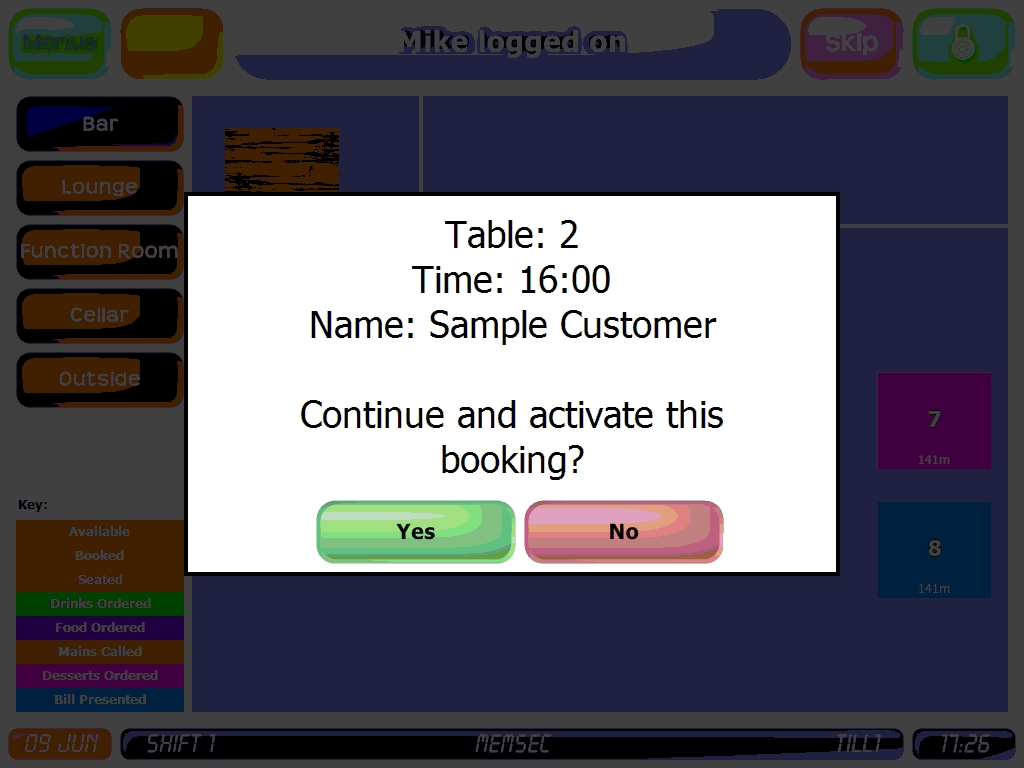
Clicking ‘Yes’ will create the tab and take you into the normal till screen to add items to it.
Open Table Plan When Viewing Tabs – ticking this option will mean that when you click the button on the main till screen ‘n tabs running’, instead of seeing a button for each open tab, or active tab type if you have more than one, you’ll see the table plan. As with the logon option, clicking a table on the plan that’s active will then take you to the tab view screen with its various options for managing the tab. If the tab you’re looking for isn’t on the table plan, press ‘Skip’ to find it in the normal manner.
Open Table Plan When Adding To Tab – this option is almost the opposite of the logon option. Rather than viewing the table plan at the start of the transaction, this will show it when the ‘Put On Tab’ button on the pay screen is pressed. Again, if the tab you’re looking for isn’t on the table plan, press ‘Skip’ to find it in the normal manner.
